I still recall the gentle scratch of a fountain pen against a yellowed index card as my aunt recorded this recipe in her careful script. The kitchen was always the heart of our home, a place where the scent of chocolate meant something truly special was beginning. This Chocolate Mousse Cake wasn’t just a dessert; it was a centerpiece for our most cherished family stories and quiet Sunday afternoons.

This cake offers a deep, cocoa-rich foundation topped with a mousse as light as a summer breeze. It is a small-batch treasure that honors the way we used to bake—with patience, care, and the very best simple ingredients from the pantry. Every slice tells a story of tradition and the heartfelt joy found in a homemade treat made from scratch.
The Magic of This Velvety Heritage Classic
There is a certain kind of magic that happens when a dense, moist sponge meets a cloud-like layer of chocolate. This recipe is a tribute to that perfect balance. Unlike modern cakes that rely on heavy frostings, this one uses a light mousse that lets the quality of the cocoa shine through. It is the kind of cake that looks like it took all day to prepare, yet it relies on the honest simplicity of a few bowls and a bit of patience.
Families have turned to this style of baking for generations because it feels substantial yet delicate. The base is tender and rich, thanks to the addition of buttermilk and sour cream, which were staples in every vintage kitchen. When you take that first bite, you are met with the cool, airy texture of the mousse followed by the deep, dark crumb of the cake. It is a timeless combination that never goes out of style, making it the perfect companion for a quiet cup of tea or a festive birthday gathering.
Baking this cake is also a way to slow down. In our busy lives, taking the time to let a cake chill and set is a small act of devotion. It teaches us that the best things are worth waiting for. Whether you are an experienced baker or just starting your journey with a hand-me-down whisk, this Chocolate Mousse Cake will become a reliable favorite in your own recipe box.
Print
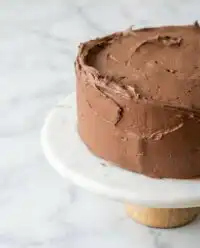
Chocolate Mousse Cake
- Total Time: 7 hours 20 mins
- Yield: 12 servings
- Diet: Vegetarian
Description
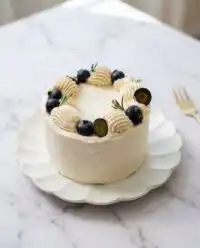
Indulge in a decadent chocolate experience featuring a moist, cocoa-infused sponge topped with a velvety, cloud-like mousse and a light whipped cream finish. This heritage-inspired dessert perfectly balances rich flavors and airy textures for any special occasion.
Ingredients
- All-purpose flour
- Cornstarch
- Baking powder
- Baking soda
- Salt
- Unsweetened cocoa powder
- Oil
- Granulated sugar
- Brown sugar
- Eggs
- Vanilla extract
- Vinegar
- Buttermilk
- Sour cream
- Hot water
- Instant chocolate pudding mix
- Milk
- Heavy cream
- Powdered sugar
Instructions
- Preheat oven to 350℉ and prepare a 9-inch springform pan with baking oil and a parchment paper circle at the bottom.
- In a large sturdy bowl, whisk together the flour, cornstarch, baking powder, baking soda, salt, and cocoa powder until smooth.
- In a separate bowl, whisk together the oil, granulated sugar, brown sugar, eggs, vanilla, vinegar, buttermilk, and sour cream, then slowly whisk in the hot water.
- Pour the batter into the prepared pan and bake for 33-36 minutes until a toothpick comes out clean; cool completely on a wire rack.
- Prepare the mousse by beating instant pudding and milk for 2 minutes, then in a separate chilled bowl, whip heavy cream, cocoa, and vanilla to stiff peaks.
- Gently fold the chocolate whipped cream into the pudding mixture using a rubber spatula to maintain lightness.
- Level the cooled cake with a serrated knife, return it to the springform pan with acetate or parchment side linings, spread the mousse over the top, and chill for at least 6 hours.
- For the final layer, beat heavy cream, powdered sugar, cocoa, and vanilla to medium peaks and spread over the set mousse before removing the pan sides.
Notes
To achieve perfectly clean and professional slices, dip a sharp knife into hot water and wipe it dry before every single cut. Ensure the cake base is completely at room temperature before adding the mousse layer, as any residual warmth will cause the airy mousse to deflate. If you do not have professional acetate strips, you can easily use strips of parchment paper around the inside of the pan to create smooth edges for the layers.
- Prep Time: 45 mins
- Cook Time: 35 mins
- Category: Dessert
- Method: Baking
- Cuisine: American
The Honest Staples in Your Pantry

When we look into the pantry of a traditional home baker, we find ingredients that have stood the test of time. To create the perfect Chocolate Mousse Cake, we start with a foundation of simple, high-quality items that work together to create a complex flavor. Each ingredient has a specific role to play in ensuring the texture is exactly as it should be.
The Cake Foundation
- All-Purpose Flour and Cornstarch: Mixing a bit of cornstarch with your flour is an old-fashioned secret for achieving a tender, cake-flour-like crumb without needing a special trip to the store.
- Unsweetened Cocoa Powder: This provides the deep, nostalgic chocolate flavor we all crave. We use it in the cake, the mousse, and the whipped cream for a layered experience.
- Buttermilk and Sour Cream: These two are the workers of the kitchen. They provide moisture and a slight tang that balances the sweetness of the sugar.
- Hot Water: Adding hot water at the end of the batter process helps to bloom the cocoa, releasing its full aromatic potential.
The Airy Mousse and Cream
- Instant Chocolate Pudding and Milk: This serves as the stable base for our mousse, a clever shortcut that busy grandmothers have used for decades to ensure a perfect set.
- Heavy Cream: When whipped to stiff peaks, it provides the volume and lightness that turns a simple pudding into a luxurious mousse.
- Pure Vanilla Extract: Never underestimate the power of a good vanilla. It acts as a supporting character that makes the chocolate taste even more like itself.
- Powdered Sugar: Just enough to sweeten the final whipped cream layer without making it heavy or gritty.
Using these familiar items allows us to focus on the process. When you measure out your flour using the spoon-and-level method, you are following in the footsteps of every careful baker who came before you. These ingredients are humble on their own, but together, they create something truly grand.
The Gentle Process of Baking Your Cake
Step 1: Prepare the Heart of the Kitchen
Begin by preheating your oven to 350℉. Take a 9-inch springform pan and give it a light spray of baking oil. Line the bottom with a circle of parchment paper and spray again. This double-layer of protection is how we ensure our cake releases perfectly from the pan every single time.
Step 2: Whisk the Dry Ingredients
In a large, sturdy bowl, whisk together the flour, cornstarch, baking powder, baking soda, salt, and cocoa powder. Taking the time to whisk these thoroughly helps to aerate the flour and remove any lumps, ensuring a smooth and even crumb in the finished cake.
Step 3: Combine the Wet Elements
In a separate bowl, bring together the oil, granulated sugar, and brown sugar. Add the eggs, vanilla, vinegar, buttermilk, and sour cream. Whisk these until they are fully combined and smooth. Slowly and carefully, pour in the hot water, whisking as you go. The batter will be thin, but do not worry—this is the secret to a moist cake.
Step 4: Bake the Heritage Sponge
Pour the batter into your prepared springform pan. Place it in the center of the oven and bake for 33-36 minutes. You will know it is done when a wooden toothpick inserted into the center comes out clean. Let the cake rest in the warm pan for about 10 minutes before moving it to a wire rack to cool completely.
Step 5: Prepare the Pudding Mousse
While the cake cools, start the mousse. In a large bowl, beat the instant pudding mix with the milk on high speed for about 2 minutes until it begins to thicken. In a separate cold metal bowl, beat the heavy cream, cocoa powder, and vanilla until stiff peaks form. Stiff peaks mean the cream holds its shape when you lift the beaters.
Step 6: Fold with Care
Using a rubber spatula, gently fold the chocolate whipped cream into the pudding mixture. Use a slow, circular motion to keep as much air in the mixture as possible. This is what gives the mousse its signature lightness.
Step 7: Assemble and Chill
Once the cake is cold, use a serrated knife to level off the top. Place the cake back into the clean springform pan. Line the sides with a strip of acetate or parchment paper. Spread the mousse evenly over the top of the cake. Cover the pan with foil and let it chill in the refrigerator for at least 6 hours, or ideally overnight, to set firmly.
Step 8: The Final Flourish
For the topping, beat the heavy cream, powdered sugar, cocoa powder, and vanilla until medium peaks form. Remove the sides of the springform pan and the paper lining. Spread the whipped cream over the mousse layer. Your masterpiece is now ready to be shared with those you love.
Secrets from the Old Recipe Box

One of the most important things to remember when making a delicate dessert like this is the temperature of your tools. For the best results when whipping cream, place your metal bowl and beaters in the freezer for ten minutes before you begin. This cold environment helps the fat molecules in the cream stay stable, resulting in a much loftier and more reliable mousse. If you find yourself enjoying this process, you might also find peace in making our chocolate-ganache-cake, which uses a similar focus on temperature control.
Another bit of baker’s wisdom is to be patient with the cooling process. Never try to add mousse to a cake that is even slightly warm. The heat will melt the air bubbles in your mousse, leaving you with a dense layer instead of a light one. Always let your dairy ingredients sit out for a short while before starting the cake batter so they incorporate smoothly without over-mixing. This avoids a tough cake and keeps everything as tender as a grandmother’s hug.
Classic Twists for Your Family Table
While the traditional chocolate version is a treasure, there are ways to make this recipe your own while keeping its vintage charm. If you have a family member who loves a bit of depth, try adding a teaspoon of instant espresso powder to the hot water before mixing it into the batter. This doesn’t make the cake taste like coffee; instead, it acts as a background note that makes the chocolate taste even richer. You can see how we use similar flavor balancing in our chocolate-truffle-cake.
For those who prefer a bit of a festive spirit, you can replace the vanilla extract in the mousse with a tablespoon of dark rum or bourbon. This adds a sophisticated warmth that is perfect for holiday gatherings. If you are looking for more inspiration on how to handle different chocolate textures, you might find this guide on a stunning chocolate cake quite helpful for your journey.
At the Table with Loved Ones

When it comes time to serve this Chocolate Mousse Cake, I always reach for my grandmother’s floral china. There is something about the weight of a real plate that makes the moment feel more significant. This cake is quite rich, so a thin slice is often just enough. It pairs wonderfully with a cup of strong black coffee or a glass of cold milk for the little ones. If you are serving a crowd and want a variety of textures, consider offering a slice of our flourless-chocolate-cake alongside it for a true chocolate celebration.
For a summer gathering, a handful of fresh raspberries or sliced strawberries on the side adds a bright, tart contrast to the deep cocoa notes. In the winter, a simple dusting of extra cocoa powder over the top is all you need to make it look like a snowy woodland treat. No matter how you choose to present it, remember that the best ingredient is the company you keep while enjoying it.
A Final Word from My Kitchen to Yours
Baking is about more than just following steps; it is about the memories we create and the traditions we carry forward. This Chocolate Mousse Cake has been a quiet witness to many birthdays, anniversaries, and simple moments of gratitude in my home. I hope it finds a cherished place in your kitchen as well. If you find yourself craving even more cocoa-filled joy, do try our chocolate-delight for another simple yet classic treat. Please share your baking photos with our community on Pinterest, Instagram, and Facebook. We would love to see how you make this recipe your own.

