You will notice the precise moment the warm caramel topping yields to the chocolate sponge, creating a saturating weight that promises a crumb both structural and impossibly tender.

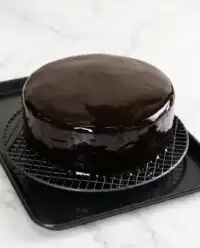
The Vintage Better Than Sex Cake represents a departure from the airier confections of the modern era, leaning instead into a rich, saturated decadence. This heritage dessert relies on the careful application of heat and timing to ensure the sweetened condensed milk and caramel are absorbed deeply into the crumb. When executed with precision, the result is a sophisticated interplay of textures that defies its humble components. Every bite offers a contrast between the density of the chocolate base and the lightness of a hand-stabilized cream frosting.
The Craft Behind This Cake
Prep: 30 min · Serves: a crowd · Difficulty: Easy
- The deep saturation of chocolate sponge.
- Salted caramel creates a sophisticated profile.
- Textural contrast from precisely crushed toffee.
- Stable whipped cream provides refined finish.
- Make-ahead steps ensure stress-free service.
Like any cherished vintage cake, this recipe rewards those who understand the value of a slow, controlled assembly process.
This result is the fruit of patience and precision.
Get The Full Cake Recipe
Print
Vintage Better Than Sex Cake
- Total Time: 1 hour 5 mins
- Yield: 15 servings
- Diet: Vegetarian
Description
A timeless, decadent dessert featuring a rich chocolate sponge infused with sweetened condensed milk and velvety caramel. Topped with stabilized whipped cream and crunchy toffee bits, this heritage cake offers a sophisticated balance of deep cocoa flavors and satisfying textures.
Ingredients
- 1 box Devil’s Food Cake Mix
- 1 can (14 oz) Sweetened Condensed Milk
- 1 jar (12 oz) Caramel Ice Cream Topping
- 4 bars (1.4 oz each) Heath Bars, crushed
- 2 cups Heavy Whipping Cream
- 2 tablespoons Granulated Sugar
Instructions
- Bake the cake. Follow the package instructions for a standard 9×13 inch pan, testing for doneness with a skewer before cooling on a wire rack.
- Create uniform voids. Use the handle of a wooden spoon to poke holes across the warm cake surface, spaced one inch apart.
- Warm the caramel. Heat the caramel topping in a microwave-safe container for 60 seconds until fluid enough to pour.
- Infuse the liquids. Pour the warm caramel and room-temperature condensed milk into the holes, allowing them to seep deep into the sponge.
- Add toffee topping. Sprinkle the crushed toffee bars over the tacky surface to allow for slight softening against the warm cake.
- Chill the cake. Refrigerate the cake completely to stabilize the starches and meld the flavors together.
- Whip the cream. In a chilled bowl, whisk the heavy cream and sugar until stiff peaks form, ensuring not to over-whip.
- Finish and serve. Spread the whipped cream evenly over the cold cake and garnish with reserved toffee and additional caramel swirls before serving.
Notes
- Use a chilled mixing bowl for the whipped cream to ensure the fat stays stable and the frosting holds its structure.
- Ensure the cake is still warm when poking holes so the milk and caramel can penetrate deep into the crumb.
- Run your knife under hot water and wipe it clean between each slice for perfect, clean vertical layers.
- Keep the cake tightly covered in the refrigerator to prevent the high-fat dairy from absorbing surrounding odors.
- Crush the toffee bars while they are still in their wrappers using a rolling pin to maintain control over the size of the pieces.
- Prep Time: 30 mins
- Cook Time: 35 mins
- Category: Dessert
- Method: Baking
- Cuisine: American
Ingredients, Chosen with Purpose

A successful bake begins with the meticulous selection of components, where each ingredient is considered for its structural contribution and flavor density. You will find that the interaction between the high-fat chocolate mix and the viscous dairy elements creates a moistness that remains stable over several days. Room temperature as an instruction is paramount here; it allows the milks to flow with the necessary fluidity into the cooling sponge.
- Devil’s Food Cake Mix: Selected for its cocoa intensity and the inclusion of specific leaveners that withstand the weight of added liquids.
- Sweetened Condensed Milk: This serves as a primary humectant, providing a milky sweetness that binds to the cake fibers during the resting period.
- Caramel Ice Cream Topping: Choose a variety with high butterfat to ensure a smooth mouthfeel and a clean break when the cake is sliced.
- Heath Bars: These provide the necessary resistance to the soft crumb, introducing notes of burnt sugar and tempered chocolate.
- Heavy Whipping Cream: A high fat content is required to achieve the stiff peaks that define a professional-grade frosting.
- Granulated Sugar: Beyond sweetness, this crystal structure helps stabilize the protein bonds in the whipped cream.
| Ingredient | Why It Matters |
|---|---|
| Devil’s Food Mix | Provides a dark crumb with structural integrity for deep liquid absorption. |
| Condensed Milk | Acts as a humectant that creates the characteristic saturated texture. |
| Caramel Topping | Introduces a buttery viscosity that complements the toffee shards. |
| Heath Bars | Offers a textural contrast through tempered chocolate and brittle toffee. |
| Heavy Cream | When whipped, it provides a neutral finish to balance the sugar levels. |
The Method, Step by Step

Step 1: Preparing the Base for Your Vintage Better Than Sex Cake
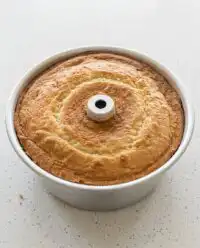
You will begin by following the package directions for a standard 9×13 inch pan, ensuring your oven has reached the precise temperature before the batter enters. A clean, dry crumb is the goal here; use a wooden skewer to confirm that no raw batter remains in the center. Once removed from the heat, place the pan on a wire cooling rack to allow the initial steam to escape while the structure is still warm and porous.
Step 2: Creating the Necessary Voids
While the cake is still radiating significant heat, you will take the handle of a wooden spoon to create a series of uniform holes across the surface. Space these approximately one inch apart, pressing firmly but carefully to reach the bottom of the pan without tearing the delicate top crust. These channels are the pathways for your flavor infusions, and their regularity determines the evenness of the final cross-section.
Step 3: Preparing the Caramel Infusion
In a Pyrex glass measuring cup, you will warm the caramel topping in the microwave for approximately sixty seconds until it reaches a pourable consistency. The caramel must be fluid enough to move freely but thick enough to coat the interior walls of the voids you have created. Patience here is not a virtue — it is an instruction; rushing the pour will result in surface pooling rather than deep infiltration.
Step 4: The Application of Condensed Milk
You will now pour the room-temperature sweetened condensed milk over the surface, following the same pathways as the caramel. You will notice the liquid slowly vanishing into the chocolate sponge as the cake fibers draw the moisture inward. This dual-liquid application requires a steady hand to ensure that no corner of the pan is left dry or oversaturated.
Step 5: Integrating the Toffee Elements
Crush your toffee bars into a mixture of fine crumbs and larger chunks, reserving a portion for the final decoration. While the surface is still slightly tacky from the milks, sprinkle the majority of the toffee across the cake to allow the chocolate coating to soften slightly against the warmth. This integration ensures the toffee remains part of the cake body rather than simply a garnish.
Step 6: The Logic of Resting
You must now move the cake to the refrigerator to cool completely, a process that should not be hurried by external fans or cold drafts. This resting period allows the starches to stabilize and the various liquids to meld into a singular, cohesive texture. The logic of resting dictates that a cold cake provides the firm foundation necessary for the heavy cream layer that follows.
Step 7: Stabilizing the Chantilly Frosting
In a chilled bowl, combine your heavy cream and sugar, whisking until you achieve very stiff peaks that hold their shape without drooping. The cream should look matte and thick, a visual signal that the fat globules have fully trapped the air needed for structure. If you notice a grainy texture appearing, stop immediately to avoid over-whipping the cream into butter.
Step 8: The Final Assembly
Spread the whipped cream evenly over the cold cake using an offset spatula, creating a smooth surface from edge to edge. You will finish by decorating the top with your reserved toffee pieces and elegant swirls of the remaining caramel. A clean, sharp knife and a steady hand when cutting will later reveal the beautiful vertical stripes of caramel and milk that define this classic.
Technical Notes

Temperature gradients dictate the success of the absorption phase; if the cake cools too much before you add the caramel, the pores will close and the liquid will sit on top. You should aim for a cake that is hot to the touch but has finished its initial carry-over cooking. This ensures the maximum amount of moisture is pulled into the center of the crumb.
When whipping your cream, always use a bowl that has been placed in the freezer for ten minutes prior to use. Cold metal or glass helps maintain the fat’s integrity, leading to a more stable frosting that will not weep or lose volume when refrigerated. A stabilized cream is essential for a professional presentation that lasts through a long dinner service.
If your cake remains dry in the center despite the pour, it is likely because the holes were too narrow or spaced too far apart. To fix this in future bakes, ensure your wooden spoon handle is at least half an inch in diameter. For the current cake, you may add a small amount of extra condensed milk directly into the areas that appear under-saturated.
Unlike the more resilient wacky cake depression cake, this recipe relies on high-fat dairy which can absorb odors from the refrigerator. Always keep the pan tightly covered with professional-grade plastic wrap or a fitted lid. This protection ensures the delicate flavors of cream and caramel remain pure and uncompromised.
For those seeking a more detailed look at similar saturation techniques, the better anything cake provides an excellent reference for how different sponge types react to liquid infusions. Understanding these differences allows the baker to adjust their timing based on the specific brand of cake mix utilized.
Precision in crushing the toffee is also a matter of technique; using a heavy rolling pin while the bars are still in their wrappers prevents a mess and allows for a controlled variety of sizes. You want some dust to melt into the cream and some chunks to provide a definitive snap when the guest takes their first bite.
Frequently Asked Questions
Why is it called Better Than Sex Cake?
The name originated in the mid-20th century as a piece of hyperbolic marketing intended to highlight the extreme decadence of the recipe. It reflects a period of American baking where rich, saturated desserts were considered the ultimate indulgence. While the name is provocative, it simply points to the satisfaction found in its complex layers.
What other names are used for this cake?
This dessert is frequently referred to as Better Than Anything Cake, Robert Redford Cake, or simply a Chocolate Poke Cake. The variety of names often depends on the specific region or the era in which the recipe was passed down through family archives. Regardless of the name, the core technique of poking and filling remains identical.
What are the main ingredients?
The foundation consists of a chocolate sponge, typically a Devil’s food variety, which is then infused with caramel and sweetened condensed milk. It is topped with a thick layer of stabilized whipped cream and crushed toffee bars. These elements work in tandem to create a balance of salt, sugar, and cocoa.
Do you serve it warm or cold?
This cake must be served cold, directly from the refrigerator, to ensure the whipped cream frosting maintains its structural integrity. If served warm, the frosting would melt into the sponge, resulting in a loss of the defined layers. Proper chilling also allows the flavors to meld, which improves the overall taste profile.
How long does this cake last?
When kept under tight refrigeration, the cake will maintain its quality for three to five days. Because it is a poke cake, the moisture level actually improves after the first twenty-four hours. However, after the fifth day, the whipped cream may begin to lose its aeration and become slightly weeped.
Can I make it gluten-free?
Yes, you may substitute the standard cake mix with a high-quality gluten-free chocolate mix. You must ensure that your chosen mix has enough structural strength to support the weight of the caramel and condensed milk. Most modern 1-to-1 flour blends in commercial mixes handle this saturation quite well.
Thoughtful Alternatives
You may consider substituting the traditional Devil’s food base with a dark chocolate Guinness cake for a more adult, bitter profile that cuts through the sweetness of the caramel. This change requires a slightly longer bake time due to the increased moisture in the batter. The resulting cake offers a more complex foundation for the same rich toppings.
For a lighter variation, use a white chocolate toffee bar in place of the standard milk chocolate variety. This creates a monochromatic aesthetic that is particularly striking when served on dark porcelain. This variation pairs beautifully with a touch of sea salt sprinkled over the final caramel drizzle to highlight the dairy notes.
If you find yourself without the required candy bars, a high-quality ooey gooey butter cake technique can be adapted by browning your own butter and sugar to create a homemade toffee brittle. This requires a candy thermometer and a precise hand, but the depth of flavor from homemade caramelization is unparalleled in heritage baking.
The Final Preparations
When preparing for service, the presentation should reflect the precision of the bake. Use a knife dipped in hot water and wiped dry between every cut to ensure clean, sharp edges that showcase the interior saturation. This technique prevents the whipped cream from dragging into the chocolate layers, maintaining the visual contrast that makes this cake so appealing.
For a more formal gathering, you might serve individual slices with a small dollop of unsweetened crème fraîche on the side. The slight acidity of the cultured cream provides a sophisticated counterpoint to the heavy sweetness of the caramel and condensed milk. This addition is reminiscent of an earthquake cake service, where textural variety is prioritized.
Plating on a chilled dessert dish is a detail that many amateur bakers overlook, yet it is essential for maintaining the temperature of the frosting during the meal. A cold plate ensures that the first bite is as refreshing and firm as the last. This small discipline is what separates a casual home bake from a professional-grade presentation.

A Word Before You Slice
You have now completed a recipe that demands a specific rhythm of action and rest. The Vintage Better Than Sex Cake is more than a simple assembly of pantry staples; it is an exercise in understanding how moisture moves through a crumb and how temperature affects stability. When you finally take that first bite, you will recognize that the time spent waiting for the cake to cool was just as important as the time spent mixing the batter.
As you master this technique, you may find yourself looking toward other heritage classics like the watergate cake to further expand your repertoire of mid-century favorites. Each of these recipes offers a unique window into a time when baking was about creating a shared experience of decadence. Precision is not a constraint. It is the freedom to repeat success every time you step into the kitchen.
I invite you to share your results and technical observations with our community of dedicated bakers. You can find more inspiration and precise methods on our social channels at Pinterest, Facebook, and TikTok. We look forward to seeing your perfectly structured layers.


i love this recipe
thanks ❤️