Baking forty bite-sized masterpieces in a tiny kitchen proves that restricting your scale increases your control over the moisture, structure, and flavor of every single crumb.

You do not need a commercial bakery or a box of factory cake mix to master Classic Vanilla Cake Pops. By baking a dedicated, tight-crumbed sponge from scratch and binding it with actual buttercream, you create a dense, decadent center that never slides off its stick. This targeted, small-scale approach guarantees that every mouthful delivers concentrated vanilla bean perfume instead of the greasy sweetness of store-bought alternatives. Grab your kitchen scale, discard the shortcuts, and let us construct a treat that honors the architecture of pastry.
Why Classic Vanilla Cake Pops Work Best in Small Batches
Prep: 120 min · Serves: 40 · Difficulty: Medium
- No boxed mix means genuine flavor depth.
- Scratch buttercream yields superior binder structure.
- Cold-cured centers maintain structural integrity.
- Precise scaling avoids wasting expensive coating ingredients.
- Small batches guarantee immaculate dipping control.
Baking in smaller quantities gives you total mastery over the moisture balance of your crumb and the thickness of your chocolate shell. Rather than rushing through a massive assembly line, this focused approach ensures that your cake pops turn out flawless every single time. This is the exact formula that brings pastry-chef precision down to a handheld stick.
Get The Full Cake Recipe
Print
Classic Vanilla Cake Pops
- Total Time: 156 mins
- Yield: 40 cake pops
Description
Create bakery-quality vanilla cake pops from scratch with this precise, small-batch method. By balancing a dense, homemade sponge with a rich, scratch-made buttercream, you achieve the perfect structure for a smooth, professional chocolate finish.
Ingredients
- All-Purpose Flour
- Baking Powder
- Baking Soda
- Fine Salt
- Unsalted Butter
- Granulated Sugar
- Large Egg
- Pure Vanilla Extract
- Whole Milk
- Confectioners’ Sugar
- Heavy Cream
- Candy Melts
Instructions
- Whisk dry ingredients. Sift and whisk together the flour, baking powder, baking soda, and salt in a medium bowl to aerate and ensure a uniform structure.
- Cream butter mixture. Beat softened butter and granulated sugar with a stand mixer on medium speed for three to four minutes until pale and fluffy.
- Incorporate wet elements. Add the egg and vanilla extract to the creamed mixture, beating on high until glossy and well combined.
- Fold in batter. Alternate adding dry ingredients and milk to the mixer on low, folding by hand at the end to maintain a tender crumb before baking at 350°F for thirty to thirty-six minutes.
- Whip the buttercream. Beat softened butter until smooth, then gradually incorporate confectioners’ sugar, heavy cream, and vanilla extract until the frosting forms stiff peaks.
- Crumble and mix. Break the cooled cake into crumbs, combine with the buttercream in a mixer on low speed, and work until a pliable, dough-like consistency is reached.
- Roll and chill. Scoop twenty-gram portions, roll into smooth spheres, and refrigerate on a parchment-lined tray for two hours to firm up.
- Melt the coating. Melt candy melts in a narrow, deep vessel using twenty-second microwave bursts, stirring until smooth, then allow to cool slightly.
- Dip and set. Dip the tip of a lollipop stick in coating, insert into a chilled cake ball, submerge the pop entirely, and tap gently to remove excess before standing upright to set.
Notes
- Use a digital scale for ingredients to ensure the cake dough achieves the perfect density for molding.
- Keep cake balls refrigerated until the very moment you are ready to dip to prevent the coating from cracking.
- Use a deep, narrow vessel for dipping to ensure the entire cake pop can be submerged in one clean, vertical motion.
- Avoid adding water or liquid food coloring to the melting candy to prevent the chocolate from seizing.
- Rub the crumbled cake through a fine-mesh sieve for an ultra-smooth, professional interior texture.
- Prep Time: 120 mins
- Cook Time: 36 mins
- Category: Dessert
- Method: Baking
- Cuisine: American
Build Your Mise en Place

Every ingredient in this recipe plays a crucial structural role in creating a pop that stays securely on its stick. Skip the boxed shortcuts and measure your components precisely by weight to avoid a greasy, collapsing dough. Let us examine what we are working with before we begin mixing.
- All-Purpose Flour: Provides the gluten structure required to hold the binder without becoming a gummy paste.
- Unsalted Butter: Delivers pure fat that yields a rich crumb and forms the emulsified foundation of our buttercream.
- Granulated Sugar: Sweetens while structuralizing the cake matrix and keeping the baked sponge tender.
- Whole Milk: Supplies hydration and lactic acid to activate the leaveners while keeping the crumb dense enough to mold.
- Confectioners’ Sugar: Dissolves completely into the buttercream binder without creating a gritty mouthfeel.
- Candy Melts: Act as the protective, shell-like outer barrier that seals in the interior moisture.
| Ingredient | Why It Matters |
|---|---|
| All-Purpose Flour | Establishes the structural crumb integrity. |
| Unsalted Butter | Creates a velvety fat emulsification. |
| Pure Vanilla Extract | Provides the foundational aromatic signature. |
| Candy Melts | Creates a snappy, protective outer shell. |
Let’s Bake

Step 1: Whisk the Dry Architecture
Begin by thoroughly sifting and whisking your all-purpose flour, baking powder, baking soda, and fine salt in a medium-sized glass mixing bowl until the mixture is completely uniform. This step is not about combining ingredients; it is about aerating the dry flour particles to confirm that when they meet the wet emulsification, they integrate without forming stubborn gluten clumps. A clump-free dry mix guarantees an exceptionally consistent, tight crumb that is essential for a cake pop that holds its shape under the pressure of dipping. Take your time with this initial phase, as any pockets of uneven baking powder can create large air bubbles in your oven, which will weaken the final rolled structure of your cake ball.
Step 2: Cream the Butter and Sugar
Cream the softened butter and granulated sugar together in the bowl of your stand mixer fitted with the paddle attachment, running it on medium speed for three to four minutes. Watch for the moment the yellow butter pale-colors and transforms into a light, almost white fluffy mass, which indicates you have successfully trapped air within the crystalline structure of the sugar. This creamed matrix is the foundation of our sponge, providing the subtle rise we need without relying on excessive chemical leaveners. If you are looking for more tips on mastering your fat-to-sugar emulsifications, take a look at our classic vanilla layer cake guide to see how we manage this technique on a larger scale.
Step 3: Incorporate the Wet Elements
Add the room-temperature egg and the pure vanilla extract to your creamed butter mixture, beating on high speed until the liquid is fully incorporated and the batter looks glossy. If your egg is too cold, it will shock the creamed fat, causing the emulsion to split into a curdled mess, so make sure all elements have rested on your counter beforehand. Scrape down the sides and the very bottom of the bowl with a silicone spatula to make sure no pockets of unincorporated butter remain unmixed. This step is where the rich, warm aromatics of vanilla are fully locked into the fat molecules, ensuring a deep and lasting flavor throughout the entire bake.
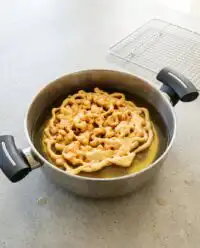
Step 4: Fold the Batter and Bake
Alternate adding the dry ingredients and the whole milk into the mixing bowl, running the mixer on your lowest speed setting to prevent overworking the flour. Mix only until the flour streaks disappear, then immediately stop the machine and finish folding the batter by hand with your spatula to maintain a tender crumb. Pour the thick, luxurious batter into your greased nine-inch springform pan, smoothing the surface with an offset spatula to guarantee even heat distribution. Bake at 350°F (177°C) for thirty to thirty-six minutes, keeping a close eye on the oven until a toothpick inserted into the dead center comes out clean and free of wet crumbs.
Step 5: Whip the Scratch Buttercream
Whip your softened butter in a clean mixer bowl for two full minutes on medium speed until it is smooth and free of lumps. Slowly add the confectioners’ sugar one cup at a time, followed by the heavy cream and vanilla extract, mixing on low to prevent a cloud of sugar from escaping. Once the sugar is fully integrated, increase the speed to high and beat the frosting for three minutes until it is light, fluffy, and holds stiff peaks. This scratch-made buttercream will act as the high-fat binder that holds our cake crumbs together, providing structural stability that canned alternatives plainly cannot match.
Step 6: Crumble Your Baked Sponge
Once the baked vanilla sponge has cooled entirely to room temperature on a wire rack, break it apart and crumble it directly into the bowl with your fresh buttercream. Ensure there are no large lumps or dry, caramelized edge pieces left in the mix, as these will ruin the smooth texture of your finished cake spheres. Turn the mixer on low speed and let the paddle attachment work the frosting and cake crumbs together until a uniform, dough-like consistency forms. The mixture should feel pliable, holding its shape flawlessly when squeezed in your fist, resembling a dense, luxurious cookie dough.
Step 7: Roll the Classic Vanilla Cake Pops
Scoop out portion sizes of exactly twenty grams and roll them firmly between your palms to form a smooth sphere. Repeat this process for all forty portions, placing the formed spheres onto a baking sheet lined with parchment paper or a silicone baking mat. Put the tray of Classic Vanilla Cake Pops into the refrigerator for two hours to let the fats solidify and lock in the shape. Keeping these cake balls cold is the key to preventing them from disintegrating when they are introduced to the warm dipping coating.
Step 8: Melt the Coating Medium
Melt your high-quality candy melts or chopped white chocolate wafers in a deep, narrow two-cup glass measuring cup in the microwave using short twenty-second bursts. Stir the coating thoroughly with a silicone spatula after each heating cycle to distribute the heat evenly and prevent the delicate cocoa butter from scorching. Once the mixture is completely melted and flows in a smooth, continuous ribbon off your spatula, let it sit on the counter for five minutes to cool slightly. A narrow, deep vessel is crucial here because it allows you to submerge the entire cake pop in one vertical plunge without wasting coating.
Step 9: Dip and Set
Remove only two or three chilled cake balls from the refrigerator at a time, keeping the remaining portion cold to maintain their structural integrity. Dip the end of a lollipop stick exactly half an inch into the warm candy coating, then insert it halfway into the center of a cold cake ball. Dip the entire cake pop straight down into the warm coating until it is fully submerged, confirming the coating seals the base where the ball meets the stick. Gently tap the stick against the side of the glass cup to release any excess coating, decorate with sprinkles, and stand the pop upright in a styrofoam block to set.
The Details That Matter

Maintaining a strict temperature equilibrium between your cake balls and your dipping coating is the single most important factor for success. If your cake balls are freezing cold and your candy melts are hot, the dramatic temperature difference will cause the cake pop to expand as it warms up, instantly cracking the delicate outer shell. Allow your melted coating to cool slightly until it is warm to the touch, and keep your cake balls refrigerated rather than frozen before dipping.
The shape and depth of your dipping vessel will make or break your decorating process. A wide, shallow bowl forces you to roll the cake pop around to coat it, which creates uneven layers and unsightly drips. A deep, narrow glass measuring cup or a small mason jar allows you to submerge the entire cake pop in a single, smooth vertical motion. If you are looking to refine your small-scale pastry presentation further, our guide on the modern mini aesthetic covers these exact geometric plating principles.
If your cake pops are falling off the sticks, here is why and how to fix it. This frustrating issue typically happens when your cake dough is too heavy due to an excess of buttercream binder, or because the cake balls were too warm when dipped. To correct this, you can follow this detailed tutorial for making homemade cake pops which breaks down the structural troubleshooting steps in depth. Make sure you stick to the twenty-gram portion size and let the dipped stick set inside the chilled cake ball for a few minutes before attempting the full dip.
When tapping off the excess coating after dipping, resist the urge to vigorously shake the lollipop stick up and down. This motion introduces air bubbles into the chocolate and can easily dislodge the cake ball from the stick. Instead, hold the pop at a slight angle and tap the stick gently against your wrist, allowing gravity to slowly draw the excess glaze down. Spin the stick slowly between your fingers as you tap to maintain an even, immaculately spherical outer coating.
Some brands of candy melts or white chocolate can melt into a thick, gloopy paste that is impossible to dip smoothly. If your coating is too thick, stir in half a teaspoon of vegetable oil, melted coconut oil, or paramount crystals to thin it to a honey-like consistency. Never use water or water-based food coloring to thin your coating, as even a single drop of moisture will cause the chocolate to seize into a solid, unworkable block.
For the most professional, velvet-like interior texture, take the extra time to rub your crumbled cake through a wire mesh sieve. This extra step removes any larger, caramelized bits of sponge that did not crumble completely, resulting in a highly uniform crumb. When combined with your scratch-made buttercream, this sieved cake dough rolls into flawless, exceptionally smooth spheres that look identical to high-end bakery creations.
Frequently Asked Questions
Why are my cake pops cracking?
This occurs when there is a significant temperature difference between the cold cake pops and the warm candy coating. As the cold cake pop warms up inside the warm shell, it expands, causing the outer coating to fracture. To prevent this, verify your cake pops are cool but not freezing, and let your melted candy coating sit for a few minutes to cool slightly before you begin dipping.
Why are my cake pops falling off the sticks?
Cake pops typically fall off their sticks because the cake mixture is too warm, contains too much frosting, or the stick was not secured with melted candy. Always dip the end of your lollipop stick into the melted candy coating before inserting it about halfway into the cake ball. This melted coating acts as a glue, securing the stick in place once it cools and hardens inside the cake.
How long do they last, and how should I store them?
These finished cake pops can be safely stored in an airtight container in the refrigerator for up to one week. If you need to make them ahead of time, you can freeze the undipped, rolled cake balls for up to six weeks. Simply thaw the cake balls in the refrigerator overnight before inserting the sticks and dipping them.
Can I use store-bought frosting?
Yes, you can use store-bought frosting, but it is highly recommended to make a quick scratch buttercream instead. Store-bought frostings are often too oily and sweet, which can cause your cake balls to become greasy, soft, and prone to sliding off their sticks. A simple, stiff scratch buttercream provides much better structural binding and a superior vanilla flavor.
Should I use real chocolate or candy melts?
Candy melts are much easier to work with because they do not require tempering to set into a firm, glossy shell. Real chocolate can be used, but it must be properly tempered or thinned with vegetable oil to prevent it from blooming or becoming dull. If you are a beginner, starting with high-quality candy melts or melting wafers will guarantee exceptional visual results.
Can I use a different pan size to bake the cake?
Since the cake will be completely crumbled anyway, the shape and size of the baking pan do not matter as long as the cake bakes through evenly. A standard nine-inch round cake pan, a springform pan, or even an eight-inch square baking dish will work perfectly. Just adjust your baking time slightly and use a toothpick to verify that the center of the cake is fully cooked before cooling.
Where to Deviate
The Almond Velvet Swap: For a subtle, sophisticated twist on the traditional flavor, replace the pure vanilla extract in your cake sponge with half a teaspoon of pure almond extract. This simple flavor modification introduces a warm, stone-fruit aroma that contrasts beautifully with a sweet white chocolate shell. This technique of substituting extracts can also be applied to our classic vanilla butter cake to create a versatile base for many other miniature desserts.
The Dark Chocolate Snappy Shell: If you find white chocolate coatings to be excessively sweet, swap them out for high-quality dark chocolate melting wafers. Thin the dark chocolate with a tiny splash of neutral vegetable oil to ensure a snappy, thin glaze that cuts through the rich vanilla buttercream core. The bitterness of the dark chocolate outer shell balances the sweet, dense interior, creating a mature flavor profile that chocolate purists will adore.
Toasted Coconut Crumb: Instead of using traditional rainbow sprinkles, decorate your freshly dipped pops with a dusting of finely shredded, toasted unsweetened coconut. The dry, nutty texture of the toasted coconut adds an excellent crunch that breaks up the softness of the cake pop center. Apply this topping immediately after dipping while the coating is still wet so the coconut flakes stick securely to the surface.
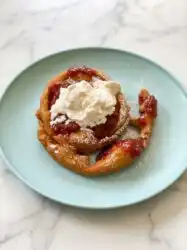
Cutting, Plating, Presenting
Plating these delicate treats requires some creative spatial planning to preserve their pristine, rounded shapes. Instead of laying them flat on a traditional serving platter, which can cause unsightly flat edges and damage the sprinkles, display them vertically. You can wrap a clean block of high-density styrofoam or florists’ foam in heavy, textured linen that matches your table setting, then press the lollipop sticks firmly into the block.
For elegant events or celebrations, arrange your cake pop display alongside other matching pastry creations to form a cohesive dessert landscape. Consider presenting them on a tiered stand next to slices of our decadent vanilla cake recipe to offer your guests a choice of textures. This visual contrast between a classic sliced cake and these playful, single-portion pops makes your dessert table look highly professional and inviting.
Keep the cake pops refrigerated until roughly fifteen minutes before your guests arrive to make sure the shell remains crisp and snappy. Allowing them to rest briefly at room temperature before eating softens the dense vanilla cake center, creating a delicious contrast between the outer shell and the buttery, melt-in-your-mouth interior.

What You Just Proved
Executing this recipe successfully proves that you do not need commercial shortcuts to create professional-grade pastry. By taking the time to bake a dedicated sponge and whip a custom buttercream, you have transformed a simple party treat into a balanced, structurally sound dessert. Remember that the recipe is a starting point, you are the variable.
As your guests bite into these decadent treats, they will immediately witness the visual drama of a cross-section cut. They will see a dense, flawlessly uniform vanilla core held together by rich buttercream rather than a soggy, oil-laden mass. If you are ready for your next baking challenge, check out our full selection of creative cake pops designs and flavor pairings. Every guide on CakeHalf is written to help you master the science of baking while encouraging you to make less and mean more.
We want to see how your beautiful desserts turned out and how you customized your dipping decorations. Share your photos with our community on Pinterest or tell us about your baking journey on Facebook. Your feedback and kitchen experiments are what keep this creative pastry space thriving!
