Early morning light slips through the window, catching the fine dust of flour suspended in the quiet air of my kitchen as I measure cocoa.

There is a quiet peace in baking a small Chocolate Lunch Box Cake, a miniature chocolate cake scaled down for sweet sharing. Years ago, we did not need grand occasions to bake; we baked to show care in the small, quiet moments of the week. This recipe brings that gentle spirit back to your table with its tender crumb and rich vanilla buttercream frosting. It is a slow, meditative process that rewards you with two beautiful little cakes, perfect for wrapping up and giving to someone you love.
When we bake in small batches, we pay closer attention to the details. We watch the way the batter flows, we smell the cocoa as it blooms in the hot water, and we take our time smoothing the frosting. This is not about producing a massive, show-stopping dessert for a crowd, but rather about creating something intimate and meaningful. In my grandmother’s kitchen, we often made smaller treats to share with a neighbor who was feeling under the weather or to celebrate a simple, quiet milestone. This particular cake captures that exact feeling, offering a rich, comforting chocolate flavor wrapped in a beautiful, transportable package.
A Bite of Pure Nostalgia: The Chocolate Lunch Box Cake
Prep: 30 min · Serves: 4 · Difficulty: Medium
This is the cake from our recipe index I bake to send a piece of home out.
- Deeply rich cocoa flavor in every tender bite.
- Ideally sized for intimate gatherings or gifts.
- Silky vanilla buttercream that spreads like a dream.
- Nostalgic charm that brings back sweet childhood memories.
- Simple pantry staples create an extraordinary dessert.
Get The Full Cake Recipe
Print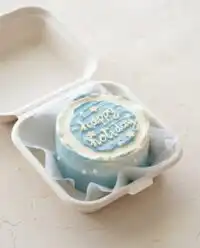
Chocolate Lunch Box Cake
- Total Time: 1 hour 55 mins
- Yield: 2 6-inch cakes
- Diet: Vegetarian
Description
A beautifully tender, small-batch chocolate cake layered with silky vanilla buttercream, scaled down to fit perfectly inside a rustic lunch box container for sweet sharing.
Ingredients
- 1 cup all-purpose flour (130g)
- 1 cup granulated sugar (200g)
- 1/3 cup dark or Dutch-processed cocoa powder (30g)
- 1 tsp baking powder (4g)
- 3/4 tsp baking soda (5g)
- 1/2 tsp fine salt (3g)
- 1/2 cup hot water (120g)
- 1/2 cup buttermilk, room temperature (120g)
- 1/4 cup vegetable or canola oil (55g)
- 1 large egg, room temperature (56g)
- 1 tsp vanilla extract or vanilla bean paste (4g)
- 1 cup unsalted butter, room temperature (226g)
- 1 tsp vanilla extract (for frosting) (4g)
- 1/4 tsp fine salt (for frosting) (2g)
- 3 cups powdered sugar (375g)
- 1/2 cup heavy whipping cream, room temperature (120g)
Instructions
- Preheat and Prep: Preheat your oven to 350°F (175°C) and grease two 6-inch cake pans, lining the bottoms with parchment paper.
- Whisk Dry Ingredients: Sift the flour, sugar, cocoa powder, baking powder, baking soda, and salt into a large bowl and whisk to combine.
- Mix Wet Ingredients: Whisk the hot water, buttermilk, canola oil, egg, and vanilla together in a separate bowl.
- Combine Batter: Pour the wet ingredients into the dry ingredients and stir gently just until incorporated.
- Bake Layers: Divide the batter between the pans and bake for 25-28 minutes, then cool completely on a wire rack.
- Torte Layers: Slice the cooled cake layers horizontally to create four thin rounds.
- Make Buttercream: Beat the butter until smooth, add the vanilla and salt, then slowly mix in the powdered sugar and heavy cream until light and fluffy.
- Assemble and Decorate: Stack the layers with buttercream on parchment squares, crumb coat, chill, frost smoothly, and pipe your sweet message on top.
Notes
- Room Temperature: Always ensure your buttermilk, egg, and butter are at room temperature for a smooth, emulsified batter and frosting.
- Measure Accurately: Use a kitchen scale to measure your flour and cocoa powder to prevent a dry, heavy crumb.
- Chill Before Frosting: Freezing the cake layers for 20 minutes before assembling makes them much easier to stack and frost without crumbs.
- Sketch Your Message: Use a toothpick to lightly trace your letters on the chilled frosting before piping with buttercream.
- Prep Time: 30 mins
- Cook Time: 25 mins
- Category: Cakes
- Method: Baking
- Cuisine: American
Gathering Your Ingredients
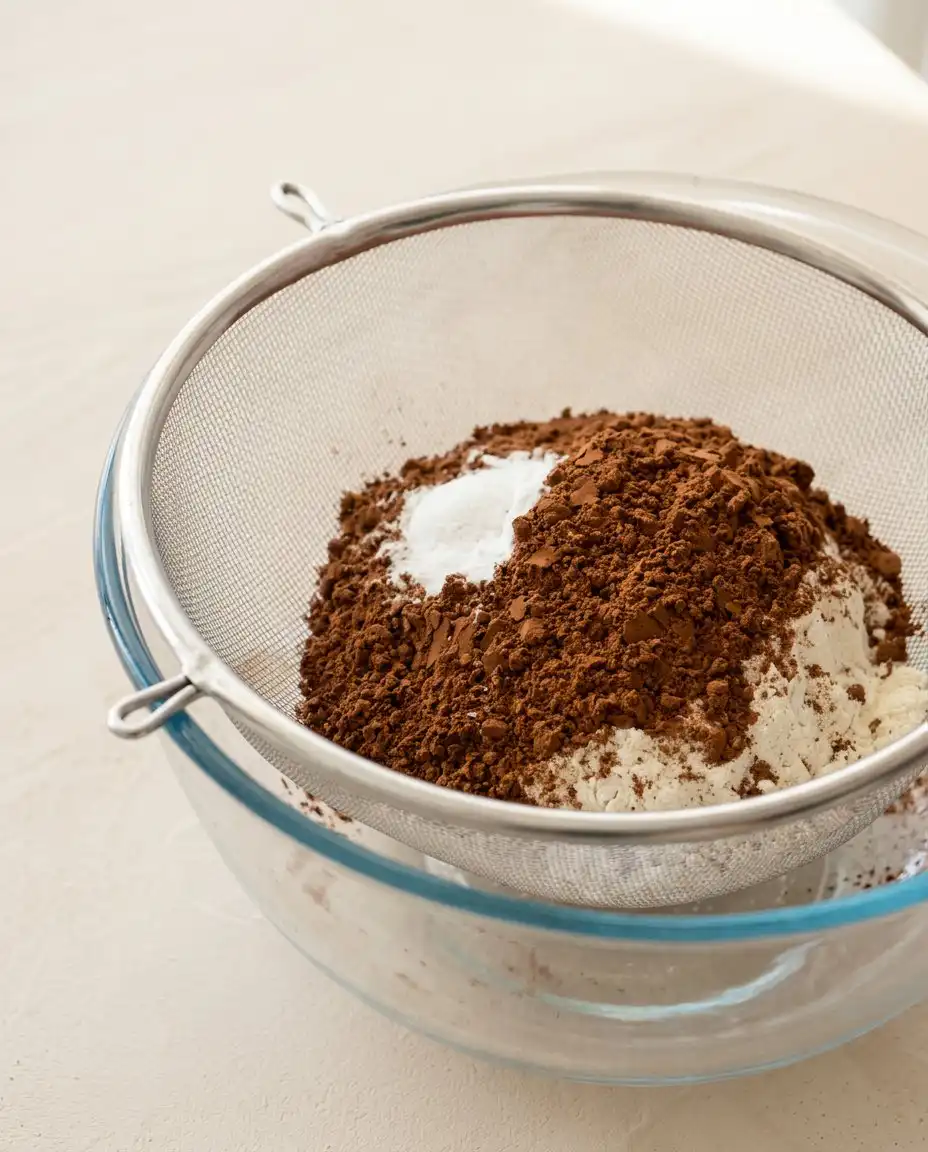
We begin by gathering our ingredients onto the counter, letting the eggs and buttermilk come to room temperature. Each element has a purpose, working in harmony to create a crumb that is both sturdy enough to stack and incredibly tender to the bite. Here is what you will need to retrieve from your kitchen shelves. Take a moment to appreciate the simple beauty of these pantry staples: the fine, powdery flour, the deep brown cocoa, and the rich, golden butter. There is a quiet magic in how these basic ingredients, which sit quietly in our larders day after day, can come together to form something so celebratory and comforting.
- Dark cocoa powder: This provides the deep, nostalgic chocolate flavor and a beautiful dark color to the cake layers. We use a Dutch-processed or dark cocoa to ensure a rich, smooth flavor profile that is never bitter.
- Buttermilk: The natural acidity in buttermilk reacts with the leavening agents to create an incredibly soft and moist texture. It tenderizes the gluten in the flour, giving the cake its signature melt-in-your-mouth quality.
- Hot water: Pouring hot water over the cocoa powder blooms the chocolate, releasing its full aromatic potential before baking. This step is crucial for deepening the chocolate flavor throughout the entire batter.
- Unsalted butter: Using high-quality butter for the frosting ensures a rich, creamy base that holds its shape beautifully when piped. It provides the perfect canvas for your sweet handwritten messages and decorative borders.
- Powdered sugar: This sweetens and structures our simple American buttercream, allowing you to write sweet messages on top. It dissolves smoothly into the whipped butter, creating a silky texture that is a joy to spread.
- Canola oil: A small amount of oil keeps the crumb remarkably moist, even after the cake has been chilled in the larder. It works alongside the buttermilk to ensure the cake never tastes dry or heavy.
- Fine salt: A pinch of salt is essential in both the cake batter and the buttercream to balance the sweetness and bring out the full depth of the chocolate and vanilla flavors.
| Ingredient | Why It Matters |
|---|---|
| Dark Cocoa Powder | Blooms with hot water to create a deep, rich chocolate base |
| Buttermilk | Softens the gluten structure for a tender, delicate crumb |
| Hot Water | Dissolves the cocoa and activates the leavening agents |
| Unsalted Butter | Creates a stable, silky canvas for the sweet buttercream |
| Canola Oil | Retains moisture so the miniature layers stay soft |
Step by Step in Teresa’s Kitchen
Step 1: Prep Your Oven and Baking Pans
Preheat your oven to 350°F (175°C) and prepare two six-inch cake pans with non-stick spray or a thin coating of homemade cake release. Line the bottoms with rounds of parchment paper to make sure the delicate layers slip out cleanly after baking. Feel the cool metal of the pans as you prepare them, knowing this careful foundation is key to a beautiful, even bake. Taking this time to prepare your pans protects your hard work when it comes time to turn the cakes out.
Step 2: Whisk the Dry Ingredients Together
Sift the all-purpose flour, granulated sugar, dark cocoa powder, baking powder, baking soda, and fine salt into a large glass bowl. Whisk them gently until the mixture is uniform in color, resembling soft, dry river sand in the morning light. Sifting is a quiet, rhythmic step that removes any stubborn lumps and aerates the flour for a lighter, more delicate crumb. As you whisk, notice how the dark cocoa begins to tint the flour, promising a rich chocolate experience.
Step 3: Combine the Wet Elements
Measure the hot water, room-temperature buttermilk, canola oil, large egg, and vanilla extract into a separate glass bowl. Whisk them together thoroughly until the egg is fully incorporated and the liquid is completely smooth. The sweet, warm scent of vanilla warming in the liquid will begin to fill your quiet kitchen, signaling that the wet ingredients are ready to meet the dry. Making sure these liquid ingredients are at room temperature helps them bond beautifully with the flour.
Step 4: Mix the Batter to Create the Chocolate Lunch Box Cake
Pour the wet ingredients slowly into the dry mixture, stirring gently with a wooden spoon or spatula just until the flour disappears. Avoid the temptation to overmix, as too much stirring will develop the gluten and make the finished cake tough rather than tender. The batter should look glossy, relatively thin, and deeply brown, with a rich chocolate aroma that promises a wonderful bake. Watch for the small bubbles to rise to the surface, showing that the leaveners are already at work.
Step 5: Bake the Chocolate Layers
Divide the rich batter evenly between your two prepared six-inch pans, using a kitchen scale if you wish to be perfectly precise. Bake for 25 to 28 minutes in the center of your preheated oven, or until a wooden toothpick inserted into the center comes out clean. Watch for the edges to gently pull away from the sides of the pans, and listen for the quiet hiss of a cake that is perfectly baked. The kitchen will fill with a warm, comforting chocolate scent that recalls Sunday afternoons of long ago.
Step 6: Cool and Slice the Cake Layers
Remove the pans from the hot oven and let them rest on the counter for ten minutes before turning the cakes onto a wire rack. Once they are completely cool to the touch, use a long serrated knife to slice each layer horizontally into two thin, even rounds. This technique, known as torting, gives you four thin layers ready for stacking and helps your cake have a perfect cake-to-frosting ratio in every single bite. Handle the delicate layers gently, feeling their soft, springy texture as you set them aside.
Step 7: Beat the Vanilla Buttercream Frosting
Place the room-temperature unsalted butter into your mixing bowl and beat on medium speed for thirty seconds until smooth and creamy. Add the vanilla extract and fine salt, mixing on low until the ingredients are fully incorporated. Slowly add the powdered sugar in stages, pouring in the heavy cream halfway through to keep the frosting supple, smooth, and easily spreadable. Beat until the frosting is light, fluffy, and holds a soft peak when you lift the paddle.
Step 8: Assemble and Decorate the Little Cakes
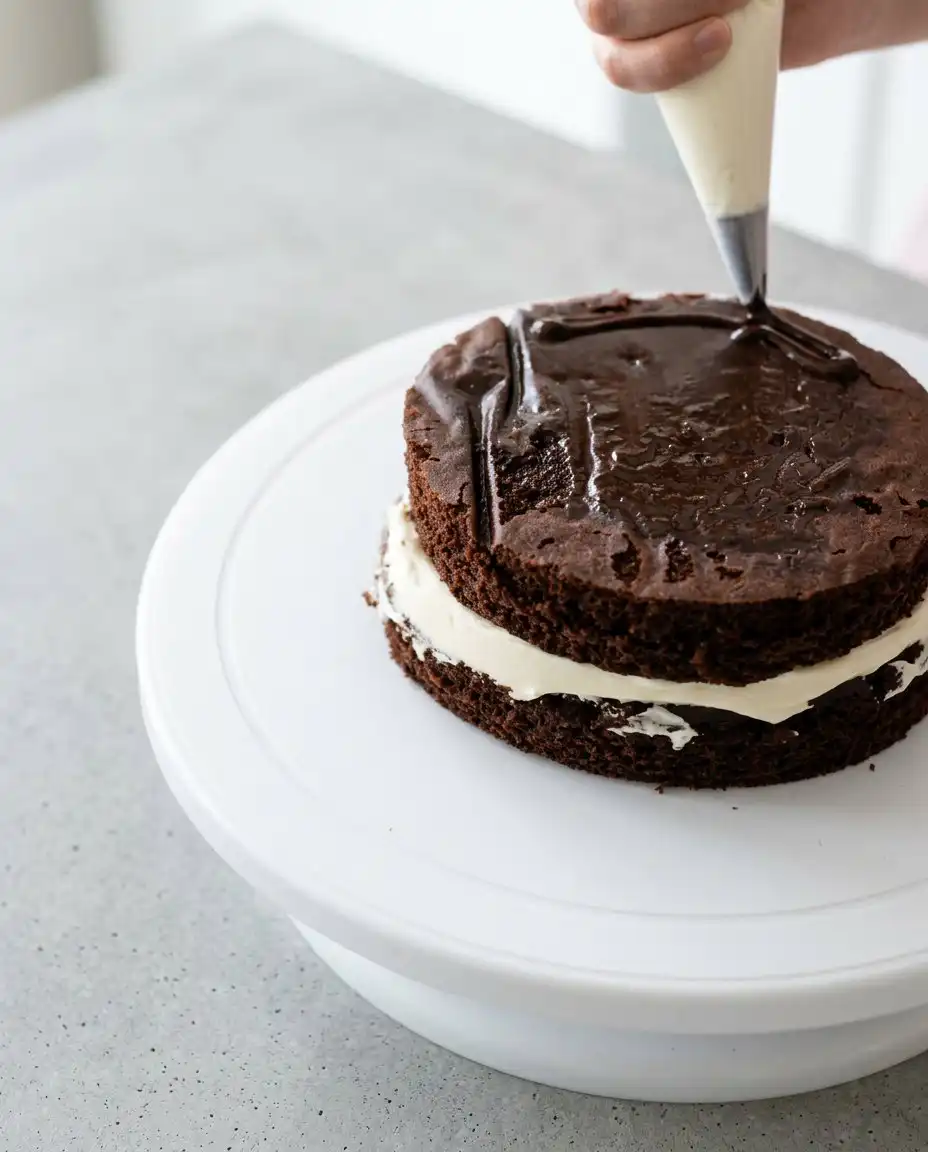
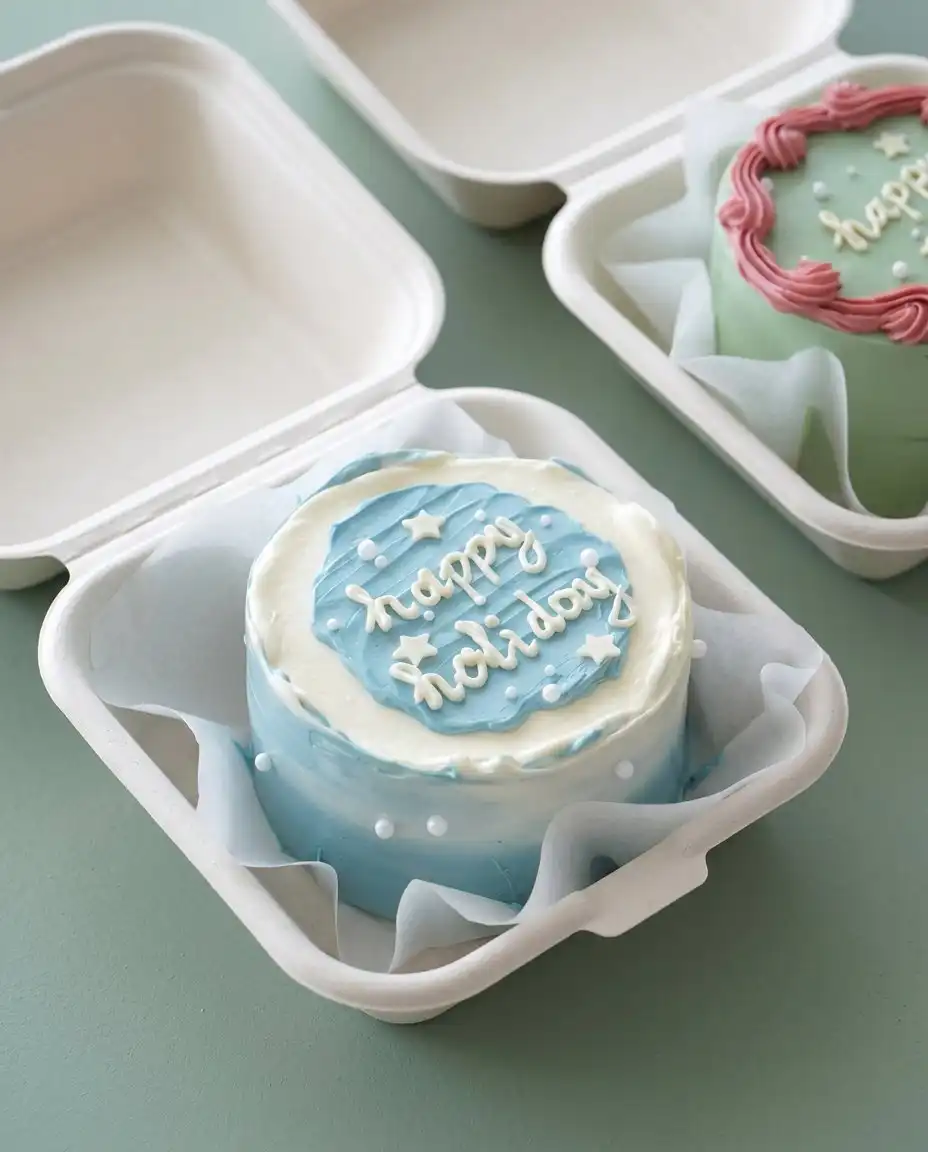
Place a square of parchment paper onto your work surface and center your first thin cake layer upon it. Spread a thin, even layer of vanilla buttercream over the top, stack the next layer, and coat the entire miniature cake in a thin crumb coat. Chill the cake for ten minutes, then apply a final smooth layer of buttercream, piping a sweet message or border on top using colored frosting. Carefully lift the finished cake by the parchment corners and place it gently inside its paper lunch box.
What Grandma Would Tell You
If your buttercream begins to curdle or separate as you mix it, the ingredients were likely at different temperatures. To fix this, gently warm the bottom of your mixing bowl with a warm, damp kitchen towel for a minute while beating on low speed, which will help the butter emulsify into a silky smooth frosting. This gentle warmth coaxes the fat and liquid back together without melting the butter.
Always use a kitchen scale to measure your dry ingredients, especially when scaling down recipes for small bakes. Scooping flour directly from the bag with a measuring cup can pack too much flour into the recipe, resulting in a dry, heavy crumb rather than the light, tender cake we desire. A digital scale guarantees accuracy, which is the secret to consistent baking success.
When preparing to write your message on top of the frosted cake, use a fine toothpick to lightly sketch the letters into the chilled buttercream first. This simple trick allows you to correct any spacing errors before committing to the piping bag, guaranteeing your sweet words are perfectly centered. It takes away the anxiety of writing with frosting and lets your creativity flow freely.
For an extra layer of moisture, you can lightly brush the sliced cake layers with a simple syrup before adding the buttercream. If you enjoy rich chocolate desserts, you might also love learning how to make a classic chocolate mousse cake for your next family gathering. This simple addition keeps the layers incredibly moist even if you need to store the cakes in the fridge for a day or two before serving.
Tap your filled cake pans firmly on the kitchen counter two or three times before putting them in the oven. This coaxes any trapped air bubbles to the surface, preventing large, unsightly holes from forming in your baked cake layers. It is a simple, old-fashioned step that helps your cake have a tight, uniform crumb that holds together beautifully when sliced.
Keep your parchment paper squares slightly larger than the lunch boxes you plan to use. This provides handy handles that allow you to lift the finished, decorated cake into the box without disturbing the delicate piped borders on the sides. It is much easier to lower the cake into the deep box when you have the support of the paper underneath.
Frequently Asked Questions
What is a lunch box cake?
A lunch box cake, also known as a bento cake, is a miniature dessert that is styled to fit inside a small takeaway container. These small-batch cakes became popular as personal gifts, perfect for sharing between two people or celebrating a quiet milestone. They carry the same love and care as a large celebration cake but in a sweet, personal size. It is a beautiful way to show someone you are thinking of them without making an overwhelming amount of dessert.
What size is a bento lunch box cake?
Typically, these miniature cakes are made using four-inch or six-inch cake pans. The finished cake is layered, frosted, and placed inside an eight-inch square takeout container, sitting flush on a piece of parchment paper. This size makes them easy to transport and incredibly charming to open. The compact dimensions make sure that the cake remains stable and beautiful during travel.
How many people does a lunch box cake feed?
A single six-inch lunch box cake comfortably serves two to four people, depending on how generously you slice it. Because this recipe makes two separate six-inch cakes, it is perfect for sharing with neighbors or keeping one at home while gifting the other. It is the ultimate way to share a sweet moment with someone special. The smaller portions make it ideal for intimate gatherings where a standard cake would be too large.
Can you make lunch box cakes from a box mix?
While you can use a boxed cake mix, baking these small layers from scratch yields a much more tender crumb and a richer, more authentic flavor. Homemade batter allows you to control the quality of the cocoa and the moisture of the crumb, making sure your miniature cake tastes as wonderful as it looks. The old way of baking from scratch always brings a deeper sense of connection to the kitchen. It is a rewarding experience that box mixes cannot replicate.
What kind of box do you use for lunchbox cakes?
These cakes are traditionally placed in eco-friendly sugar cane or paper pulp clamshell boxes, which measure about eight inches square. The tapered bottom of these containers holds a six-inch cake perfectly, preventing it from sliding around during transport. You can line the box with decorative parchment paper to make the presentation even more beautiful. These boxes are inexpensive, easy to find, and add a lovely rustic charm to your homemade gift.
How do you keep lunchbox cakes moist?
To keep these small cakes moist, be careful not to overbake the thin layers, as small pans bake much faster than larger ones. Wrapping the cooled layers tightly in plastic wrap and chilling them before assembly also helps lock in their natural moisture. Additionally, a thin coat of buttercream acts as a seal, keeping the crumb soft and fresh. Storing the finished cake in its closed box in the refrigerator will also protect it from drying out.
What frosting works best for mini lunch box cakes?
A sturdy American buttercream or a silky Swiss meringue buttercream works best for these miniature creations. The frosting needs to have enough structure to hold its shape for piping messages and borders, yet remain soft enough to slice easily. This recipe features a classic vanilla American buttercream that is simple to prepare and wonderful for decorating. It provides a sweet, creamy contrast to the deep chocolate cake layers.
Can I freeze the cake layers before assembling?
Yes, you can certainly freeze the cake layers ahead of time, which actually makes them much easier to frost. Wrap each cooled layer tightly in plastic wrap and place them in the freezer for up to a month. When you are ready to assemble, frost the layers while they are still slightly frozen; this prevents crumbs from getting mixed into your beautiful buttercream. It is a wonderful way to break up the baking process over two days.
From the Same Recipe Box
For a delightful twist, you can replace the vanilla extract in the buttercream with a teaspoon of peppermint extract for a festive holiday treat. This simple swap pairs beautifully with the deep cocoa cake layers, reminiscent of old-fashioned winter gatherings around the fireplace. You can top the cake with crushed candy canes or chocolate shavings to add a lovely texture that contrasts with the silky smooth frosting.
If you prefer a richer, more decadent dessert, try filling the layers with a spoonful of silky chocolate ganache instead of vanilla buttercream. For those who enjoy a combination of rich textures, our chocolate turtle cake is another wonderful recipe to bake when you want to create something truly special. The rich caramel and toasted pecans in that recipe offer a wonderful contrast to the simple sweetness of this lunch box cake.
You can also adapt this recipe to fit a single eight-inch round cake pan if you do not have the smaller six-inch pans on hand. To learn more about the history and creative assembly of these charming mini desserts, you can read about traditional lunch box cakes and how they became a beloved baking tradition around the world. This adjustment makes the recipe incredibly versatile, allowing you to enjoy the same delicious chocolate flavor in a more traditional format.
Sitting Down Together
Sitting down together to enjoy a slice of cake is one of life’s simplest pleasures. These beautiful miniature cakes are best served on small, vintage dessert plates with a delicate silver fork. Pair a slice of this rich chocolate cake with a hot cup of black tea or a pour of fresh milk to balance the sweet buttercream. The contrast between the dark cocoa and the creamy frosting makes each bite a delightful experience that encourages you to linger at the table.
This dessert is the perfect centerpiece for a quiet Sunday afternoon visit with a dear friend or a small family birthday. If you are planning a larger dessert table, you might also consider serving our classic chocolate delight alongside these mini cakes to offer your guests a variety of chocolate treats. Having different textures and styles of dessert allows everyone to find something they love while keeping the atmosphere relaxed and welcoming.
Because these cakes are packaged in transportable boxes, they also make wonderful gifts for picnics in the park or quiet porch visits. Tie the box with a piece of cotton twine and slip a wooden spoon under the knot for a rustic, thoughtful presentation that feels like a warm embrace. It is a gentle reminder that the best gifts are handmade, carrying the warmth of the baker’s kitchen wherever they go.
Until Next Time
As we wash the flour from our hands and close the tin recipe box, we are reminded that baking is more than just combining ingredients. It is a way to slow down, to honor the hands that taught us, and to share quiet affection with those we hold dear. This little cake carries that timeless tradition from my kitchen to yours, one small slice at a time. It is a quiet rebellion against the fast-paced world, a moment carved out solely for sweet connection.
If you enjoyed spending this quiet morning in the kitchen with me, I hope you will try baking our old fashioned peanut butter cake next time you crave a comforting, classic dessert. Each recipe we share is an invitation to step back from the rush of modern life and find peace in the old ways of doing things. The simple act of measuring, mixing, and waiting for the oven to work its magic can be incredibly grounding.
Please share your beautiful bento creations with us on Pinterest or join our quiet community of home bakers on Facebook to swap stories and photos from your own kitchen. We love seeing how you make these recipes your own and hearing about the memories you create around your family tables. Until we meet again over mixing bowls and warm ovens, may your home be filled with the sweet scent of vanilla and the warmth of shared memories.