I still remember the thrill of the school bake sale, clutching a crumpled dollar bill and scanning the long tables for the brightest, happiest treat. There was always something magical about a cake that didn’t just taste sweet but looked like a celebration. This recipe takes me back to those simple joys, capturing the whimsy of childhood in a baking cup.

These little cakes are pure happiness, featuring a tender vanilla crumb that hides a colorful secret inside. By dividing the batter and swirling in vibrant hues, you create a tie-dye effect that is as fun to make as it is to eat. They are perfect for birthdays, sunny afternoons, or any day that needs a little splash of color.
A Little Slice of Joy
There is a special charm to baking something that makes people smile before they even take a bite. These cute cakes are incredibly tender, thanks to the combination of butter and oil, giving you the flavor of a classic butter cake with the moistness of a quick bread.
I love this recipe because it is forgiving and flexible. You don’t need fancy equipment, just a few bowls and a bit of patience. It is the perfect project to bake with little ones, letting them stir the colors and watch the magic happen in the oven.
Print
Cute Cake
- Total Time: 40 mins
- Yield: 24 cupcakes
- Diet: Vegetarian
Description
Brighten up any celebration with these whimsical, multi-colored vanilla cupcakes that feature a stunning marble effect. With a tender crumb and vibrant hues, these treats are as fun to assemble as they are to share with friends and family.
Ingredients
- 2 cups all-purpose flour
- 1 1/2 cups white sugar
- 1 tablespoon baking powder
- 1/2 teaspoon baking soda
- 1/2 teaspoon salt
- 1/2 cup butter, softened
- 1/4 cup vegetable oil
- 2 large eggs, room temperature
- 1 cup whole milk
- 1 teaspoon vanilla extract
- Red, blue, green, and yellow gel food coloring
Instructions
- Preheat your oven to 350 degrees F (175 degrees C) and line two 12-cup muffin pans with paper baking cups.
- In a large bowl, stir together the flour, baking powder, baking soda, and salt until well combined.
- In a separate bowl or measuring cup, whisk together the milk, vegetable oil, and vanilla extract.
- In a large mixing bowl, beat the softened butter and white sugar with an electric mixer for 3 to 4 minutes until the mixture is light, fluffy, and pale.
- Add the eggs one at a time to the butter mixture, beating well after each addition.
- Alternately add the flour mixture and the milk mixture to the butter base, mixing gently until just incorporated.
- Divide the cake batter evenly into four separate small bowls and stir a few drops of red, blue, green, and yellow food coloring into each respective bowl.
- Using different spoons for each color, drop small portions of colored batter into the cupcake liners until they are 1/2 to 3/4 full.
- Bake for 15 to 20 minutes, or until a toothpick inserted into the center comes out clean.
Notes
To achieve the best marble effect without the colors bleeding too much, avoid using a toothpick to swirl the batter in the cups; simply layering the different colors will allow them to naturally meld during the baking process. If you are using liquid food coloring instead of gel, be aware that you may need more drops to reach your desired vibrancy, though this might slightly alter the batter consistency.
- Prep Time: 20 mins
- Cook Time: 20 mins
- Category: Dessert
- Method: Baking
- Cuisine: American
Pantry Staples for Perfect Cakes

Butter and Oil: We use a blend here. The butter provides that nostalgic, creamy flavor, while the vegetable oil ensures the cupcakes stay soft for days.
Cake Flour vs. All-Purpose: This recipe uses all-purpose flour for a sturdy structure that holds the colors well without blending into a muddy mess.
Eggs: Make sure your eggs are at room temperature. This helps them emulsify with the butter and sugar, creating a fluffy batter that rises beautifully.
Milk: Whole milk adds richness. If you have buttermilk on hand, it makes a lovely tangy substitution, but classic milk is what Grandma always used.
Food Coloring: You will need red, blue, green, and yellow to create the distinct layers. Gel pastes work best for vibrant colors without thinning the batter.
How to Make These Colorful Treats
Step 1: Prepare the Oven and Pans
Start by preheating your oven to 350 degrees F (175 degrees C). Line two 12-cup muffin pans with your favorite paper baking cups. I love using vintage floral liners for an extra touch of charm.
Step 2: Mix Dry and Wet Ingredients
In a large bowl, stir together the flour, baking powder, baking soda, and salt. In a separate bowl or measuring cup, whisk the milk, vegetable oil, and vanilla extract until they are evenly blended. Set these aside for a moment.
Step 3: Cream the Butter and Sugar
In a large mixing bowl, beat the softened butter and white sugar with an electric mixer. You want this to get light and fluffy, which usually takes about 3 to 4 minutes. The mixture should look noticeably paler in color.
Step 4: Add Eggs and Combine
Add the eggs one at a time, beating well after each addition to let it fully blend into the butter mixture. Then, pour in the flour mixture alternately with the milk mixture. Mix gently until just incorporated—be careful not to overmix, or the cakes can become tough.
Step 5: Color the Batter
Divide your cake batter evenly into four separate small bowls. Add a few drops of food coloring to each bowl—one red, one blue, one green, and one yellow. Stir gently until the color is uniform.
Step 6: Layer and Bake
Using a different spoon for each color, drop small portions of batter into the cupcake liners. Layer them randomly until the liners are about 1/2 to 3/4 full. Do not stir them once they are in the cup; the oven will do the marbling for you. Bake for 15 to 20 minutes, or until a toothpick comes out clean.
Secrets from the Recipe Box

Room Temperature is Key: I cannot stress this enough—ingredients at room temperature bond better. If you forgot to take your eggs out, sit them in a bowl of warm water for five minutes.
Avoid Overmixing: Once you add the flour, mix with a gentle hand. Overworking the gluten can lead to heavy cupcakes rather than light, fluffy ones. This is especially important when stirring in the food coloring.
The Toothpick Test: Every oven is different. Start checking at 15 minutes. A toothpick inserted into the center should come out with just a few moist crumbs, not wet batter.
For another colorful baking project, you might enjoy trying our lemon rainbow cake, which uses similar techniques for a larger centerpiece.
Make It Your Own
Flavor Twists: While vanilla is classic, a drop of almond extract in the batter adds a lovely, vintage wedding cake flavor. You could also use lemon zest in the yellow batter for a bright citrus note.
Pastel Perfection: For a softer look, use just one small drop of food coloring. This creates beautiful pastel tones perfect for spring gatherings or baby showers.
Chocolate Swirl: Substitute 1/4 cup of flour with cocoa powder in one of the divided bowls for a vanilla-chocolate marble effect.
If you prefer a more traditional flavor profile without the bright colors, our vintage cake recipe offers a timeless buttermilk crumb that pairs with any frosting.
At the Table

These cute cakes are delightful on their own, but they really shine when served on a tiered platter for a birthday party or afternoon tea. I like to dust them lightly with powdered sugar if I’m skipping the heavy frosting, letting the colorful tops peek through.
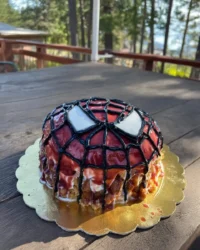
Serve them alongside a cold glass of milk or a warm cup of coffee. If you are planning a themed party, these pair wonderfully with shaped treats like our heart cake, creating a spread that is full of love and whimsy.
A Final Word
Baking these cute cakes is a reminder that the kitchen is a place for play, not just work. Whether you are baking for a crowd or just treating yourself to a colorful afternoon snack, I hope this recipe brings a little brightness to your day.
For the little ones—or the young at heart—who love fun shapes, you might also want to peek at our car cake tutorial.
Happy baking, friends! We’d love to see your colorful creations. Share them with us on Pinterest, Instagram, or Facebook.

