In the world of French *pâtisserie*, we often speak of *trompe-l’œil*—the art of deceiving the eye to create something unexpected. While this comic cake leans towards modern pop art rather than classical realism, the principle remains the same: precise lines and careful structure creating a delightful illusion. It brings the charm of a two-dimensional drawing into the three-dimensional world, requiring a steady hand and an appreciation for architectural assembly.
 10")
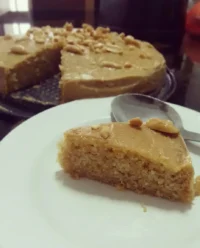
Beneath the playful, cartoon-like exterior lies a serious flavor combination: a savory-sweet peanut butter sponge paired with a silky dark chocolate ganache. This recipe uses a clever cutting technique to transform a standard round cake into a towering, exaggerated wedge, perfect for a whimsical celebration or a challenge to your fondant skills.
A Masterpiece of Illusion
This recipe is a true conversation starter, blending the visual impact of graphic art with the comforting flavors of home baking. You will love the process of constructing the ‘wedge’ shape—it is a lesson in cake architecture that transforms a simple round sponge into a tall, dramatic slice.
The flavor profile is equally refined. By using crunchy peanut butter in the sponge and a 54% dark chocolate for the ganache, we achieve a balance that is rich without being cloying. The result is a cake that looks like a drawing but tastes like an indulgence.
Print 11")
Comic Cake (2D Cake)
- Total Time: 1 hour 25 mins
- Yield: 8 servings
- Diet: Vegetarian
Description
This striking Comic Cake combines the playful aesthetics of pop art with a sophisticated peanut butter and dark chocolate flavor profile. By cleverly stacking and carving a standard sponge, you will create a gravity-defying wedge that looks like a two-dimensional drawing come to life.
Ingredients
- 225g unsalted butter, softened
- 225g caster sugar
- 100g crunchy peanut butter
- 4 large eggs
- 225g self-raising flour, sieved
- 1 tsp baking powder
- 2 tbsp milk
- 1 tsp vanilla extract
- 200g dark chocolate (54%)
- 200ml double cream
- 50g light brown sugar
- Pinch of sea salt
- 1 pasteurized egg white
- 250g royal icing sugar
- Black gel food coloring
- White, pink, yellow, red, and brown fondant
- Cornflour for dusting
- Edible glue
Instructions
- Preheat oven to 190°C (170°C fan/375°F) and grease/line a 20cm cake tin.
- Beat butter, caster sugar, peanut butter, eggs, flour, baking powder, milk, and vanilla until just smooth.
- Spoon mixture into the tin, level the top, and bake for 20–25 minutes until springy; cool completely on a wire rack.
- Make the ganache by pouring a simmered mixture of double cream, brown sugar, butter, and salt over dark chocolate; stir until glossy and let thicken.
- Prepare the black royal icing by mixing egg white, icing sugar, and black gel until pipeable; transfer to a piping bag with a number 3 nozzle.
- Quarter the cooled cake and stack the pieces with ganache layers to form a tall wedge, then trim the sides with a serrated knife for sharp edges.
- Apply a smooth crumb coat of ganache over the entire wedge and chill until firm.
- Roll out white fondant for the straight sides and pink fondant for the top and curved back; trim precisely with a scalpel.
- Add fondant details including a wobbly “drip” edge, colorful filling layers, a white cream swirl, and a red cherry.
- Pipe black royal icing outlines along every edge and detail of the cake to create the signature 2D graphic effect.
Notes
To ensure the sharpest 2D effect, use a ruler when cutting your cake quarters to maintain perfect symmetry. If your black royal icing feels too thick to pipe smoothly, add a few drops of water at a time until it reaches a soft-peak consistency that flows without breaking.
- Prep Time: 1 hour
- Cook Time: 25 mins
- Category: Dessert
- Method: Baking and Sculpting
- Cuisine: Modern
The Palette of Flavors
 12")
To achieve both the structural integrity required for carving and the delicate crumb we desire, precise ingredient selection is essential.
- Unsalted Butter: softened to room temperature. This allows for proper aeration when creamed with the sugar, creating the foundation for a light sponge.
- Crunchy Peanut Butter: I prefer crunchy over smooth for this sponge; it adds small pockets of texture that surprise the palate.
- Dark Chocolate (54%): We use a semi-sweet chocolate for the ganache. It provides a glossy, stable filling that firms up enough to hold the layers together during carving.
- Fondant (White, Pink, Yellow, Red): Quality fondant is crucial here. It must be pliable enough to drape over the sharp angles of the wedge without tearing.
- Royal Icing & Black Gel Coloring: This is your ‘ink.’ A high-quality black gel is necessary to get a true, deep black for the outlines without altering the consistency of the icing.
The Method
Step 1: Preparation and Sponge Base
Preheat your oven to 190°C (170°C fan/375°F). Precision begins with temperature. Grease and base-line a 20cm (8-inch) cake tin. For the sponge, beat the softened butter, caster sugar, crunchy peanut butter, eggs, sieved self-raising flour, baking powder, milk, and vanilla extract in a mixer until smooth. Do not overwork the batter; stop as soon as it is uniform.
Step 2: Baking the Foundation
Spoon the mixture into your prepared tin, leveling it gently with a palette knife to ensure an even rise. Bake for 20–25 minutes. You are looking for a light golden hue and a springy texture when touched. Allow it to cool in the tin for 5 minutes before turning it out onto a wire rack to cool completely. A cold cake is essential for the carving steps ahead.
Step 3: The Ganache Emulsion
While the cake cools, prepare the ganache. Place the dark chocolate in a heatproof bowl. In a saucepan, bring the double cream, light brown sugar, butter, and sea salt to a gentle simmer. Pour this hot mixture over the chocolate and let it sit undisturbed for 2 minutes. Then, stir gently in small circles until glossy and smooth. Allow this to cool until it has thickened to a spreadable consistency.
Step 4: Preparing the ‘Ink’
For the outlines, mix the pasteurized egg white with the royal icing sugar. Add the black gel food coloring gradually until you achieve a deep, jet-black tone. The consistency should be pipeable but hold its shape. Transfer this to a piping bag fitted with a number 3 writing nozzle and set aside.
Step 5: Architectural Assembly
Divide your cooled round sponge into quarters. Stack these quarters on top of one another to form a rough wedge tower. Using a serrated knife, trim the sides to create a sharp, defined cake wedge shape. Sandwich each layer with a generous spoonful of the thickened ganache, using an offset spatula to push it to the edges.
Step 6: The Crumb Coat
Spread the remaining ganache over the sides and top of your wedge. This acts as a foundation for the fondant. Smooth the edges meticulously—sharp edges here will translate to a better 2D effect later. Chill the cake to firm up the ganache.
Step 7: Fondant Covering
On a cornflour-dusted surface, roll the white fondant into a rectangle (approx. 25 x 12cm) and the pink fondant into a rectangle about 5mm thick. Wrap the white fondant around the two straight sides of the wedge, smoothing it with your hands. Place the pink fondant over the curved ‘crust’ edge and the top. Trim the excess carefully with a scalpel.
Step 8: Creating the Cartoon Details
Cut a wobbly line along the pink fondant where it meets the white to simulate a dripping icing effect. Gently score lines around the side of the wedge to mark where the ‘fillings’ would be. Roll pink and yellow fondant into thin sausages and attach them to these scored lines using a little edible glue—these represent the jam and cream layers.
Step 9: The Final Flourishes
Shape the red fondant into a cherry and the remaining white fondant into a whipped cream swirl. Attach the swirl to the top of the cake, followed by the cherry. Use a small piece of brown fondant to create a stem.
Step 10: The Outline (The Artistry)
This is the moment of transformation. Choose a ‘front’ viewing angle. Using your black royal icing, pipe an outline along every visible edge of the cake, including the swirl, cherry, and filling layers. Pipe small circles or accents on the sponge area to mimic the texture of a drawing. The key is confidence—keep your pressure steady for smooth, graphic lines.
Mastering the 2D Effect
 13")
- Temperature Control: Ensure your cake is thoroughly chilled before you begin carving and fondant work. A cold cake is firmer and produces fewer crumbs, resulting in sharper architectural lines.
- The Royal Icing Consistency: If your black icing is too runny, the lines will bleed and lose that crisp ‘comic book’ look. If it is too stiff, the lines will break. Test a line on a piece of parchment paper first.
- Fondant Alternatives: If you find fondant challenging, you might explore techniques for a buttercream comic cake to achieve a similar effect with a different medium.
- Planning the Cut: When cutting your round cake into quarters, use a ruler to ensure they are identical. This symmetry makes stacking and carving the final wedge much easier.
- More Inspiration: If you enjoy creating show-stopping centerpieces like this, do explore our collection of celebration cakes for more architectural challenges.
Creative Interpretations
- Classic Vanilla: You may substitute the peanut butter in the sponge for an equal weight of butter and add the seeds of one vanilla pod for a classic Victoria sponge profile.
- Berry Filling: Instead of just fondant ‘jam,’ you could spread a thin layer of high-quality raspberry preserve between the ganache layers for a fruity tartness.
- Vintage Aesthetic: For a softer look, use pastel colors and brown outlines instead of black. This mimics the style of old storybook illustrations, similar to the charm found in our vintage cake recipes.
- Citrus Zest: Add the zest of an orange to the chocolate ganache. Orange and chocolate is a classic French pairing that works beautifully with the peanut butter sponge.
Plating the Illusion
 14")
To maximize the *trompe-l’œil* effect, serve this cake on a pristine white plate. This enhances the contrast of the black outlines, making the slice pop as if it were hovering in space.
For a playful dessert table, pair this architectural slice with other shaped treats. It contrasts beautifully with the soft curves of a heart cake, creating a display that feels like an art gallery of sweets. Serve with a simple glass of cold milk or a robust espresso to cut through the richness of the peanut butter and chocolate.
The Final Stroke
Creating a comic cake is less about baking and more about artistic construction. It challenges you to look at lines and perspective differently. Once you master the technique of outlining and defining shapes with icing, you can apply it to endless designs.
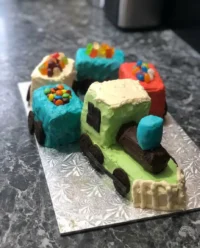
If you enjoyed the structural aspect of this project, you might find your next challenge in our sculpted car cake. Remember, in pastry as in art, patience and a steady hand are your best tools.
Connect with us and share your creations:

