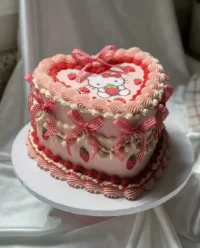
I remember finding a tattered photo in my mother’s worn recipe box of a cake she made for a valentine’s lunch in 1954. It was shaped like a heart, draped in delicate ruffles, and looked like it belonged in a Victorian parlor. This Coquette Cake brings that same gentle, feminine charm back to the table with its soft pink hues and classic piping.

While it looks intricate, this style of baking is all about patience and a steady hand with a piping bag. It is a celebration of “just enough” beauty, turning simple ingredients into a centerpiece that feels like a shared secret between friends. Let us walk through the process of creating something truly timeless for your next small gathering.
The Timeless Charm of the Coquette Style
There is something deeply comforting about a cake that wears its heart on its sleeve. This coquette style, often called a Lambeth or vintage heart cake, honors the old way of decorating where every flourish had a purpose. You will love this recipe because it transforms a standard cake into a piece of art that feels cherished and personal.
In a world of fast trends, the coquette aesthetic feels like a return to the intimacy of small-batch baking. It is not just about the sugar and the flour; it is about the quiet moments spent at the kitchen counter, smoothing out the buttercream and choosing the perfect shade of pink. This cake is the heartbeat of any celebration, from a quiet birthday to a Sunday tea.
Furthermore, the flavor is exactly what a cake should be—simple, reliable, and sweet. By using a classic vanilla base, we let the craftsmanship of the piping stand out. It is a recipe that asks you to slow down, breathe in the scent of butter and sugar, and create something that your family will remember for years to come.
Print
Coquette Cake
- Total Time: 1 hour 45 mins
- Yield: 12 servings
- Diet: Vegetarian
Description
This elegant heart-shaped cake captures the timeless charm of the 1950s with its delicate ruffles and intricate vintage piping. Perfect for a romantic celebration or a Victorian-inspired tea, it transforms simple vanilla layers into a stunning, hand-crafted centerpiece.
Ingredients
- 2 8-inch round vanilla cake layers, cooled
- 9 cups vanilla buttercream (approximately 3 batches)
- Deep pink food color gel
- Fuchsia food color gel
Instructions
- Carve the two 8-inch round cake layers into matching heart shapes using a serrated knife and a cardboard template for precision.
- Stack the heart layers with a generous filling of buttercream, apply a thin crumb coat to the exterior, and chill in the refrigerator for 30 minutes.
- Apply a thick layer of pink buttercream to the chilled cake, using a turntable and icing smoother to create a flat, even surface.
- Using piping tip 102 and fuchsia frosting, create delicate ruffles along the top and bottom edges using a rhythmic U-shaped motion.
- Add a shell border at the base using tip 4B, then accent with stars or swirls using tip 32 to create layered texture.
- Using tip 3 and your darkest pink icing, carefully write a name or sweet sentiment in the center of the heart.
Notes
To ensure your ruffles stay crisp and well-defined, keep your hands cool while piping; if the buttercream starts to soften from hand warmth, briefly chill the piping bag in the refrigerator. Using a cardboard template during the initial carving phase is the secret to achieving a perfectly symmetrical heart shape before you begin decorating.
- Prep Time: 45 mins
- Cook Time: 1 hour
- Category: Dessert
- Method: Decorating
- Cuisine: American
Everything Needed for a Vintage Masterpiece

To begin this journey, we must look to our pantry staples. These ingredients are the building blocks of a memory. I always say that a cake is only as good as the care you put into selecting your materials. For this heart-shaped beauty, we focus on structure and stability so the ruffles hold their shape through the afternoon.
- Two 8-inch round cake layers: These should be cooled completely. A cold cake is a baker’s best friend because it won’t crumble when you begin to shape the heart.
- Vanilla Buttercream: You will need about nine cups (three batches) of a sturdy frosting. I prefer a classic American buttercream for this because it crusts slightly, holding those vintage ruffles perfectly.
- Food Color Gels: I use deep pink and fuchsia to create a gradient of color. These gels provide a rich tint without thinning out your frosting.
- The Baker’s Tools: A serrated knife for carving, a cake turntable for smooth movements, and an angled spatula for spreading the love across the layers.
- Piping Tips: We will use Wilton Tips 4B for the larger borders, 32 for the star textures, and 102 for the delicate ruffles. For the writing, a small Tip 3 is just right.
How to Craft Your Coquette Heart
Step 1: Carving the Heart Shape
Place your two 8-inch round cake layers on a clean surface. Using a serrated knife, cut a small ‘V’ shape from the top of the circles and taper the bottoms to a point. It is helpful to use a cardboard template to make certain both layers match. This part of the process reminds me of how Grandma used to mend old quilts—steady, purposeful, and careful.
Step 2: Setting the Foundation
Place your first layer on the cake drum and add a generous layer of buttercream. Top it with the second layer. Now, apply a thin crumb coat over the entire heart. This ‘dirty icing’ layer traps any stray crumbs so they do not ruin your final finish. Let this chill in the icebox for at least thirty minutes.
Step 3: Smoothing the Base
Apply a thick layer of pink buttercream over the chilled cake. Using your icing smoother and the turntable, rotate the cake slowly to create a flat, even surface. Don’t worry if it isn’t perfect; the ruffles will cover many of the edges. It’s like putting a fresh tablecloth over a well-loved wooden table.
Step 4: Piping the Vintage Ruffles
This is where the magic happens. Load your piping bag with Tip 102 and the fuchsia frosting. Hold the bag at a 45-degree angle and move your hand in a small ‘U’ motion to create ruffles along the bottom and top edges. If you need a visual guide, this vintage heart cake tutorial offers wonderful insight into the motion.
Step 5: Adding the Decorative Borders
Switch to Tip 4B and add a shell border along the base. Then, use Tip 32 to add smaller stars or swirls between the ruffles. This layering of textures is what gives the cake its heritage character. It should look like the lace on a vintage apron—intricate, soft, and inviting.
Step 6: The Final Script
With Tip 3 and your darkest pink icing, carefully write a name or a sweet word like ‘Love’ or ‘Cherish’ in the center of the heart. Keep your pressure steady and your heart light. Once finished, let the cake sit for a moment so the frosting can set before moving it to its final resting place.
Secrets from the Recipe Box

One of the most important things I learned from the old ways of baking is that temperature is everything. If your hands are warm, the buttercream will soften and the ruffles will lose their crisp edges. I often keep a bowl of ice water nearby to cool my hands before I pick up the piping bag. It makes a world of difference when you want that professional, nostalgic finish.
Another trick is to practice your ruffles on a piece of parchment paper before touching the cake. This allows you to get the rhythm of the ‘U’ motion down. If you enjoy this style of decorating, you might also like to see how we apply similar techniques to a larger vintage cake for bigger celebrations. Always remember to keep your piping tips clean by wiping them with a damp cloth every few minutes to prevent clumping.
Classic Flavor Twists
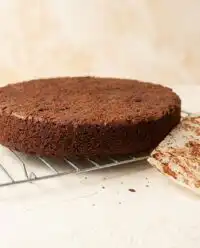
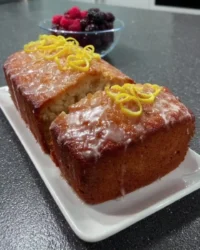
While vanilla is the traditional choice for a coquette design, you can easily change the flavor to suit your mood. A lemon-scented sponge with raspberry filling is a wonderful way to add a bit of sunshine to the plate. If you prefer something more decadent, a rich chocolate cake with pink peppermint frosting offers a lovely contrast between the dark cake and the light ruffles.
For a truly special occasion, you might consider a fruit-forward approach. Our strawberry tres leches cake is a family favorite, and while the assembly is different, the flavor profile of fresh berries and cream matches the coquette aesthetic perfectly. You can also swap the pink gels for a soft lavender or a sage green to create a garden-themed heart that feels just as timeless.
At the Table

Serving this cake is as much an event as baking it. I love to place it on a pedestal stand covered with a lace doily to emphasize that heritage feel. When it is time to cut the first slice, use a sharp knife dipped in hot water and wiped dry; this creates a clean edge that preserves the beauty of your piping. It is the little details that make the moment feel cherished.
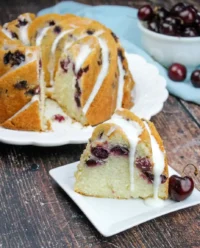
This cake pairs wonderfully with a pot of Earl Grey tea or a cold glass of milk. If you are looking for more fruit-heavy pairings, consider serving it alongside a slice of our raspberry white chocolate cake for a variety of textures. The soft ruffles and the tart berries create a balanced dessert table that guests will talk about long after the last crumb is gone.
A Final Word
Baking a Coquette Cake is a beautiful way to bring a touch of the past into your modern kitchen. It reminds us that beauty doesn’t have to be complicated—it just requires a bit of time and a whole lot of love. Whether you are making this for a special someone or just to brighten a quiet afternoon, I hope it brings as much joy to your home as it has to mine over the years. This heart cake is a testament to the fact that some traditions never go out of style.
I would love to see your creations! Please share your baking journey with me and our community of home bakers. You can find us and more vintage inspiration on Pinterest, Instagram, and Facebook. Happy baking, and may your kitchen always be filled with the scent of something sweet.

