In the quiet mornings of my training in Paris, I learned that the most profound expressions of pastry are often the most contained. This recipe for Jar Cake 2 represents that philosophy of precision, turning a classic vanilla sponge into a portable masterpiece of texture and light. There is a specific grace in a dessert that reveals its layers through glass, offering a glimpse into the careful work of the baker before the first bite is even taken.

Making a Jar Cake 2 allows for a level of moisture retention that a standard slice simply cannot match. By sealing the tender crumb and silky frosting within a glass vessel, we preserve the delicate integrity of the cake. This small-batch approach invites us to focus on the quality of our aeration and the smoothness of our emulsion, resulting in a dessert that is as technically sound as it is visually stunning.
The Art of the Individual Portion
There is something inherently sophisticated about a dessert served in its own vessel. This Jar Cake 2 avoids the common pitfalls of larger cakes, such as dry edges or uneven frosting distribution. Because the cake is protected by the glass, every spoonful remains as fresh as the moment it was assembled.
Technique enthusiasts will appreciate the structural balance of this recipe. We use a specific combination of butter for flavor and oil for a lingering softness on the palate. The inclusion of cornstarch weakens the protein structure of the all-purpose flour just enough to mimic the delicate nature of French pastry flour. This results in a crumb that is tight enough to hold its shape when cut into circles, yet tender enough to melt away.
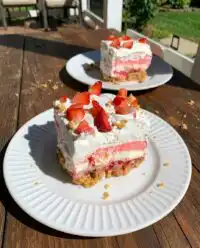
Finally, the aesthetic appeal of the layered presentation is unmatched. Whether you choose a precise circular cut or a more rustic crumbled assembly, the contrast between the white cake, the colorful sprinkles, and the glossy frosting creates a professional finish. It is a testament to the idea that when we bake in small batches, we can devote our full attention to every singular detail.
Print
Jar Cake 2
- Total Time: 1 hour 15 mins
- Yield: 6 servings
- Diet: Vegetarian
Description
This refined vanilla sponge cake is layered with silky buttercream and colorful sprinkles in individual glass jars, ensuring every bite remains moist and perfectly portioned. A sophisticated take on a classic confetti cake, it balances professional pastry techniques with a playful presentation.
Ingredients
- Unsalted butter, room temperature
- Canola oil
- Egg whites
- All-purpose flour
- Cornstarch
- Baking powder
- Salt
- Granulated sugar
- Whole milk, room temperature
- Vanilla extract
- Rainbow sprinkles
- Powdered sugar
- Heavy cream
Instructions
- Preheat oven to 350℉ (175℃) and grease a 9×13 inch jelly roll pan with butter, line with parchment, and grease/flour the parchment.
- In a medium bowl, whisk together the flour, cornstarch, baking powder, and salt until aerated and well combined.
- Using a stand mixer with a paddle attachment, cream the butter and granulated sugar for 3 to 4 minutes until pale and fluffy.
- Incorporate the egg whites one at a time, beating thoroughly after each addition, then stream in the oil and vanilla extract.
- Turn the mixer to low and add dry ingredients in three parts alternating with the milk in two parts, starting and ending with the flour.
- Gently fold in the rainbow sprinkles with a silicone spatula and spread the batter evenly into the prepared pan.
- Bake for 8 to 12 minutes until the cake springs back to the touch, then allow it to cool completely in the pan.
- Whip the frosting butter for 4 minutes, add powdered sugar and vanilla, and adjust with heavy cream until light and supple.
- Use a circular cookie cutter to cut discs from the cake and layer them into jars with piped rings of frosting between each layer.
Notes
To achieve a truly professional finish, measure the internal diameter of your jars at different points as they often taper; using different sized cutters ensures a snug fit for every layer. Always tap the jar gently on a folded towel after adding each cake disc to settle the layers and remove any unsightly air pockets against the glass.
- Prep Time: 30 mins
- Cook Time: 10 mins
- Category: Dessert
- Method: Baking
- Cuisine: French-inspired
The Foundation of a Perfect Crumb

Success in the patisserie begins with the quality and temperature of your ingredients. For this Jar Cake 2, every component must be handled with a sense of purpose to achieve the desired lightness.
- Unsalted Butter and Canola Oil: We use a dual-fat system. The butter provides the classic, rich flavor and the structural aeration during the creaming stage, while the oil ensures the cake remains moist even when refrigerated.
- Egg Whites: By using only the whites, we maintain a pristine, pale color and a lighter texture. The whites provide structure without the weight or the yellow hue of the yolks.
- Cornstarch: This is our secret for a refined crumb. It softens the flour’s gluten, creating a texture that is silky rather than bready.
- Whole Milk: This provides the necessary hydration and a touch of natural sweetness. It must be at room temperature to prevent the butter from seizing during the mixing process.
- Rainbow Sprinkles: These add a playful visual element. In a French kitchen, we call these ‘confetti,’ and they should be folded in at the very last moment to prevent the colors from bleeding into the batter.
- Powdered Sugar: For the frosting, a high-quality, finely sifted sugar is essential for a mouthfeel that is smooth and free of grit.
The Method of Refined Assembly
Step 1: Preparing the Canvas
Begin by preheating your oven to 350℉ (175℃). The preparation of the pan is a critical step for a Jar Cake 2. Grease a 9×13 inch jelly roll pan with butter, line it with parchment paper, and then grease the parchment itself before a light dusting of flour. This triple-layer protection makes certain that the thin cake releases perfectly without tearing, which is vital for clean circular cuts later.
Step 2: The Aeration of Dry Ingredients
In a medium bowl, whisk together the flour, cornstarch, baking powder, and salt. Sifting these together is recommended to remove any clumps and to begin the process of aeration. The cornstarch must be evenly distributed to work its magic on the gluten structure.
Step 3: The Creaming Stage
Using your stand mixer with the paddle attachment, cream the butter and granulated sugar for a full 3 to 4 minutes. You are looking for a transformation; the mixture should become pale, almost white, and noticeably fluffy. This process creates millions of tiny air pockets that will expand in the oven.
Step 4: Emulsifying the Liquids
Add the egg whites one at a time. It is important to beat the mixture thoroughly after each addition to maintain the emulsion. Once the whites are incorporated, stream in the oil and the vanilla. The batter may look very glossy at this stage, which is a sign of a stable emulsion.
Step 5: The Delicate Incorporation
Turn your mixer to the lowest setting. Add the dry ingredients in three parts, alternating with the milk in two parts. Start and end with the flour. Mix only until the last white streaks of flour vanish. Overmixing at this stage will develop the gluten and result in a tough cake, which we must avoid for a refined Jar Cake 2.
Step 6: Folding and Baking
Use a silicone spatula to gently fold in the sprinkles with a light hand. Pour the batter into your prepared pan, smoothing the top with an offset spatula for an even thickness. Bake for 8 to 12 minutes. The cake is done when it springs back lightly to the touch and a tester comes out clean. Let it cool completely in the pan; a warm cake will crumble when cut.
Step 7: Crafting the Frosting
Whip the butter for the frosting for 3 to 4 minutes until it is incredibly creamy. Add the powdered sugar and vanilla on low speed. Once the sugar is incorporated, increase the speed and whip for another 3 minutes. The goal is a texture like a cloud. Adjust the consistency with a tablespoon of cream until it is supple enough to pipe but firm enough to hold its shape.
Step 8: Precise Assembly
Use a circular cookie cutter that matches the diameter of your jars. For the most professional look, measure the jar at different heights, as many jars taper toward the base. Place a cake disc at the bottom, pipe a ring of frosting starting from the outside edge to keep the glass walls clean, and repeat the layers until you reach the top.
Pastry Wisdom for Pristine Results

To achieve the cleanest look in your Jar Cake 2, temperature control is your greatest ally. Ensure your butter and milk are truly at room temperature (about 68℉ or 20℃) before you begin. If the ingredients are too cold, the fats will clump, and the batter will lose the air you worked so hard to incorporate. For those looking to master other small-form desserts, understanding the physics of a stable emulsion is just as important as it is when crafting cake-balls.
When layering, if you find that frosting is smearing on the sides of the glass, use a long-handled spoon or a piping bag with a long tip. Keeping the upper walls of the jar clean is the difference between a professional pastry and a home experiment. You can also refer to this guide on cake in a jar technique for additional tips on high-volume assembly. Finally, always tap the jar gently on the counter after adding a cake layer to remove any large air gaps between the cake and the glass.
Refined Twists on a Classic Base
While the vanilla and sprinkle combination is a timeless classic, the Jar Cake 2 format invites many sophisticated variations. You might consider a ‘Zeste d’Agrumes’ version by adding the finely grated zest of two lemons and a tablespoon of poppy seeds to the batter. This provides a bright, acidic lift that cuts through the sweetness of the buttercream.
For a deeper flavor profile, you can replace the vanilla extract with a high-quality almond extract or even a splash of orange blossom water. If you find yourself craving a different format of concentrated flavor, you might enjoy our chocolate-mug-cake which offers a similar sense of individual indulgence but with a much faster preparation time. Another elegant option is to soak the cake layers in a light simple syrup infused with lavender or Earl Grey tea before adding the frosting.
The Final Touch of Presentation

Presentation is the final step in the art of the patisserie. When serving your Jar Cake 2, I recommend placing the jar on a small, polished porcelain saucer. Accompany the dessert with a long-handled silver spoon, which allows the guest to reach the bottom layers with ease. For a festive gathering, you might tie a silk ribbon around the neck of the jar in a color that complements the sprinkles within.
These jars are the perfect accompaniment to a mid-afternoon tea service or a post-dinner digestif. If you are looking for other creative ways to serve individual portions, our push-pop-cakes offer a similarly playful yet refined experience. Always serve the jar at room temperature to allow the butter in the frosting to soften to its most luxurious consistency.
The Art of Small-Batch Mastery
Mastering the Jar Cake 2 is a journey into the importance of precision and the beauty of the miniature. By focusing on the foundational techniques of creaming and emulsifying, you create a dessert that transcends its humble vessel. I hope this recipe brings a touch of French elegance to your kitchen and reminds you that the greatest joys are often found in the smallest details. To continue your journey into the world of delicate, small-scale desserts, I invite you to see our modern-mini collection for further inspiration.
I would be delighted to see your creations and the unique ways you choose to layer your jars. Please share your progress with our community of dedicated bakers on Instagram, Pinterest, or Facebook. Happy baking, and may your crumb always be tender.

