In the quiet mornings at the patisserie in Lyon, I spent hours watching the head florist across the street arrange spring blooms. There is a specific grace in a tulip—the way its petals protect its heart while leaning toward the light. Translating that organic movement into buttercream requires a gentle hand and an appreciation for the subtle shifts in color that nature provides.

This small-batch cake is a study in texture and patience, designed for those who find joy in the quiet rhythm of the piping bag. By focusing on a single, refined technique with the curved petal tip, we can transform a simple six-inch layer into a blooming masterpiece that celebrates the transition of the seasons.
The Art of the Buttercream Bloom
There is a profound satisfaction in mastering the curved petal. Unlike standard roses which require a rigid structure, the tulip is about fluidity and enclosure. This recipe matters because it moves away from the oversized, heavy decorations of commercial baking and returns to the delicate precision of fine pastry work. You will find that the smaller six-inch scale allows for a more intimate level of detail, making every petal feel intentional and unique.
We focus here on a sophisticated palette—ivory, moss green, and deep burgundy—avoiding the garish colors often found in celebratory cakes. This selection reflects a more mature aesthetic, reminiscent of vintage botanical illustrations. The technique of using a flower nail with a template provides a professional foundation, allowing you even spacing that mimics the perfect symmetry found in a Dutch garden. It is a meditative process that rewards the baker who is willing to slow down and observe the small nuances of their work.
Finally, the addition of pearl dust and sugar pearls adds a layer of depth that catches the light. This is not just about sweetness; it is about creating a visual experience that feels both luxurious and handcrafted. When you present this cake, you are sharing a piece of art that required your full attention and care, which is the highest form of hospitality a baker can offer.
Print
Tulip Cake
- Total Time: 1 hour 35 mins
- Yield: 1 six-inch cake
- Diet: Vegetarian
Description
This elegant small-batch project combines delicate buttercream piping with a sophisticated botanical palette to create a stunning floral masterpiece. Perfect for spring celebrations, the technique focuses on using a curved petal tip to transform a simple six-inch layer cake into a realistic, blooming tulip garden.
Ingredients
- 1 six-inch round vanilla cake
- White decorator icing
- Ivory icing color
- Burgundy icing color
- Moss Green icing color
- Black icing color
- Lilac purple pearl dust
- Sugar pearls
- Pink and white pearlized jimmies
Instructions
- Divide the decorator icing into five portions and tint them using the ivory, moss green, burgundy, and black colors to create a muted, organic floral palette.
- Prepare piping bags with couplers and Tip 123, filling them with the various floral shades and a dedicated bag for pure ivory.
- On a flower nail with a parchment square, use Tip 12 and Tip 3 to build a small central stamen and mound to serve as the tulip’s heart.
- Hold the Tip 123 at a 45-degree angle and pipe two layers of overlapping curved petals around the center mound, rotating the nail as you go.
- Place the piped flowers in the freezer for at least 20 minutes to firm up for handling.
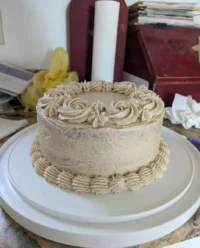
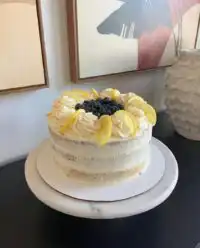
- Ice the six-inch cake with a textured ivory base, then carefully arrange the chilled tulips on top, finishing with Moss Green leaves using Tip 352 and a scattering of sugar pearls.
Notes
To achieve the most realistic floral effects, try mixing two colors of icing side-by-side in the piping bag; this creates a natural variegated look as the colors blend at the tip. Keeping your hands cool and working in small batches ensures the buttercream maintains the sharp definition required for the delicate tulip petals.
- Prep Time: 45 mins
- Cook Time: 30 mins
- Category: Dessert
- Method: Piping
- Cuisine: French
The Foundation of Fine Decorating

To achieve the sharp edges and delicate ruffles of a tulip petal, the quality and consistency of your icing are paramount. We begin with a high-quality white decorator icing that provides a stable canvas for our color work. The icing must be stiff enough to hold its shape against the warmth of your hands but supple enough to flow smoothly through the petal tip. Using premium colors like Moss Green and Burgundy allows us to create shades that feel organic rather than synthetic.
- White Decorator Icing: The structural backbone of our flowers. It must be whipped until smooth but not over-aerated, as air bubbles will cause the petals to break.
- Icing Colors (Ivory, Black, Burgundy, Moss Green): These are used to create our sophisticated palette. A touch of black added to burgundy creates a moody, realistic depth in the purple tones.
- Lilac Purple Pearl Dust: This fine shimmer provides a professional finish, giving the sugar pearls a translucent, iridescent quality.
- Pink and White Pearlized Jimmies: These offer a textural contrast to the soft buttercream, acting like tiny jewels scattered among the greenery.
- Moss Green Tones: By combining Ivory with Moss Green, we achieve a dusty, natural leaf color that avoids the neon look of standard food coloring.
Working in small batches, specifically with three cups of batter for our cake layer, means we can monitor the crumb and moisture levels with much higher precision. A small cake demands the best ingredients—use the finest butter and real vanilla extract for your base, as the flavor must be as refined as the decoration.
The Method of the Master Florist
Step 1: Mixing the Painterly Palette
Begin by portioning your icing into five small mixing bowls. Precision in color mixing is what separates a student from a master. In four bowls, place half a cup of icing each; in the fifth, place a quarter cup. To create the moss green, blend the Ivory and Moss Green colors into the small portion until you reach a muted, earthy tone. For the floral shades, use varying amounts of Burgundy and a tiny speck of Black to create light burgundy, deep purple, and a softer lilac purple. Keep one bowl of pure ivory for the classic blooms. Cover these bowls with a damp cloth to prevent a crust from forming while you work.
Step 2: Preparing the Piping Vessels
Fit one bag with a coupler and another directly with Tip 123. Fill both with your ivory icing. The Tip 123 is a large petal tip with a slight curve, which is essential for the tulip’s shape. Prepare another bag with a coupler and a blend of your burgundy and purple shades; this multi-colored bag will create the variegated centers of your flowers. Having several bags ready with Tip 123 allows you to switch between colors without cleaning tips in between, maintaining a steady workflow.
Step 3: Constructing the Inner Heart
Place a flower template on your nail and secure a parchment square with a dot of icing. Using Tip 12, pipe a small mound of icing in the center, about half an inch high. This is the ‘heart’ of your tulip. Switch to Tip 3 and pipe a single pull-out dot in the very center, extending it slightly higher than the mound. Surround this central stamen with six shorter dots. This internal structure is vital for supporting the heavy outer petals we are about to create.
Step 4: Piping the Curved Petals
Hold your bag at a 45-degree angle with the wide end of Tip 123 touching the base of the mound. Position the tip at the 3 o’clock mark on your template. As you squeeze, rotate the nail with your other hand, moving the bag slightly up and then back down in a rhythmic arc. You want the petal to curve over the center stamen. Repeat this three times, skipping every other line on the template, to create the first layer. For the second layer, start the petals where the first ones overlap, filling in the gaps to create a full, rounded bloom.
Step 5: Chilling for Stability
Once you have piped 12 to 15 flowers, place the entire cake circle or tray into the freezer. Buttercream is sensitive to the warmth of the room and your touch. Freezing the flowers for at least twenty minutes makes them firm enough to handle with a spatula or your fingers without losing the delicate ruffles. If you notice any jagged edges on your petals before freezing, use a finger dipped in a little cornstarch to gently pat them into a smooth, refined finish.
Step 6: Final Assembly and Greenery
Ice your cooled six-inch cake with a pale ivory base. Use a spatula to create diagonal, textured marks on the sides for a rustic yet intentional look. Carefully lift your chilled tulips and arrange them on the top. I find that creating small mounds of icing on the cake surface first allows you to place the flowers at different heights and angles, mimicking a natural cluster. Finish by piping Moss Green leaves with Tip 352, tucking them between the blooms, and scattering your pearl-dusted sugar pearls around the edges for a touch of light.
Pastry Wisdom for Perfect Petals

The temperature of your hands is your greatest challenge when working with delicate petal tips. If you find the icing is becoming too soft or the petals are losing their sharp definition, stop immediately and place your piping bag in the refrigerator for five minutes. A cool bag produces a crisp, professional edge that looks like real velvet. I also recommend practicing your rotation on the flower nail without icing first; the motion should be a continuous, fluid dance between your left and right hands. To ensure your base is as sturdy as your decorations, refer to our vanilla cake recipe for a crumb that supports the weight of buttercream blooms without sagging.
Refined Twists on the Tulip
While the classic ivory and burgundy palette is timeless, you can explore several variations that respect the integrity of the design. A monochromatic white-on-white cake, using only ivory icing with different textures, creates an ethereal look perfect for a sophisticated wedding tea. You might also consider an ombre effect, where the base of each petal starts dark and fades to a light lilac at the tips by striping your piping bag with two shades of purple. If you are looking for a different aesthetic entirely, our ribbon cake technique provides a beautiful way to practice similar piping pressure with a more linear result.
Presentation and the Final Touch

When serving a cake of this detail, simplicity in presentation is essential to let your craftsmanship shine. Place the cake on a simple white ceramic stand or a vintage silver pedestal. Because the six-inch size is so intimate, it is best served with a delicate silver cake server. I recommend pairing this with a light Earl Grey tea or a glass of chilled Prosecco, as the acidity cuts through the richness of the decorator icing. This design is a highlight among our collection of celebration cakes, as it brings a sense of occasion to even the smallest gathering.
The Art of the Small Batch
Mastering the tulip cake is a journey toward precision and grace. By focusing on a smaller scale, you have the freedom to perfect every petal and color choice without the pressure of a large-scale project. This process reminds us that the most beautiful things often require the most patience. As you continue to refine your piping skills, remember that every flower you create is a reflection of your dedication to the craft. For more inspiration on classic designs, you might enjoy our guide to the vintage cake aesthetic. For additional technical tutorials on floral piping, visit Wilton.
Please share your floral creations with us on Instagram and Pinterest. We look forward to seeing your progress.
