I remember finding a tattered recipe card tucked inside a vintage dollhouse my mother kept in the attic. It was written in a faint, elegant script, detailing a cake so light and airy it seemed made for a tea party with porcelain friends. That old memory flickered back to life when my granddaughter asked for a kitty-themed birthday celebration this year. This recipe captures that same timeless magic, blending a soft vanilla crumb with the playful spirit of a modern favorite.

This cake is more than just a sweet treat; it is a canvas for childhood imagination. With its tender texture and creamy buttermilk frosting, it honors the tradition of scratch baking while delighting the smallest fans of the show. Whether you are baking for a big celebration or just a quiet afternoon of play, this cake brings a sense of wonder to the kitchen. It is simple enough for any home baker to master, yet special enough to be remembered for years to come.
The Heart of the Dollhouse
There is a special kind of joy that comes from baking something that feels truly homemade. This cake relies on the classic combination of butter for flavor and oil for moisture, a trick many grandmothers used to ensure a soft slice every time. The addition of a small amount of almond flour provides a subtle depth and a tender crumb that melts in your mouth. It is the kind of recipe that feels familiar, like a warm hug from a loved one after a long day.
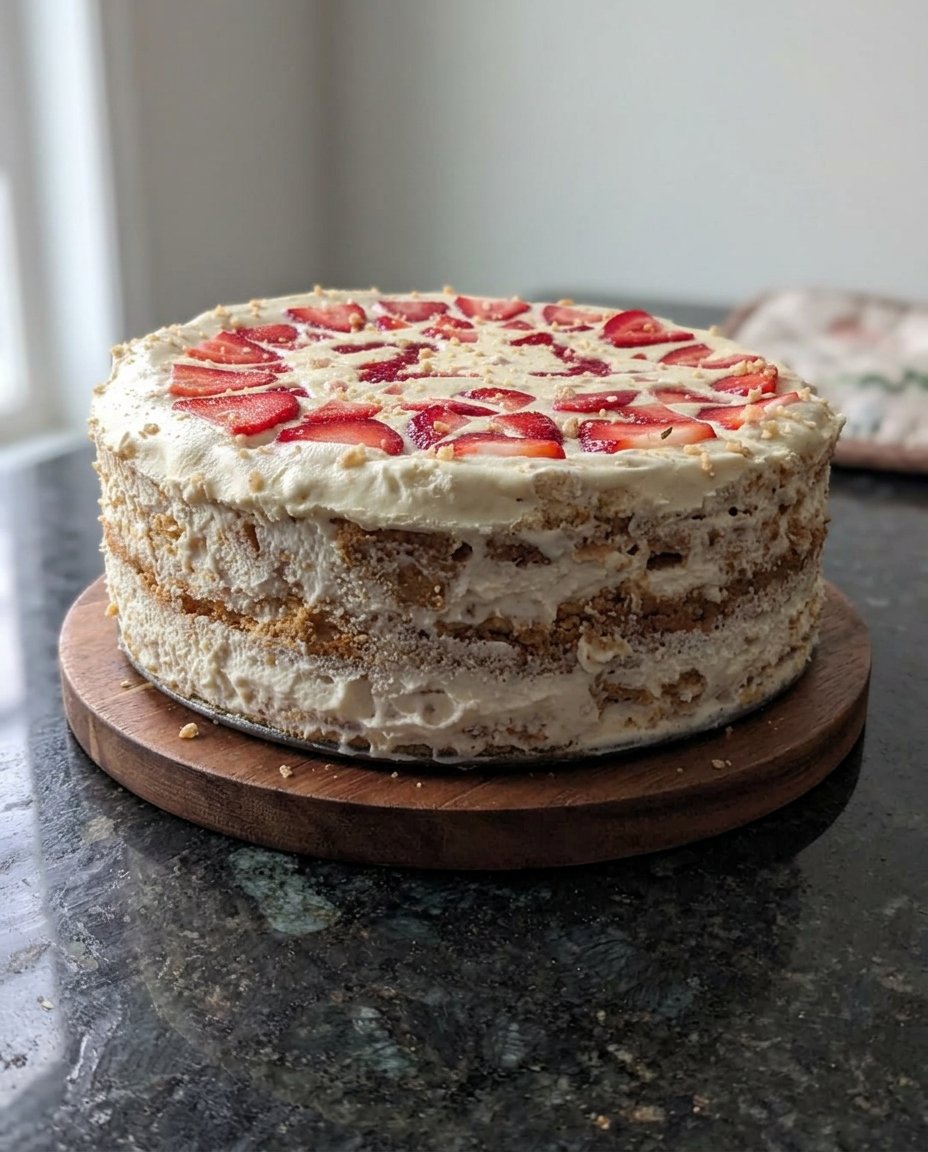
What makes this cake stand out is its incredible versatility and reliability. It holds its shape beautifully for decorating, which is essential when you are trying to recreate the colorful world of a dollhouse. The buttermilk provides a gentle tang that balances the sweetness of the sugar, creating a sophisticated flavor profile that adults will enjoy just as much as the children. Every bite is a reminder of why we take the time to bake from scratch—to share something genuine and crafted with care.
Print
Gabbys Dollhouse Cake
- Total Time: 1 hour 20 mins
- Yield: 12 servings
- Diet: Vegetarian
Description
A tender vanilla cake with a touch of almond flour and a creamy buttermilk frosting, perfect for themed celebrations or a nostalgic afternoon tea. This scratch-made recipe ensures a moist crumb and a light, cloud-like finish that delights both children and adults.
Ingredients
- All-purpose flour
- Almond flour
- Baking soda
- Baking powder
- Salt
- Unsalted butter, softened
- Vegetable oil
- Granulated sugar
- Whole milk
- White vinegar
- Eggs, room temperature
- Pure vanilla extract
- Confectioners’ sugar
- Milk
Instructions
- Whisk room temperature milk and white vinegar together and let sit for at least five minutes until slightly curdled.
- Preheat oven to 350F (175C) and prepare two 8-inch round cake pans with butter, flour, and parchment paper.
- In a medium bowl, whisk together all-purpose flour, almond flour, baking soda, baking powder, and salt.
- Cream the softened butter, vegetable oil, and granulated sugar in a stand mixer for 3 minutes until light and fluffy.
- Add eggs one at a time, mixing well after each addition to maintain the batter structure.
- Stir in the vanilla extract and 1/2 cup of the prepared buttermilk until just combined.
- On low speed, alternately add the dry ingredients and the remaining buttermilk, starting and ending with the flour mixture.
- Divide the batter evenly between the two pans, using a scale for accuracy (about 630g each).
- Bake for 35 minutes until the tops are golden and a toothpick comes out clean.
- Cool in pans for 15 minutes before transferring to a wire rack to cool completely.
- Whip confectioners’ sugar, butter, vanilla, and milk for 10 minutes until the frosting is white and stable.
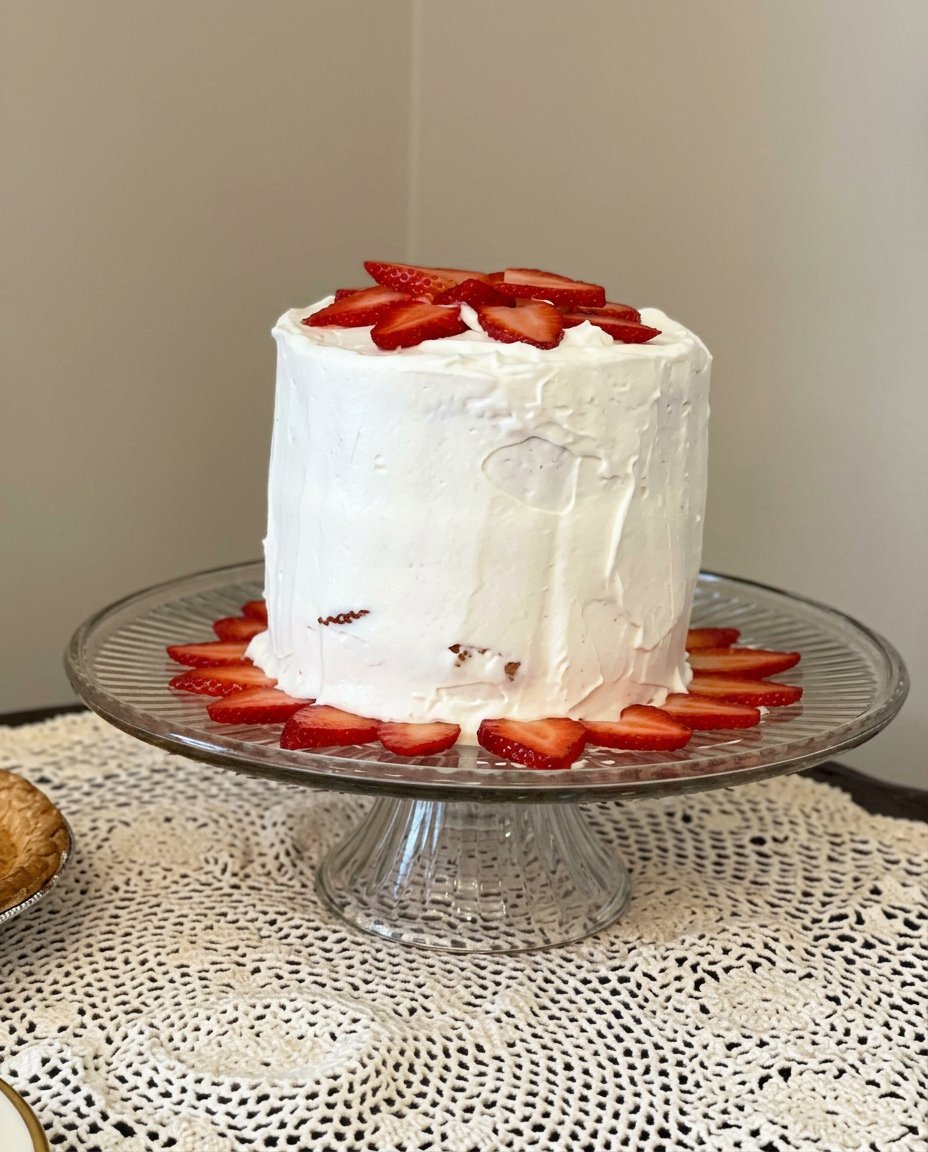
- Assemble the layers with frosting, apply a crumb coat, chill for 20 minutes, then apply the final layer of frosting and decorations.
Notes
To achieve the lightest possible crumb, avoid over-mixing the batter once the flour is added. Additionally, whipping the frosting for the full ten minutes is crucial for that signature stable, cloud-like texture suitable for detailed decorating.
- Prep Time: 25 mins
- Cook Time: 35 mins
- Category: Dessert
- Method: Baking
- Cuisine: American
Staples from the Pantry

Every great cake begins with humble ingredients found in a well-stocked kitchen. We start with all-purpose flour for structure, but the real secret lies in the tiny addition of almond flour. This keeps the cake moist and adds a professional touch to the final texture. You will also need both baking soda and baking powder to give the layers the perfect lift they need to stay fluffy and light as air.
- Unsalted Butter and Vegetable Oil: We use both to get the best of both worlds—rich, buttery flavor and a long-lasting, soft texture.
- Homemade Buttermilk: By mixing whole milk with a splash of white vinegar, we create a traditional buttermilk that reacts with the leavening agents for a beautiful rise.
- Granulated Sugar: This provides sweetness and helps create that light, fluffy texture during the creaming process.
- Farm-Fresh Eggs: These should be at room temperature to incorporate smoothly into the batter without curdling.
- Pure Vanilla Extract: A generous tablespoon ensures the floral, comforting scent of vanilla wafts through the entire house as it bakes.
The Baking Process
Step 1: Prepare the Buttermilk
Start by whisking together your room temperature milk and white vinegar in a small glass jar. Set this aside for at least five minutes until it begins to thicken and curdle slightly. This simple step is a hallmark of the old way of baking, ensuring the most tender results.
Step 2: Set the Stage
Preheat your oven to 350F (175C) and prepare two 8-inch round cake pans. I like to brush them lightly with butter and coat them with a dusting of flour, then place a circle of parchment paper at the bottom for an easy release.
Step 3: Whisk the Dry Ingredients
In a medium-sized mixing bowl, gently whisk together the all-purpose flour, almond flour, baking soda, baking powder, and salt. Make sure there are no lumps so the cake rises evenly in the oven.
Step 4: Cream the Fats and Sugar
Place your softened butter, oil, and granulated sugar into a stand mixer fitted with the paddle attachment. Mix on medium speed for about three minutes until the mixture looks white and fluffy, scraping down the sides with a rubber spatula as needed.
Step 5: Incorporate the Eggs
Add the eggs one at a time, mixing for a few seconds after each addition. This gradual process helps maintain the structure of the batter and keeps it from becoming too heavy.
Step 6: Flavor and First Liquid
Stir in the vanilla extract and about half a cup of your prepared buttermilk. Mix until just combined, being careful not to overwork the delicate mixture at this stage.
Step 7: Combine Wet and Dry
Reduce the mixer speed to low. Add one-third of your dry flour mixture, followed by half of the remaining buttermilk. Repeat this until all ingredients are incorporated, finishing with the last bit of flour for a smooth finish.
Step 8: Scale and Pour
Using a kitchen scale, divide the batter evenly between your two prepared pans. You should have about 630 grams of batter in each pan to ensure they bake at the same rate and look uniform.
Step 9: The Golden Bake
Place the pans in the center of the oven and bake for approximately 35 minutes. You will know they are ready when the tops are a light golden brown and a toothpick inserted into the center comes out clean.
Step 10: The Cooling Period
Let the cakes rest in their pans for about 15 minutes. Run a thin knife around the edges to loosen them, then carefully invert them onto a wire cooling rack to reach room temperature before frosting.
Step 11: Whip the Frosting
In a clean mixer bowl, combine the confectioners’ sugar, softened butter, vanilla, and milk. Start on low speed, then increase to medium and whip for a full 10 minutes until the frosting is white, stable, and cloud-like.
Step 12: Assemble and Decorate
Place one cake layer on a vintage plate and spread a generous layer of frosting on top. Stack the second layer and apply a thin crumb coat. Chill for 20 minutes, then finish with the remaining frosting and your favorite colorful decorations.
Wisdom from the Recipe Box

One of the most important things to remember is the temperature of your ingredients. If your butter is too cold, it will not cream properly with the sugar, and your cake will lack that signature fluffiness. If you find yourself in a hurry, you can place cold eggs in a bowl of warm water for a few minutes to take the chill off. This small bit of patience makes a world of difference in the final crumb of your celebration cakes. Always remember to tap your filled cake pans on the counter a few times before sliding them into the oven; this releases trapped air bubbles that can cause uneven holes in your cake.
Using a kitchen scale is another piece of advice I always give to those looking for consistent results. Measuring flour by the cup can be inaccurate depending on how tightly it is packed. By weighing your ingredients, you ensure that every batch is just as perfect as the last one. If you are looking for more visual inspiration for your theme, you might find some lovely gabbys dollhouse cakes ideas to help you plan your design.
Simple Twists for Little Hands
While the classic vanilla is always a favorite, you can easily adapt this recipe to suit different tastes. If you want a bit more color inside the cake, stir in half a cup of dye-free sprinkles to the batter just before baking to create a funfetti effect. You could also swap the vanilla extract for almond or lemon extract to give the cake a bright, citrusy note. This base recipe is very similar to my lemon rainbow cake, which also uses buttermilk for that irresistible moisture. For a richer flavor, try using brown sugar in place of half the granulated sugar to add a subtle caramel undertone to the sponge.
Gathering Around the Table

When it comes time to serve this cake, I love to lean into the nostalgic tea party theme. Use your favorite floral china or vintage plates to make the occasion feel even more special. A cold glass of milk or a light herbal tea pairs beautifully with the vanilla and almond flavors. If you are celebrating a smaller milestone, you might even consider cutting the cake into small squares like a heart cake to serve as bite-sized treats. Always use a sharp knife dipped in warm water and wiped clean between slices to get those perfect, clean edges that show off the layers.
A Final Word on Baking Memories
Baking this cake is a wonderful way to slow down and focus on the joy of creating something by hand. It reminds us that the best celebrations are often the ones where we put a little bit of ourselves into the process. I hope this recipe finds a permanent place in your own kitchen’s recipe box, just as it has in mine. Whether you are building a car cake or a dollhouse masterpiece, the love you put into it is what truly matters. For more vintage baking inspiration and to share your own creations, come visit us on Pinterest, Instagram, or Facebook. Happy baking, and may your kitchen always be filled with the scent of vanilla and laughter.


