In the patisserie schools of Paris, we are often taught that complexity is the enemy of perfection. There is a profound beauty in returning to the essentials—butter, eggs, and chocolate—and executing them with absolute precision. This recipe reminds me of the simple, unadorned gateaux my grandmother would bake, where the luxury came not from decoration, but from the depth of flavor and the tenderness of the crumb.

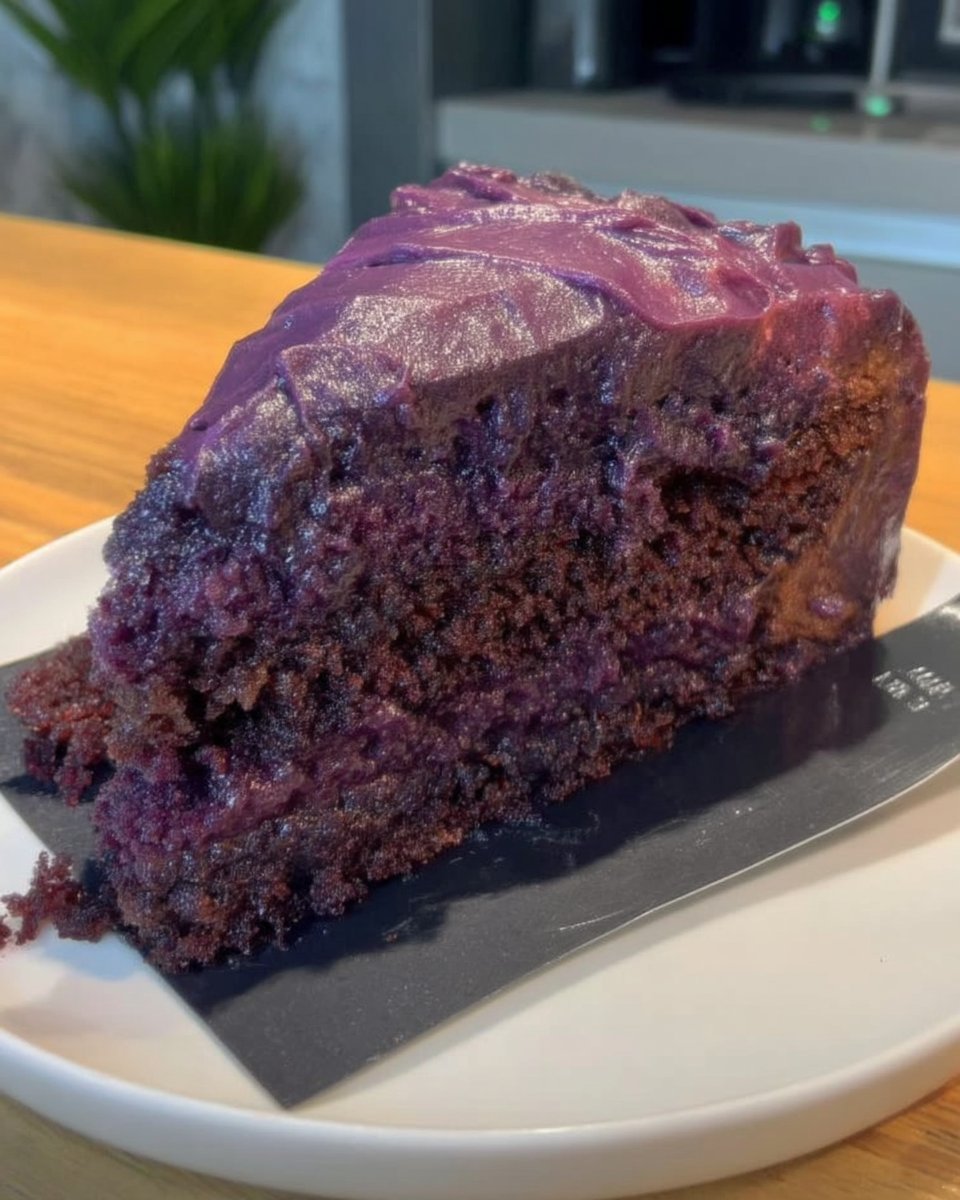
This old-fashioned chocolate cake is a study in texture and technique, yielding a crumb that is moist, dense, and deeply aromatic. Unlike the heavy, preserved nature of a traditional fruit cake, this confection relies on the immediate freshness of buttermilk and the blooming of cocoa to achieve its character. It is a small-batch masterpiece, baked in six-inch pans to create an elegant, tall silhouette perfect for an intimate celebration.
The Art of the Classic Gateau
There is a reason this recipe has stood the test of time; it balances the richness of chocolate with the tang of buttermilk in a way that modern recipes often overlook. By ‘blooming’ the cocoa powder in hot liquid, we unlock the full spectrum of the chocolate’s flavor profile, ensuring a taste that is robust rather than merely sweet. The method of adding butter cube by cube to the aerated egg foam—a technique akin to making an enriched brioche or a delicate emulsion—creates a texture that is remarkably velvety. It is a recipe that rewards patience and precision, offering a slice of nostalgia that feels sophisticated on the palate.
Print
Old-Fashioned Chocolate Cake
- Total Time: 50 mins
- Yield: 10 servings
- Diet: Vegetarian
Description
This elegant, small-batch chocolate cake utilizes a sophisticated ribbon-stage egg foam and a blooming cocoa technique to produce a velvety, tender crumb. Finished with a rich espresso-infused buttercream, it is the quintessential dessert for intimate gatherings or special celebrations.
Ingredients
- 4 oz semi-sweet chocolate
- 1/4 cup Dutch-processed cocoa
- 1/2 cup hot water
- 1 3/4 cups granulated sugar
- 1 3/4 cups all-purpose flour
- 1 cup buttermilk
- 4 large eggs
- 2 large egg yolks
- 18 tbsp unsalted butter
- Baking soda
- Salt
- Pure vanilla extract
- 1 3/4 cups unsweetened baking cocoa
- 3 1/2 cups confectioners’ sugar
- 1 cup unsalted butter
- 4–6 tbsp heavy cream
- 1 tsp espresso powder
Instructions
- Preheat oven to 350°F (175°C) and grease, flour, and line three 6-inch baking pans with parchment paper.
- Create a double boiler to melt the semi-sweet chocolate, hot water, Dutch-processed cocoa, and 1/2 cup of the sugar until glossy, then set aside to cool.
- In separate bowls, sift together the dry ingredients (flour, baking soda, and salt) and combine the wet ingredients (buttermilk and vanilla).
- In a stand mixer, whip the eggs, yolks, and remaining 1 1/4 cups sugar on high speed for 5 minutes until the ribbon stage is reached.
- Lower the mixer speed to incorporate the cooled chocolate mixture, then add the room-temperature butter one cube at a time until emulsified.
- Add the flour mixture in three parts and the buttermilk in two parts, alternating and beginning/ending with the flour.
- Divide the batter among the three pans and bake for 18–22 minutes until a toothpick inserted in the center comes out with a few moist crumbs.
- Cool in the pans for 15 minutes before turning out onto wire racks to cool completely.
- Beat the sifted cocoa, confectioners’ sugar, and espresso powder with the soft butter and heavy cream until the frosting is light and spreadable.
- Level the cake layers, stack with frosting between each, and coat the exterior with a bench scraper for a smooth finish.
Notes
To ensure the most successful emulsion, make sure your butter is truly at room temperature—soft enough to leave an indentation when pressed, but not melting. If the batter looks slightly separated before adding flour, continue as directed, as the dry ingredients will help the mixture come together perfectly for a velvety finish.
- Prep Time: 30 mins
- Cook Time: 20 mins
- Category: Dessert
- Method: Baking
- Cuisine: American
The Foundation of Flavor

For the Cake
- Semi-Sweet Chocolate (4 oz): Choose a high-quality couverture if possible, with around 55-60% cocoa solids for the perfect balance of sweetness and depth.
- Dutch-Processed Cocoa (¼ cup): This alkalized cocoa provides a darker color and a smoother, more mellow flavor than natural cocoa.
- Hot Water (½ cup): Essential for blooming the chocolate and cocoa, awakening their volatile oils.
- Granulated Sugar (1 ¾ cups, divided): Used to stabilize the egg foam and sweeten the chocolate base.
- All-Purpose Flour (1 ¾ cups): A standard protein content ensures structure without toughness.
- Buttermilk (1 cup): Room temperature is non-negotiable here; its acidity tenderizes the gluten and activates the baking soda.
- Eggs (4 large) & Yolks (2 large): The extra yolks add richness and emulsifying power.
- Unsalted Butter (18 tbsp): Cubed and at room temperature. Using unsalted butter allows us to control the seasoning precisely.
- Essentials: Baking soda, salt, and pure vanilla extract.
For the Frosting
- Unsweetened Baking Cocoa (1 ¾ cups): Provides the intense chocolate base.
- Confectioners’ Sugar (3 ½ cups): Sifted to ensure a silky finish.
- Unsalted Butter (1 cup): Very soft, to whip easily into the cocoa.
- Heavy Cream (4-6 tbsp): Adds lightness and aeration to the buttercream.
- Espresso Powder (1 tsp): Optional, but highly recommended to deepen the chocolate notes.
The Method
Step 1: Prep and Mise en Place
Preheat your oven to 350°F (175°C). Precision begins with preparation; grease and flour three 6-inch baking pans and line the bottoms with parchment paper. This size creates a delightful height and ensures even baking.
Step 2: Bloom the Chocolate
Create a bain-marie (double boiler) by placing a heatproof bowl over a saucepan of simmering water. Turn off the heat. Add the semi-sweet chocolate, hot water, Dutch-processed cocoa, and ½ cup of the sugar. Stir gently until melted and glossy. The heat releases the cocoa butter’s aroma—this is the ‘blooming’ stage. Set aside to cool slightly.
Step 3: Mix Dry and Wet Elements
In a small bowl, sift together the flour, baking soda, and salt. In a separate vessel, combine the room-temperature buttermilk and vanilla extract. Having these ready prevents delays during the final mixing.
Step 4: The Ribbon Stage
In the bowl of a stand mixer, combine the eggs, egg yolks, and the remaining 1 ¼ cups of sugar. Whip on high speed for approximately 5 minutes. You are looking for the ‘ribbon stage’—where the mixture is pale, voluminous, and falls back into the bowl in thick, folding ribbons. This aeration provides the cake’s lift.
Step 5: The Emulsion
Reduce the mixer speed and gently pour in the cooled chocolate mixture, beating until combined. Now, add the softened butter one cube at a time, waiting for each piece to incorporate before adding the next. This requires patience; rushing this step can break the emulsion.
Step 6: Alternating Additions
With the mixer on low, add the flour mixture in three parts and the buttermilk mixture in two parts, beginning and ending with the flour (Flour – Buttermilk – Flour – Buttermilk – Flour). Mix only until the flour disappears to maintain a tender crumb.
Step 7: Bake
Divide the batter evenly among the prepared pans. Bake for 18–22 minutes. The cakes are done when a toothpick inserted into the center emerges with just a few moist crumbs attached—never wait for it to be completely dry.
Step 8: Cool
Allow the cakes to cool in their pans for 15 minutes to set their structure. Turn them out onto wire racks to cool completely. For the cleanest frosting application, wrap the layers in plastic and chill them briefly.
Step 9: The Frosting
Sift the cocoa powder, confectioners’ sugar, and espresso powder together to remove any lumps. Beat this mixture with the very soft butter and salt. It will look sandy at first—this is normal. Add the heavy cream one tablespoon at a time, whipping on medium-high speed until the frosting is glossy, aerated, and spreadable.
Step 10: Assembly
Level the chilled cake layers with a serrated knife if necessary. Spread a generous layer of frosting between each cake, then coat the exterior. Use a bench scraper for a smooth, professional finish.
Precision Secrets

- Temperature is Key: Ensure your buttermilk and eggs are truly at room temperature. Cold ingredients will shock the melted chocolate and butter mixture, causing it to seize or curdle, which ruins the texture.
- The Ribbon Stage: Do not undercut the 5-minute whipping time for the eggs. This mechanical leavening creates a sponge that is light despite the richness of the butter. It is a classic French *génoise* technique applied to this American recipe.
- Ingredient Quality: In a recipe with so few hiding places, the quality of your cocoa powder matters immensely. I prefer a high-fat Dutch-processed cocoa for that luxurious mouthfeel.
- Troubleshooting: If your batter looks slightly curdled after adding the butter, do not panic. It will typically come back together once the flour is added. If you have specific questions about saving a broken batter, feel free to contact us for guidance.
Refined Twists
- Orange & Grand Marnier: Chocolate and orange is a timeless combination. Rub the zest of one orange into the sugar before whipping the eggs to release the oils, and add a tablespoon of Grand Marnier to the chocolate syrup.
- Coffee Infusion: Enhance the mocha profile by dissolving the espresso powder in the hot water during the blooming step rather than adding it to the frosting.
- Salted Caramel: A drizzle of salted caramel between the layers adds a modern, savory counterpoint to the sweetness.
- Nutty Texture: Fold in finely chopped, toasted hazelnuts into the frosting for a textural contrast reminiscent of a *Paris-Brest*.
For more seasonal variations and pastry techniques delivered to your inbox, please subscribe to our newsletter.
Presentation and Service

Serve this cake at slightly below room temperature to keep the frosting silky but stable. A slice of this richness pairs beautifully with a dark roast coffee or a glass of red wine, such as a Banyuls or Maury, which complements the chocolate notes without overwhelming them.
For an elegant presentation, garnish with chocolate shavings or fresh berries. Visit cakehalf.com for more plating inspiration and dessert pairings.
The Art of Small Batches
Mastering this old-fashioned chocolate cake is a testament to the power of small-batch baking. When you work with three six-inch pans, you can control the bake more precisely than with larger layers, ensuring edge-to-edge perfection. It is a recipe that asks for your attention but rewards you with a dessert of unparalleled comfort and class.
If you find yourself still yearning for holiday traditions and wish to attempt a different challenge, you might explore discussions on the best fruit cake to see how another classic is perfected. Until then, happy baking.
Read more about our philosophy at about us.
