Ever wonder why we commit to a massive cake when these Mini Cheesecake Cups offer the same creamy thrill? I call it efficiency for the dessert-obsessed in a tiny, perfect package.

Forget the stress of a water bath or the tragedy of a cracked surface on a nine-inch behemoth. These little rebels are all about high reward with zero risk, delivering that perfect graham-pecan crunch in every bite without the kitchen drama. When you are baking in small batches, you have the freedom to be fearless with your flavors, and these cups are the ultimate canvas for your wildest topping dreams.
Why These Mini Wonders Reign Supreme
Small-batch baking is the ultimate playground for flavor hunters who want it all.
- 🥧 Perfectly portioned for guilt-free snacking
- 🥜 Pecan-infused crust for extra crunch
- ⏱️ Bakes in half the usual time
- 🍓 Endless topping possibilities for everyone
- 🧊 Freezes beautifully for midnight cravings
Get The Full Cake Recipe
Print
Mini Cheesecake Cups
- Total Time: 2 hours 45 mins
- Yield: 12 servings
- Diet: Vegetarian
Description
These perfectly portioned cheesecake cups feature a rich, pecan-infused graham cracker crust and a silky, smooth cream cheese filling. They are the ideal small-batch dessert, offering a stress-free alternative to traditional cheesecakes with endless customization options.
Ingredients
- 1 1/2 cups graham cracker crumbs
- 1/2 cup toasted pecans, finely chopped
- 1/4 cup granulated sugar
- 1/2 tsp ground cinnamon
- 6 tbsp unsalted butter, melted
- 16 oz cream cheese, softened
- 1/2 cup sour cream
- 1/2 cup granulated sugar
- 2 large eggs
- 1 tsp vanilla extract
- 1/8 tsp salt
Instructions
- Preheat your oven to 350°F (175°C) and line a muffin pan with paper liners.
- In a food processor, pulse graham crackers, toasted pecans, sugar, and cinnamon until fine. Add melted butter and pulse until the mixture resembles wet sand.
- Press about two tablespoons of the crust mixture into each muffin liner and bake for 8-10 minutes. Remove and let cool.
- In a stand mixer, beat the softened cream cheese until perfectly smooth.
- Add the sugar and salt, mixing until combined, then scrape down the bowl.
- Mix in the sour cream and vanilla until the batter is glossy and uniform.
- Add eggs one at a time on medium-low speed, mixing just until the yellow disappears to avoid over-aeration.
- Scoop a quarter-cup of batter into each prepared crust.
- Bake for 15-17 minutes until the edges are set but the centers retain a slight, jelly-like jiggle.
- Cool in the pan to room temperature, then refrigerate for at least 2 hours before serving.
Notes
Ensure all refrigerated ingredients are at room temperature for at least two hours before beginning to prevent lumps in your filling. For the best texture, use brick-style cream cheese rather than tub-style, and avoid over-whipping the batter once the eggs are added to prevent cracks during the cooling process.
- Prep Time: 20 mins
- Cook Time: 25 mins
- Category: Dessert
- Method: Baking
- Cuisine: American
The Flavor Arsenal

To build the best Mini Cheesecake Cups, you need to understand the science of the squeeze. We are looking for that perfect tension between the crunch of the base and the velvety silk of the filling. This is not just a snack; it is an architecture of taste.
The Foundation
- Graham Crackers: These provide the classic honeyed snap. Don’t settle for pre-crushed crumbs; pulsing your own keeps the texture varied and interesting.
- Toasted Pecans: This is my secret weapon. Toasting them brings out oils that bond with the butter, creating a smoky, nutty depth that regular crusts lack.
- Cinnamon and Sugar: Just enough to bridge the gap between savory nuttiness and sweet filling.
- Unsalted Butter: The glue. Use high-quality butter because its fat content determines how well that crust holds up under the weight of the cheese.
The Heart of the Cup
- Cream Cheese: You must use full-fat, brick-style cream cheese. Do not even think about the spreadable tub version; we need the structural integrity that only the blocks provide.
- Sour Cream: This is the rebel move. It adds a tang that cuts through the heavy fat of the cream cheese, making the Mini Cheesecake Cups feel light rather than leaden.
- Granulated Sugar: We want sweetness, but we aren’t making candy. Half a cup is the sweet spot for balance.
- Large Eggs: These are your binders. They provide the lift and the setting power that turns a liquid batter into a custard-like dream.
- Vanilla Extract: Think of this as the aromatic backbone. It ties the pecans, cinnamon, and cream together.
Let’s Build This
Frequently Asked Questions
How do you keep mini cheesecakes from sinking in the middle?
Sinking usually happens because of too much air or sudden temperature changes. Don’t overbeat the eggs, and let your **Mini Cheesecake Cups** cool slowly at room temperature before putting them in the fridge.
Can you freeze mini cheesecakes?
Yes! These are perfect for freezing. Once they are fully chilled, place them in an airtight container. They stay fresh for up to 3 months. Just thaw them in the fridge overnight before you plan to serve them.
How long do mini cheesecakes take to bake?
These take about 15 to 17 minutes at 350°F. You want the edges to be set but the centers to have a slight jiggle. If the edges start to brown, they are overdone.
Do you need a water bath for mini cheesecakes?
No water bath is required for these **Mini Cheesecake Cups**. Because they are small, they bake evenly and quickly without the need for the steam that larger cakes require.
Step 1: Prep the Base
Heat your oven to 350°F (175°C). Line your muffin pan with paper liners. This isn’t just for easy cleanup; it provides the structural support your Mini Cheesecake Cups need while they set.
Step 2: Blitz the Crust
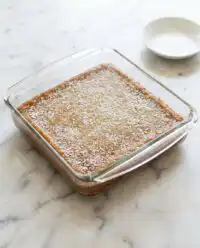
Toss your graham crackers and those beautifully toasted pecans into a food processor. Pulse until you have a mix of fine dust and tiny, pebble-like pieces. Add your sugar and cinnamon, then drizzle that melted butter over the top. Pulse until it looks like wet sand.
Step 3: The Pinch Test
Take a small handful of the mixture and squeeze. If it stays together, you are gold. If it falls apart, add that extra tablespoon of butter. Press about two tablespoons into each liner. I like using a shot glass to get a perfectly flat, compressed surface. Bake for 8-10 minutes until your kitchen smells like a bakery.
Step 4: Cream the Cheese
While the crusts cool, hit the stand mixer. Beat the cream cheese alone for 3 minutes. You want it so smooth it looks like silk. This prevents those annoying lumps that ruin the mouthfeel of your Mini Cheesecake Cups.
Step 5: Incorporate the Flavor
Add the sugar and salt. Mix for another minute, then scrape the bowl. Don’t skip the scraping! Add the sour cream and vanilla, mixing until the batter is a uniform, glossy dream.
Step 6: The Egg Phase
Turn the mixer to medium-low. Add eggs one at a time. This is crucial: you want to incorporate them without whipping in too much air. Too much air leads to those dreaded cracks and sinks. Mix just until you can’t see the yellow anymore.
Step 7: Fill and Fire
Use an ice cream scoop to drop a quarter-cup of batter into each liner. They should be nearly full. Slide them into the oven for 15-17 minutes. You are looking for a slight jiggle in the center—like Jell-O—while the edges stay firm.
Step 8: Cool and Chill
Let them sit in the pan until they reach room temperature. This gradual cooling prevents the structure from collapsing. Once cool, move them to the fridge for at least 2 hours. Patience is a flavor ingredient here.
Riley’s Flavor Secrets

One move that most people miss is the temperature of the ingredients. If your cream cheese or eggs are cold, they will never truly marry into a smooth batter. You will end up with tiny white dots in your Mini Cheesecake Cups that scream “amateur.” Leave everything on the counter for at least two hours before you start.
If you want to take the flavor profile even further, try swapping the vanilla for almond extract or adding a citrus zest to the batter. I often find that a little hit of lemon can make these taste like a lemon-cheesecake without the extra effort. Also, for more mini-dessert inspiration, check out this guide on mini cheesecakes for different crust ideas.
When pressing the crust, don’t be afraid to use some muscle. A loose crust will crumble the moment you peel back the paper. You want a solid, dense foundation that can support the creamy weight above it. If you have extra pecans, chop them roughly and press them into the top of the batter before baking for a rustic, textured finish.
Twist It Up
Why play it safe when you can experiment? These Mini Cheesecake Cups are just the beginning.
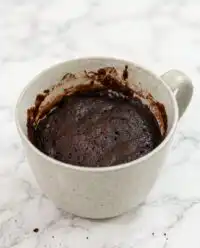
- The Chocolate Rebel: Fold in half a cup of mini chocolate chips or swirl in some melted dark chocolate for a rich, decadent version.
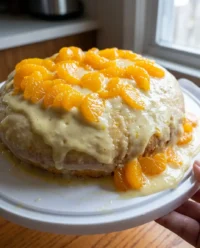
- The Fruity Fusion: Top each cup with a spoonful of homemade raspberry coulis or a fresh peach slice. If you love fruit, you might want to see my peach-honey-cheesecake-cupcakes for a more floral twist.
- The Salty-Sweet: Add a pinch of sea salt to the pecan crust and top the finished cakes with a drizzle of salted caramel. The contrast between the salt and the creamy cheese is mind-blowing.
- The Red Velvet Spin: Add a tablespoon of cocoa powder and some red food coloring to the batter for a look that rivals my red-velvet-cheesecake.
Showtime

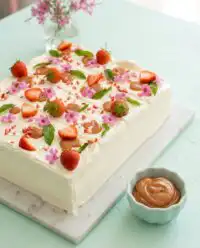
Presentation is everything when you are serving something this cute. I love to set these out on a wooden board with small bowls of various toppings—think fresh berries, chocolate shavings, and maybe some crushed honeycomb. It turns a simple dessert into an interactive experience.
Pair these with a bold espresso or even a smoky bourbon if you are feeling adventurous. The richness of the cheese stands up beautifully to strong flavors. If you are hosting a larger event and need more small-batch ideas, my guide on the perfect mini-cake will help you round out your dessert table perfectly. Always serve them chilled, but let them sit out for 5 minutes before the first bite to let the flavors wake up.
The Final Bite
These Mini Cheesecake Cups prove that you don’t need a massive kitchen or hours of labor to create something truly spectacular. They are bold, creamy, and unapologetically fun to make. Whether you are baking for a crowd or just treating yourself to a midnight snack, these little cakes are the ultimate victory for the home baker.
I want to see your creations! Did you go with the pecan crust or try something even wilder? Tag me on Instagram or share your results on Facebook. For more flavor-forward recipes that break the rules, don’t miss my red-velvet-cheesecake guide. Keep experimenting, keep tasting, and never settle for a boring dessert. Catch more tips on Pinterest and join the conversation on X.

