Most bakers hide structural failure under pounds of heavy buttercream, but stacking raw fruit requires actual architectural precision to achieve real stability.

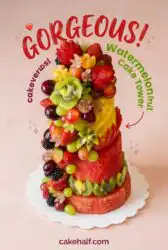
Stacking a Watermelon Fruit Cake Tower is not about cutting corners; it is about choosing structural integrity and pure flavor over dry flour. You are taking a seedless watermelon, shaping it into exact cylinders, and pinning it together like a master joiner. The result is a stunning, raw alternative to cake that behaves beautifully on a platter. It proves that small-batch precision is equally satisfying when you put down the mixing bowl.
The Case for Making This Watermelon Fruit Cake Tower
Prep: 25 min · Serves: 8 · Difficulty: Medium
- No baking ovens required for assembly.
- Naturally sweet hydration in every bite.
- Stunning geometric presentation on the table.
- Completely customizable seasonal berry toppings.
- Unmatched crisp texture contrast throughout.
Creating a spectacular cake with fruit does not require turning on a hot oven.
Get The Full Cake Recipe
Print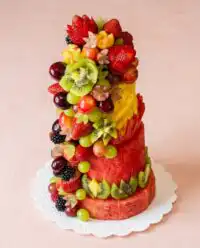
Watermelon Fruit Cake Tower
- Total Time: 55 mins
- Yield: 8 servings
- Diet: Vegan, Gluten-Free, Paleo
Description
Create a stunning, architectural dessert centerpiece using fresh carved melons and vibrant seasonal fruit. This raw, no-bake creation offers a refreshing, low-calorie alternative to traditional cakes that is perfect for any summer gathering.
Ingredients
- 1 large seedless red watermelon
- 1 medium seedless yellow watermelon
- 1 cup fresh blueberries
- 1 cup fresh blackberries
- 2 kiwis
- 2 peaches or nectarines
- 1 bunch fresh mint
- 1 box wooden toothpicks
Instructions
- Prepare the workspace. Anchor a clean cutting board with a damp paper towel and organize your carving knife and toothpicks.
- Carve the base. Slice a thick five-inch slab from the center of the red watermelon and remove the rind to create a cylinder.
- Shape the base. Shave the sides of the red slab until perfectly vertical and circular, then pat dry with a towel.
- Carve the accent. Slice a three-inch slab from the center of the yellow watermelon and trim the rind away carefully.
- Shape the accent. Carve the yellow slab into a six-inch cylinder and ensure the top and sides are level and smooth.
- Stack the tiers. Place the red base on a platter, insert three toothpicks vertically, and press the yellow cylinder securely onto them.
- Create the topper. Slice the kiwi into jagged flower shapes and pin one to the top center of the yellow melon.
- Decorate the tower. Arrange sliced stone fruit around the base and pile fresh berries around the top kiwi flower.
- Chill and finish. Tuck fresh mint into gaps and refrigerate for at least thirty minutes to firm the structure before serving.
Notes
- Ensure all melon surfaces are completely patted dry to prevent berries from slipping during assembly.
- Use a very sharp chef’s knife rather than a serrated blade to keep the melon flesh firm and prevent juice pooling.
- Check the levelness of your melon cylinders from eye level before stacking to guarantee the tower remains stable.
- Briefly toss stone fruit slices in lemon juice if assembling more than an hour before your event to prevent oxidation.
- Prep Time: 25 mins
- Cook Time: 0 mins
- Category: Dessert
- Method: No-Bake
- Cuisine: Modern Fusion
Build Your Mise en Place
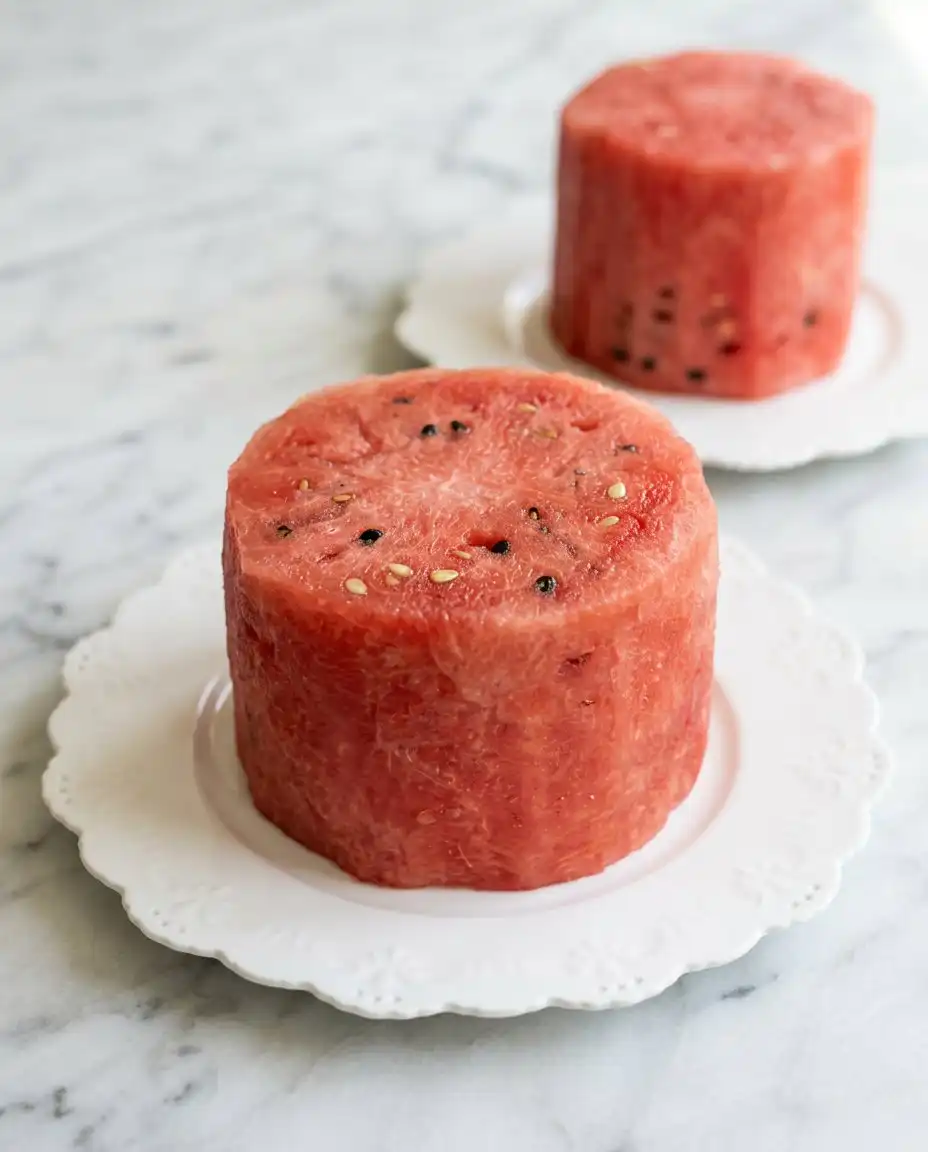
Assembling a raw masterpiece forces you to rely completely on the pristine quality of your seasonal harvest. Since there is no batter to hide blemishes, each melon must possess a dense texture and high water content to stand firm. You want to gather ingredients that contrast sharply in color and scale to create real visual drama on the serving platter.
- Seedless Red Watermelon: This massive melon forms your heavy foundation tier, offering a solid structural base and a deep rose color that commands attention on the table.
- Seedless Yellow Watermelon: This smaller melon sits directly on top, providing an unexpected pale gold layer that breaks up the monochromatic look and surprises your guests when sliced.
- Fresh Berries: A mix of blueberries and blackberries fills the natural crevices, adding deep dark blue tones and a sharp, acidic punch that cuts through the sweet melon.
- Kiwi Fruit: Carving this bright green melon into sharp geometric points creates a central star crown that draws the eye upward and finishes the peak of your design.
- Peach or Nectarine: Slicing these into thin, uniform crescents introduces elegant curves and a sweet, aromatic contrast to the crisp, clean melon tiers below.
- Fresh Mint: These small, fragrant green leaves offer a refreshing garden aroma and help cover any visible structural toothpicks near the base.
- Toothpicks: These thin wooden pins serve as your invisible support beams, guaranteeing that the stacked tiers do not slide during transport or slicing.
| Ingredient | Why It Matters |
|---|---|
| Red Watermelon | Creates the heavy structural foundation tier |
| Yellow Watermelon | Delivers beautiful color contrast on top |
| Fresh Berries | Fill gaps with bright, acidic pops |
| Kiwi Flower | Acts as the centerpiece of the crown |
| Toothpicks | Lock the stacked cylinders into place |
The Method
Step 1: Prep the Work Surface and Melons
Before you pick up your knife, make sure your cutting board is completely anchored to the counter using a damp paper towel underneath. Wipe down the outer skin of both the red and yellow watermelons with cold water to remove any dirt or dust from the market. Gather your toothpicks, chef’s knife, and serving platter so your assembly station is fully organized before you begin. Having your tools arranged allows you to work quickly and keeps the fruit from sitting at room temperature for too long.
Step 2: Carve the Red Melon Base Slab
Place your large seedless red watermelon horizontally on the cutting board and locate the widest part of the center. Use a long, sharp carving knife to make two clean parallel cuts, slicing out a thick five-inch slab. This solid slab will act as the heavy foundation for your entire structure, so it must be completely uniform. Trim away the tough green rind by cutting downward in smooth, curved strokes around the perimeter.
Step 3: Shape the Red Cylinder
Once the rind is removed, shave away any remaining white pith until only the deep red flesh remains. Keep your knife blade perfectly vertical to the cutting board as you shave the sides to create a true cylinder. Rotate the melon slab slowly after each cut to check for symmetry and make sure the top surface is flat. Pat the finished eight-inch cylinder dry with a paper towel to remove loose pulp and excess juices.
Step 4: Carve the Yellow Melon Accent Slab
Take your seedless yellow watermelon and slice a three-inch slab from the center using the same technique. This slab will form your second tier, creating a beautiful color contrast against the red base. Slice away the rind and white pith carefully, making sure not to carve too deep into the precious yellow flesh. This contrasting tier will sit on top, adding a lovely gold tone to your display.
Step 5: Shape the Yellow Cylinder
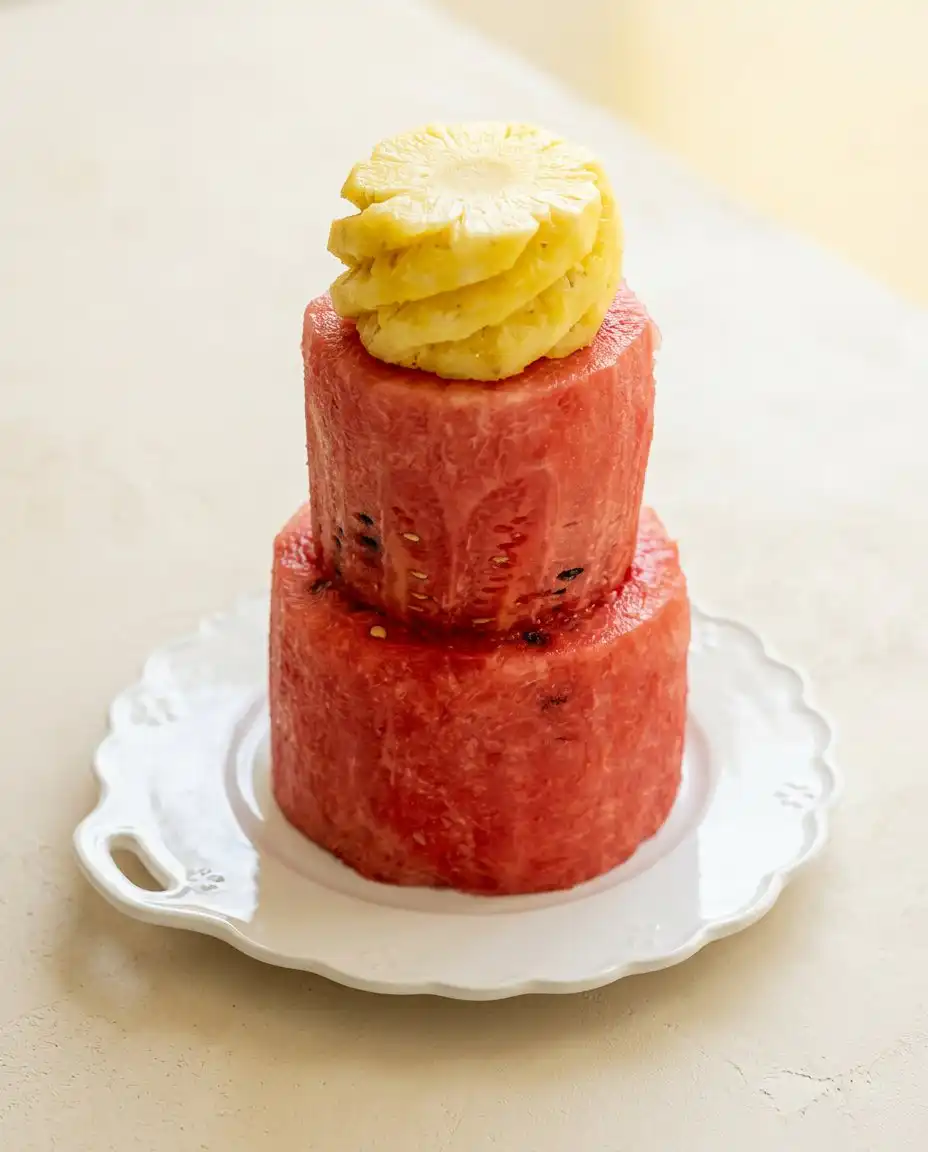
Shape the yellow melon slab into a smaller six-inch cylinder, keeping the sides straight and the top level. You want the diameter of this tier to be significantly smaller than the red base to create a stepped appearance. Take your time to shave the sides into a clean circle, checking the shape from eye level as you work. Dry the surface thoroughly with a clean kitchen towel to prepare the melon for stacking.
Step 6: Secure the Watermelon Fruit Cake Tower Stack
Transfer your large red cylinder directly onto the center of your chosen serving platter or cake stand. Insert three sturdy wooden toothpicks into the center of the red base, leaving about one inch of wood exposed. Align your yellow cylinder directly over the pins and press down gently until the two tiers sit flush. This pinning technique prevents the yellow layer from sliding off center when you move the tower to the table.
Step 7: Carve the Decorative Kiwi Flower
Cut both ends off your fresh kiwi to expose the bright green flesh inside, then hold it upright on your board. Make alternating diagonal cuts around the middle of the kiwi, pressing your knife tip directly to the center core. Gently pull the halves apart to reveal a pair of jagged, eye-catching kiwi flowers. Secure one of these green flowers to the top center of the yellow melon tier using a toothpick.
Step 8: Dress the Tiers with Berries and Stone Fruit
Slice your peach or nectarine into thin, uniform crescent shapes to prepare for the final decorating phase. Arrange these stone fruit slices in an overlapping fan pattern around the exposed shoulder of the red base tier. Pile fresh blueberries and blackberries high around the base of the kiwi flower on the yellow tier. Use partial toothpicks to pin any loose or rolling berries directly to the sides of the melon.
Step 9: Add Herb Details and Chill
Tuck small sprigs of fresh mint leaves into any visible gaps between the berries and stone fruit slices. This green foliage masks the toothpicks and adds a clean, refreshing aroma to the entire presentation. Slide the finished platter into your refrigerator and let it chill for at least thirty minutes before serving. Chilling helps the melon flesh tighten up, making the structure firmer and much easier to slice.
The Details That Matter
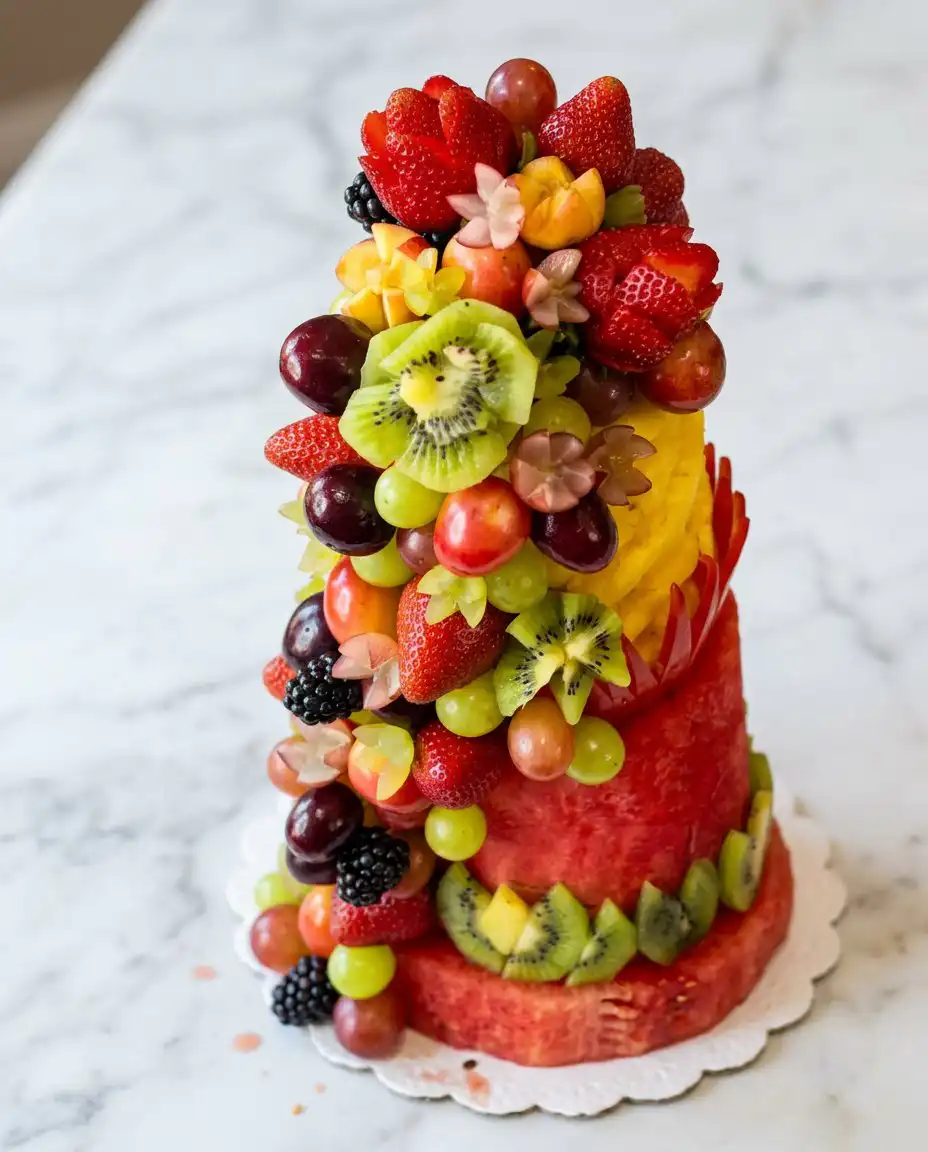
If your melon layers begin to lean or slide sideways, this indicates that your initial cuts were not level. You can correct this mid-assembly by sliding thin wooden wedges or extra slices of firm rind under the low side of the cylinder. To prevent this entirely, always use a level kitchen counter and check your slices from eye level before inserting any toothpicks.
Keeping your decorations looking crisp requires keeping your fruit fresh during the assembly process. Brush a tiny amount of lemon juice over the sliced nectarines and peaches to stop them from turning brown before your guests arrive. This step maintains the bright, clean colors of your stone fruit without altering the clean melon flavor.
When shopping for watermelons, always choose fruit that feels heavy for its size and sounds hollow when tapped. Melons with a solid cream-colored field spot on the bottom are fully ripe and contain less fibrous pulp, which makes carving much easier. You can refer to this watermelon fruit cake guide to master the art of selecting stable melons.
Avoid carving your melon tiers with a serrated bread knife, as the teeth tear the delicate cell walls of the fruit. This tearing causes excessive weeping of juice, which pools on your platter and dilutes the surrounding berries. A long, extremely sharp chef’s knife allows you to make clean, single-pass cuts that seal the moisture inside the cylinder.
Use a dry, lint-free kitchen towel to pat every carved surface completely dry before you begin decorating. Moisture on the outside of the melon makes it difficult for smaller berries and mint leaves to stick to the sides. Creating a dry canvas guarantees that your decorations stay exactly where you place them.
Keep your melon off-cuts in a separate bowl to serve as proof-of-concept snacks while you assemble the main display. These trimmings are a great resource for testing flavor pairings with different herbs or dipping sauces. Having these pieces on hand also keeps you from nibbling on the main tower during the styling phase.
Frequently Asked Questions
How do I store leftovers of this watermelon tower?
Remove any remaining wooden toothpicks from the tower before storing the leftover fruit. Chop the melon tiers into bite-sized cubes and place them in an airtight container with the remaining berries. Store the container in your refrigerator and consume the fruit salad within two days for the best quality.
Can I assemble this entire recipe a day before my event?
We do not recommend fully assembling the tower a day in advance, as the fruit will release too much water and make the berries soggy. You can carve the melon cylinders the night before, wrap them tightly in plastic wrap, and store them on paper towels. Assemble and decorate the tower a few hours before serving to maintain a crisp presentation.
How do I slice the tower without it collapsing?
Use a very sharp, thin carving knife and warn your guests about the presence of securing toothpicks. Slice straight down through both tiers to create clean, triangular wedges. Take your time with each cut to make sure the knife passes smoothly through the layers without pushing them off center.
What is the best way to clean and prepare the berries?
Wash your berries in cold water and dry them completely on clean kitchen towels before arranging them on the cake. Wet berries will slide off the melon surfaces and cause the mint leaves to wilt. Ensuring your fruit is bone-dry before assembly is the secret to a stable design.
Is there a seedless yellow watermelon alternative?
If yellow watermelon is unavailable in your local market, honeydew melon makes a fantastic substitute. Its pale green flesh offers a beautiful contrast against the bright red base tier. Honeydew is also dense enough to hold its shape well under the weight of your toppings.
Can I add other tropical fruits like mango or pineapple?
Yes, mango slices and pineapple stars make excellent decorative elements for this raw tower. Slice them thinly and secure them to the sides using toothpicks, similar to the peaches. These fruits add a bright tropical acidity that balances the clean sweetness of the melon.
How do I handle guests who might be sensitive to raw mint?
You can easily swap the fresh mint leaves for basil or edible flowers like pansies. Basil offers a slightly savory, peppery contrast that works surprisingly well with sweet red watermelon. If you want to avoid herbs entirely, focus on using bright berries to cover any visible toothpick holes.
Can I use cookie cutters to shape the watermelon tiers?
While cookie cutters work wonderfully for small shapes, they are usually too shallow to cut through a thick center slab of watermelon. A long, sharp carving knife is the best tool for shaping the main cylinders of your tower. You can, however, use metal cutters to stamp out decorative star shapes from the leftover yellow melon pieces to decorate the top tier.
Where to Deviate
If you want to mimic a traditional frosted strawberry cake, you can coat the outer melon cylinders with a thick layer of whipped coconut cream. Chill the carved melon tiers thoroughly and pat them dry before spreading the cream over the surfaces. This variation offers a rich, dairy-free frosting that pairs beautifully with the sweet, crisp watermelon flesh underneath.
You can replace the yellow watermelon tier with a dense, peeled cantaloupe or honeydew melon. This substitution changes the color palette to a soft pastel green or warm orange, introducing a completely different melon aroma. The firm texture of these alternative melons provides excellent structural support for holding heavy berry skewers.
To make this cake even more interactive, insert long wooden skewers loaded with alternating grapes, melon balls, and strawberries directly into the sides of the base. This variation creates a starburst effect that makes it easy for guests to grab individual fruit portions without cutting the cake. It is a fantastic presentation style for larger outdoor gatherings where plates are scarce.
Cutting, Plating, Presenting
Presenting this raw centerpiece requires a sense of occasion to make the colors shine. Place the tower on a dark slate board or a vintage glass cake stand to create a beautiful contrast with the red and yellow flesh. Scatter extra blackberries, sliced peaches, and fresh mint leaves around the base of the stand to give the display an abundant, rustic garden aesthetic. Keep the cake refrigerated until your guests are ready to gather around the table.
When slicing the tower, use a long chef’s knife wiped clean with a damp cloth between cuts. This clean blade ensures that the yellow melon does not get stained with red juice as you slice. Serve each fresh wedge on a cold dessert plate alongside a slice of moist summer berry poke cake for a delicious contrast between raw fruit and tender baked cake.
What You Just Proved
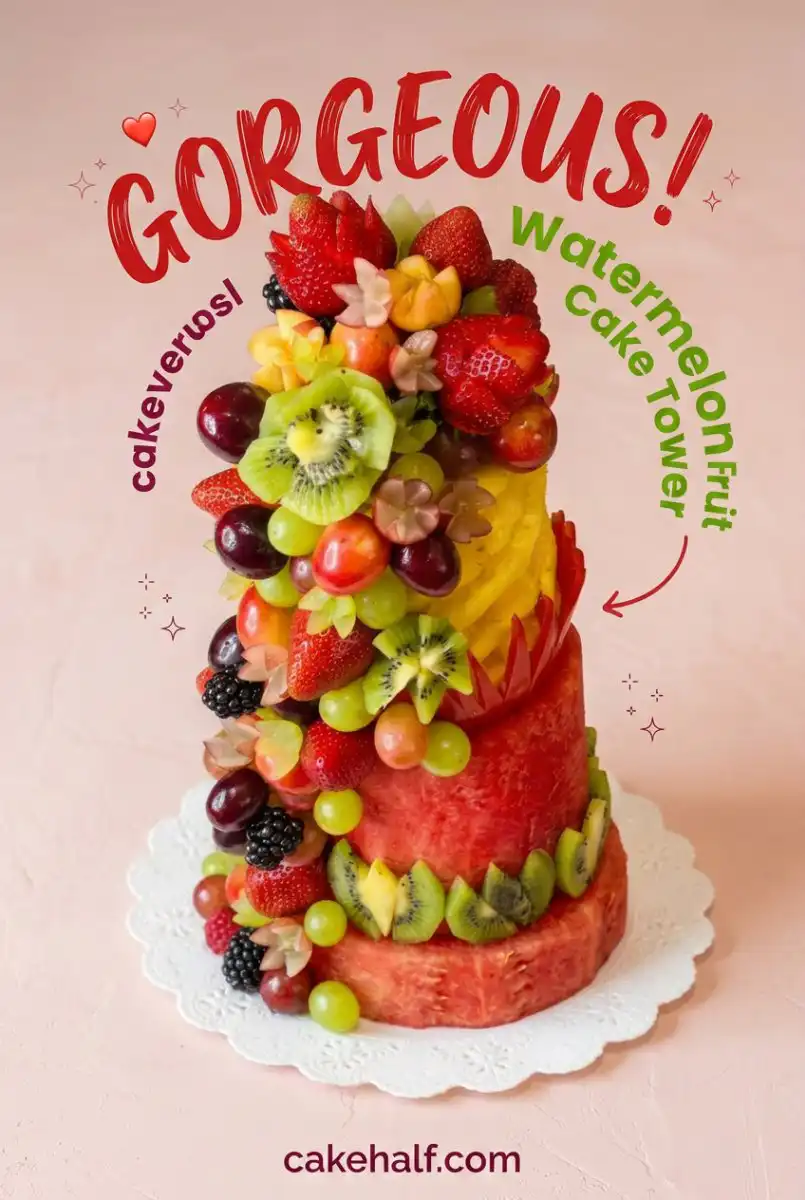
By constructing this stunning tower, you have proved that great desserts do not always require a hot oven or heavy flour. You took simple, raw ingredients and used clean geometry to build a show-stopping centerpiece. This approach represents small-batch innovation at its finest: choosing crisp quality and precise technique over tired baking traditions.
If you enjoyed this fresh style of pastry innovation, try applying your skills to other classic fruit displays. Our guide to crafting a modern fruitcake offers another path to working with deep, rich fruit profiles without compromising on clean presentation. Remember: the recipe is a starting point. You are the variable.
Share your gorgeous raw creations with our growing community of flavor rebels. Follow our boards on Pinterest for more creative ideas, join the conversation on our Facebook page, and watch our quick styling tutorials on TikTok to keep your kitchen experiments exciting.