I remember a soft autumn evening in a small patisserie near the Place des Vosges, where the only light came from the flickering glow of slender tapers. It was there I first understood that a cake is not merely a confection but a vessel for ceremony and light. To create a masterpiece worthy of these moments, one must approach the foundation with the reverence of a craftsman, focusing on the quiet chemistry of a perfectly balanced crumb.

This chocolate-based recipe is designed to be the ultimate canvas for your celebration. It is a composition of deep cocoa notes, softened by the inclusion of buttermilk and sharpened by the addition of hot coffee. The result is a structure that is both tender enough to melt on the palate and resilient enough to support the artistic arrangement of candles for any sophisticated gathering.
Mastering the Classic Celebration Sponge
The beauty of this particular sponge lies in its remarkable texture, which we achieve through a dual-fat method. By combining the richness of melted butter with the moisture-retaining properties of neutral oil, we create a cake that remains soft for days without sacrificing the buttery flavor profile we desire. In my years of practice, I have found that small-batch baking allows us to monitor the aeration of the batter more closely, preventing the common pitfall of over-mixing that often plagues larger commercial recipes.
Furthermore, this recipe respects the science of chocolate. We do not simply add cocoa; we bloom it with hot liquid to release the volatile flavor compounds trapped within the powder. This technique, a cornerstone of professional pastry work, transforms a simple chocolate cake into a sophisticated dessert with layers of flavor. Whether you are hosting an intimate dinner or a grander fete, this recipe provides a reliable, professional-grade foundation that allows the natural elegance of your ingredients to shine through.
Print
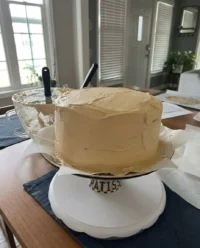
Candle Cake
- Total Time: 1 hour
- Yield: 12 servings
- Diet: Vegetarian
Description
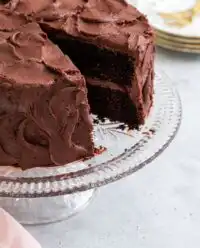
This elegant chocolate candle cake features a deeply moist, fine-crumbed sponge achieved through a unique blend of butter, oil, and tangy buttermilk. Bloomed with hot coffee to intensify its cocoa notes, it serves as the perfect sophisticated foundation for any celebratory gathering.
Ingredients
- 208 g All-Purpose Flour
- 75 g Natural Cocoa Powder
- Light Brown Sugar
- Granulated Sugar
- Unsalted Butter, melted
- Neutral Oil
- 236 ml Buttermilk
- 118 ml Hot Coffee or Water
- 2 whole Eggs
- 1 extra Egg Yolk
- Vanilla Extract
- Baking Soda
- Salt
Instructions
- Preheat your oven to 350F (175C) and prepare two 8-inch round cake pans by lining the bottoms with parchment paper and greasing the sides.
- In a large mixing bowl, whisk together the flour, both sugars, cocoa powder, baking soda, and salt until the mixture is homogenous and free of lumps.
- Stir the melted butter and neutral oil into the dry ingredients until the particles are fully moistened and the batter is thick.
- Add the whole eggs, the extra egg yolk, and vanilla extract, stirring steadily until the mixture is cohesive and emulsified.
- Gradually pour in the buttermilk while stirring to create a silky, thinning batter.
- Carefully stir in the hot coffee or water to bloom the cocoa and activate the leavening agents; the batter should be glossy and pourable.
- Divide the batter evenly between the prepared pans and bake for 35 to 40 minutes, or until a toothpick emerges clean.
- Allow the cakes to rest in their pans for 15 minutes before inverting them onto a wire rack to cool completely before frosting.
Notes
For the cleanest slices, consider chilling your cake layers in the refrigerator for one hour before assembly to firm up the crumb. If you prefer a milder chocolate flavor, you may substitute the hot coffee for boiling water, though the coffee is highly recommended for its ability to deepen the natural profile of the cocoa.
- Prep Time: 20 mins
- Cook Time: 40 mins
- Category: Dessert
- Method: Baking
- Cuisine: American
The Foundation of Fine Pastry

Quality is the silent partner in every successful bake. For this recipe, every element serves a specific structural and flavor-driven purpose.
- All-Purpose Flour (208 g): Providing the necessary gluten structure to hold the weight of the moisture and fats without becoming heavy.
- Natural Cocoa Powder (75 g): This provides the acidic reaction needed with the leavening agents to produce a fine, tight crumb.
- The Sugar Duo (Light Brown and Granulated): The brown sugar introduces moisture and a hint of molasses depth, while granulated sugar ensures a crisp, clean sweetness and aids in the aeration process.
- Unsalted Butter and Neutral Oil: This combination is the secret to a cake that is both flavorful and exceptionally moist even when chilled.
- Buttermilk (236 ml): Its acidity tenderizes the gluten strands, creating that signature melt-in-the-mouth sensation.
- Hot Coffee or Water (118 ml): The heat is essential for blooming the cocoa, while the coffee notes act as a flavor enhancer for the chocolate without making the cake taste like a latte.
- Extra Egg Yolk: This addition increases the lecithin and fat content, contributing to a more luxurious, velvety mouthfeel.
Using a kitchen scale for these measurements is the hallmark of a disciplined baker. Precision in the weight of your flour and cocoa ensures that the hydration levels remain consistent every time you return to this recipe.
The Method of Precision
Step 1: Prep Your Environment
Begin by preheating your oven to 350F (175C). Preparation is the first step toward mastery. Line the bottoms of two 8-inch round cake pans with parchment paper. Lightly grease the sides and dust them with flour, tapping out any excess. This creates a clean release and professional edges on your finished layers.
Step 2: Sifting and Combining Dry Elements
In a large mixing bowl, whisk together the flour, both sugars, cocoa powder, baking soda, and salt. It is vital to ensure no lumps of brown sugar remain. Sifting the cocoa powder is highly recommended here, as natural cocoa tends to clump, and we want a perfectly homogenous dry mixture for the best aeration.
Step 3: Integrating the Primary Fats
Pour the melted butter and neutral oil into the dry ingredients. Stir these together until the dry particles are fully moistened. The batter will be thick and heavy at this stage; do not be alarmed. We are coating the flour particles in fat, which limits gluten development and guarantees a tender result.
Step 4: Emulsifying the Eggs
Add the two whole eggs, the extra egg yolk, and the vanilla extract. Stir with a steady hand until the mixture is cohesive. Pause to scrape the bottom and sides of the bowl with a silicone spatula. This step is about emulsification—bringing the water-based eggs and the fats together into a smooth base.
Step 5: Incorporating the Buttermilk
Gradually pour in the buttermilk while stirring. The batter will begin to thin and take on a silky appearance. The lactic acid in the buttermilk starts to react with the baking soda at this moment, so move with purpose but without haste.
Step 6: The Cocoa Bloom
Carefully stir in the hot coffee or water. This hot liquid will thin the batter significantly and activate the cocoa powder. Scrape the bowl one final time to ensure no pockets of unmixed flour remain at the bottom. The batter should be glossy and pourable.
Step 7: The Gentle Bake
Divide the batter evenly between your prepared pans. Place them on the center rack of the oven. Bake for 35 to 40 minutes. You are looking for a toothpick to emerge clean or with just a few moist crumbs. Avoid over-baking, as the residual heat will continue to set the crumb as it cools.
Step 8: The Cooling Ritual
Allow the cakes to rest in their pans for exactly 15 minutes. This allows the structure to firm up slightly. Invert them onto a wire cooling rack and remove the parchment paper. They must be completely cold before you attempt to frost them, as the delicate crumb requires time to settle.
Pastry Wisdom for Success

To achieve a professional finish, always ensure your eggs and buttermilk are at room temperature. Cold ingredients can cause the melted butter to seize, resulting in an uneven crumb. If you find yourself in a hurry, place the eggs in a bowl of warm water for five minutes to take the chill off. For a truly sophisticated flavor profile, I recommend using a high-quality Dutch-processed cocoa if you prefer a darker, mellower taste, though natural cocoa provides a better lift with the baking soda in this specific recipe.
When testing for doneness, listen to your cake. A fully baked cake will have a very faint hiss if you hold it near your ear, but a silent cake is often over-baked. If you are looking to practice more intricate designs, you might find inspiration in our guide on the vintage cake aesthetic, which pairs beautifully with this chocolate base. For more professional chocolate techniques, you can also look into the methods used at Sugar Spun Run. Always remember that the difference between good and extraordinary is often just a degree of temperature or a minute of timing.
Refined Flavor Twists
While this chocolate sponge is a masterpiece in its own right, it serves as a wonderful foundation for subtle variations. You might consider adding the finely grated zest of two organic oranges to the sugar before mixing to create a bright, citrus-forward chocolate experience. Alternatively, for a more rustic and romantic presentation, you could bake this batter in heart-shaped tins. If you are interested in exploring different shapes for your celebrations, our heart cake tutorial offers excellent guidance on assembly and decoration.
Another elegant variation involves replacing the hot coffee with a spiced chai tea infusion. The warmth of cardamom and ginger against the backdrop of dark chocolate creates a profile that is perfect for winter evenings. For those who prefer a more modern touch, a teaspoon of espresso powder added to the dry ingredients will intensify the cocoa notes without the need for liquid coffee. No matter which path you choose, maintain the core ratios to keep the structural integrity of the crumb intact.
Presentation and The Final Touch

Serving a cake of this quality requires a thoughtful presentation. I prefer to serve slices at a slight chill, which highlights the fudgy texture of the chocolate. Pair each slice with a dollop of unsweetened Chantilly cream to balance the richness of the cocoa. If you are looking for a lighter, more colorful accompaniment, consider the citrus notes discussed in our lemon rainbow cake guide for ideas on fruit pairings.
When it comes to the candles, choose slender, high-quality tapers that burn cleanly. Arrange them in a clustered formation in the center for a modern look, or in a traditional ring for a classic feel. Light them just before bringing the cake to the table to capture the full magic of the moment. A glass of vintage port or a dark roast coffee will provide the perfect bitter-sweet contrast to the deep chocolate flavors of the cake.
The Art of Small Batches
Mastering the art of the celebration cake is a journey of patience and precision. By focusing on the small details—the temperature of the buttermilk, the blooming of the cocoa, and the careful lining of the pans—you create something far superior to any store-bought alternative. I hope this recipe becomes a staple in your kitchen for your most cherished moments. For more inspiration on marking life’s milestones with style, feel free to browse our collection of celebration cakes. I invite you to share your beautiful creations with our community of dedicated bakers on Instagram and Pinterest. Happy baking, and may your kitchen always be filled with light.

