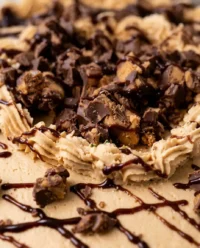
During my early mornings at a small patisserie in Lyon, the air always carried the heavy, sweet perfume of deep chocolate and warm spices. This Donut Cake captures that specific, nostalgic essence of a fresh chocolate old-fashioned pastry, translated into a refined Bundt form that demands your patience and precision. It is a celebration of the simple joys found in a perfect crumb and a glossy, translucent glaze.

Crafting this dessert requires a gentle hand and a deep appreciation for the chemistry of aeration and moisture. We are not merely making a cake; we are creating a bridge between the humble morning treat and a sophisticated centerpiece. By using high-quality Dutch cocoa and a touch of cardamom, we achieve a flavor profile that is both complex and comforting for any dedicated home baker.
Mastering the Classic Chocolate Crumb
You will find that this Donut Cake is more than just a novelty; it is a lesson in texture and balance. The combination of buttermilk and sour cream provides a specific acidity that tenderizes the gluten, resulting in a cake that stays moist for days while maintaining a structural integrity that mimics a dense cake donut. It is the perfect project for those who find peace in the quiet rhythm of the creaming method and the slow drip of a vanilla glaze.
The inclusion of hot water at the end of the process is a technique known as blooming the cocoa. This helps to release the full depth of the chocolate flavor, turning a simple batter into something truly luxurious. When you bake this in a classic Bundt pan, the shape itself pays homage to the iconic ring of a donut, while the ‘rough side up’ presentation offers a beautiful, rustic texture that holds onto the glaze with grace. It is a recipe that rewards the baker who values technique over speed.
Print
Donut Cake
- Total Time: 1 hour 10 mins
- Yield: 12 servings
- Diet: Vegetarian
Description
This elegant Bundt cake replicates the nostalgic texture and deep chocolate flavor of a classic old-fashioned donut. With a tender crumb enriched by buttermilk and sour cream, it is finished with a translucent vanilla glaze for a sophisticated yet comforting treat.
Ingredients
- 1 cup unsalted European-style butter, room temperature
- 2 cups granulated sugar
- 3 large eggs, room temperature
- 1 tablespoon vanilla extract
- 2 1/2 cups all-purpose flour
- 3/4 cup Dutch-process cocoa powder, sifted
- 2 teaspoons baking powder
- 1 teaspoon baking soda
- 1 teaspoon salt
- 1/2 teaspoon ground nutmeg (optional)
- 1/4 teaspoon ground cardamom (optional)
- 1/2 cup buttermilk
- 1/2 cup full-fat sour cream
- 1 cup hot water
- 2 cups powdered sugar (for glaze)
- 3–4 tablespoons milk (for glaze)
- 1 teaspoon vanilla extract (for glaze)
Instructions
- Preheat your oven to 350°F (175°C) and generously coat a 10-12 cup Bundt pan with non-stick baking spray or butter and flour.
- In a stand mixer, cream together the room-temperature butter and granulated sugar on medium-high speed for 2-3 minutes until light and fluffy.
- Add the eggs one at a time, beating well and scraping down the bowl after each addition, then stir in the vanilla extract.
- In a separate bowl, whisk together the flour, cocoa powder, baking powder, baking soda, salt, nutmeg, and cardamom.
- Combine the buttermilk and sour cream in a small jar; add the dry ingredients to the butter mixture in three parts, alternating with the buttermilk mixture, mixing on low until just combined.
- Gently fold in the hot water using a rubber spatula until the batter is smooth and a deep mahogany color.
- Pour the batter into the prepared pan and tap it firmly on the counter to remove large air bubbles, then bake for 45-50 minutes until a skewer comes out clean.
- Cool the cake in the pan for exactly 10 minutes before inverting onto a wire rack; flip it once more so the flat side faces up to mimic a donut shape.
- Once completely cooled, whisk the powdered sugar, milk, and vanilla together to create a thick glaze and drizzle it over the top, letting it set for 15 minutes before serving.
Notes
To ensure a perfect release from the Bundt pan, always grease it right before adding the batter to prevent the coating from sliding down the sides. For the best flavor, use high-quality Dutch-process cocoa and ensure all dairy ingredients are at room temperature to maintain a stable emulsion.
- Prep Time: 20 mins
- Cook Time: 50 mins
- Category: Dessert
- Method: Baking
- Cuisine: American
The Foundation of Quality Ingredients

To achieve the refined results we seek, every ingredient must be at the correct temperature and of the best possible quality. The chemistry of this cake relies on the interaction between the leavening agents and the acidic dairy components.
- Unsalted Butter: Use premium European-style butter if possible, and make certain it is at a true room temperature (around 68°F or 20°C) to allow for proper aeration with the sugar.
- Dutch Process Cocoa Powder: This is vital. Unlike natural cocoa, Dutch-processed cocoa has been alkalized, providing a darker color and a smoother, less acidic chocolate flavor that pairs beautifully with the spices.
- Buttermilk and Full-Fat Sour Cream: These two are the secret to the tender crumb. The fat content and acidity work together to break down protein strands in the flour, creating that signature ‘melt-in-your-mouth’ feel.
- Nutmeg and Cardamom: These are optional but highly recommended. They provide the aromatic signature of a classic old-fashioned donut, whispering of tradition without overpowering the chocolate.
- Hot Water: The water should be steaming but not boiling. Its primary role is to hydrate the cocoa particles and ensure they are fully integrated into the batter without lumps.
The Method: A Step-by-Step Technique
Step 1: Preparation and Aeration
Preheat your oven to 350°F (175°C). Prepare your 10-12 cup Bundt pan by spraying it generously with a non-stick baking spray that contains flour, or use a traditional butter-and-flour coating to verify a clean release. In the bowl of a stand mixer, beat the room-temperature butter and granulated sugar on medium-high speed. You are looking for a light, fluffy texture which usually takes about 2 to 3 minutes. This step creates the tiny air pockets that the baking powder will later expand.
Step 2: The Emulsion
Add the eggs one at a time, allowing each to be fully incorporated before adding the next. This creates a stable emulsion between the fats and the liquid. Scrape down the sides of the bowl frequently to make certain no butter streaks remain at the bottom. Mix in the vanilla extract until just combined.
Step 3: Sifting and Combining
In a separate medium bowl, whisk together the all-purpose flour, Dutch-processed cocoa, baking powder, baking soda, salt, and the spices. Sifting the cocoa is often necessary to remove any stubborn clumps. With the mixer on the lowest speed, add the flour mixture in three parts, alternating with the buttermilk and sour cream mixture. Begin and end with the dry ingredients. Mix until only a few streaks of flour remain; over-mixing at this stage will develop too much gluten and result in a tough cake.
Step 4: Blooming the Cocoa
Remove the bowl from the mixer. Gently stir in the hot water using a rubber spatula. The batter will become quite thin, but do not be alarmed. Continue stirring until the mixture is smooth and the color is a deep, uniform mahogany. This hot water ‘blooms’ the cocoa, intensifying the chocolate notes significantly.
Step 5: The Bake
Transfer the batter into your prepared pan. Tap the pan firmly on the counter three times to encourage any large air bubbles to rise to the surface. Bake for 45 to 50 minutes. The cake is finished when a wooden skewer inserted into the center comes out clean or with just a few moist crumbs. If you notice the top browning too quickly, a loose tent of aluminum foil for the final 10 minutes will protect the delicate surface.
Step 6: The Critical Inversion
Allow the cake to cool in the pan for exactly 10 minutes on a wire rack. Any longer and the sugars may begin to stick; any shorter and the structure may not be set enough to travel. Invert the cake onto a rack, then flip it once more so the ‘bottom’ (the flatter side) is facing up. This mimics the appearance of a donut and provides a better surface for the glaze. Cool completely.
Step 7: Glazing the Masterpiece
Whisk the powdered sugar, milk, and vanilla until you achieve a thick but pourable consistency. Drizzle the glaze generously over the cooled cake, allowing it to pool slightly and drip down the sides in a natural, organic fashion. Let the glaze set for 15 minutes before the first slice is taken.
Precision Secrets for the Perfect Donut Cake

Temperature is the most common variable that bakers overlook. When eggs or dairy are cold, they can cause the butter to seize, resulting in a broken batter and a coarse crumb. If you find yourself in a rush, place your eggs in a bowl of warm water for five minutes to take the chill off. For more on managing delicate chocolate bases, you might find our guide on the old-fashioned chocolate cake helpful for mastering these emulsions.
Another secret to a professional finish is the ‘internal temperature’ method. If you have a digital thermometer, the cake is perfectly baked when the center reaches 210°F (99°C). This removes the guesswork of the toothpick test. For a more detailed look at similar chocolate techniques, you may also enjoy this chocolate donut cake which offers a slightly different perspective on the classic glaze application.
Refined Twists and Building on Mastery
Once you have mastered the classic chocolate version, you can begin to introduce subtle variations. A salted caramel glaze is a beautiful alternative to the vanilla one; simply replace the milk in the glaze with a high-quality salted caramel sauce. For those who enjoy a bit of crunch, toasted pistachios or crushed cacao nibs can be sprinkled over the glaze before it sets. If you enjoy the combination of fruit and cake, consider serving this alongside a seasonal compote, much like we do with our blueberry coffee cake. Another elegant modification is to infuse the milk for the glaze with lavender or Earl Grey tea for a sophisticated, floral finish that elevates the cocoa’s natural earthy notes.
Presentation and the Final Touch

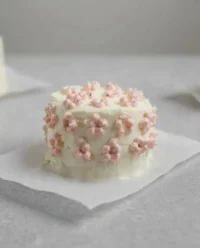
Presentation is the final act of the baker’s craft. Serve this cake on a simple ceramic pedestal to allow the glaze drips to be the star of the show. It is best enjoyed at room temperature with a cup of strong, dark-roast coffee or a delicate afternoon tea. For a truly professional touch, you can serve individual slices with a small dollop of lightly sweetened crème fraîche to balance the sweetness of the glaze. If you prefer smaller portions for a gathering, you might look into our modern mini techniques for scaling down larger recipes into bite-sized elegance.
The Art of Small Batches and Final Thoughts
There is a quiet satisfaction in mastering a recipe that feels both nostalgic and professional. This Donut Cake reminds us that with the right technique and high-quality ingredients, even a simple concept can become a masterpiece of patisserie. I encourage you to take your time with the creaming process and the glaze, as these small details are what separate a good cake from a truly extraordinary one. For those who wish to continue their journey into classic foundations, I recommend trying our yellow cake with chocolate frosting for another lesson in crumb perfection.
Please share your results with our community of dedicated bakers. You can find more inspiration and technical guidance on our social channels:

