A standard sheet cake relies on artificial syrups, while the professional version demands a slow-reduced strawberry puree and the steady patience of a tempered white chocolate ganache foundation.

The quest for the Best Strawberry Sheet Cake often ends in disappointment when bakers prioritize speed over the structural integrity of the fruit. In this laboratory of flavor, you will learn to manage the high moisture content of fresh berries through reduction and careful emulsion. By treating the humble sheet cake with the reverence of a tiered masterpiece, you create a crumb that remains tender yet sturdy enough to support a sophisticated ganache and elderflower finish. This is not merely a dessert; it is an exercise in intentional baking that elevates a seasonal classic into a permanent fixture of your repertoire.
Why Technique Matters in This Best Strawberry Sheet Cake Recipe
Prep: 45 min · Serves: 24 · Difficulty: Advanced
- Concentrated berry reduction provides authentic fruit intensity.
- Precision creaming creates a refined, uniform crumb.
- Layered elderflower notes add unexpected botanical depth.
- Elegant ganache topping ensures lasting moisture retention.
- Refined presentation honors traditional French pastry standards.
This strawberry cake recipe is the result of patience and precision, a cake that rewards the baker who values technique over speed.
This is the result of patience and precision, a cake that rewards the baker who values technique over speed.
Get The Full Cake Recipe
Print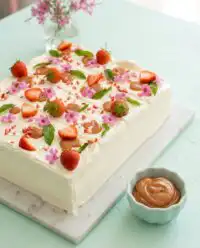
Best Strawberry Sheet Cake
- Total Time: 2 hours
- Yield: 24 servings
Description
This elevated sheet cake features a tender, uniform sponge layered with concentrated strawberry puree and a sophisticated white chocolate ganache. Infused with delicate elderflower and fresh mint, it is a masterclass in structural integrity and refined fruit flavor.
Ingredients
- 620g unsalted butter
- 620g caster sugar
- 10 large eggs
- 620g self-raising flour
- 6 tbsp milk
- 1 tsp vanilla extract
- 200g strawberry puree
- 400g white chocolate
- 25g butter
- 30g glucose syrup
- 1/2 cup sugar
- 1/2 cup water
- 2 tbsp elderflower cordial
- Handful fresh mint leaves
- 375g unsalted butter
- 600g icing sugar
- 3–4 tbsp elderflower cordial
- Fresh strawberries for layering
Instructions
- Prepare mise en place. Weigh all ingredients carefully using a digital scale and ensure eggs and butter reach room temperature before starting the assembly.
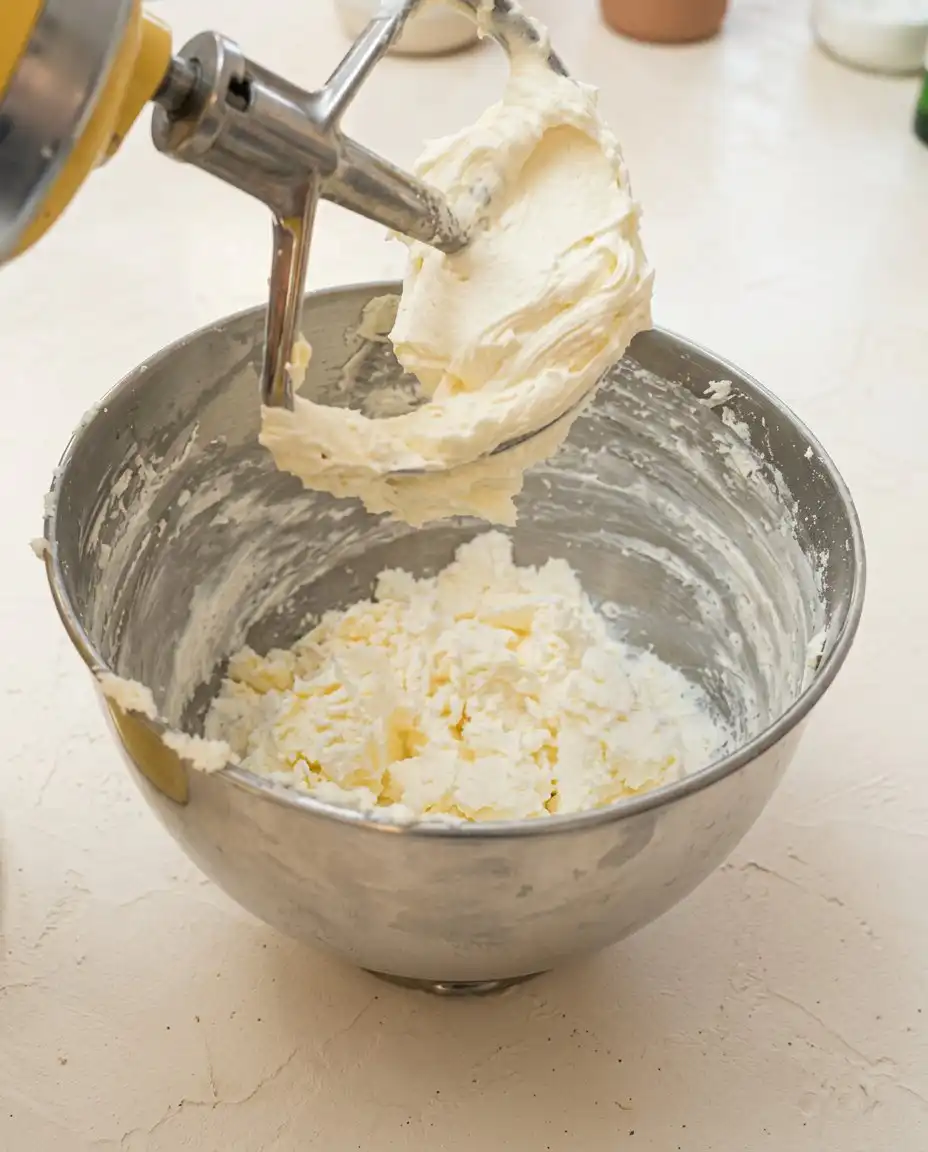
- Cream butter mixture. Combine butter and sugar in a stand mixer for eight minutes until the mixture reaches a pale, ribbon-like consistency.
- Emulsify the eggs. Add eggs one by one to the butter mixture, ensuring each is fully incorporated to maintain a smooth, glossy emulsion.
- Incorporate the flour. Sift flour in three additions and fold gently into the batter by hand, then stir in the milk and vanilla until just combined.
- Bake the sponges. Divide batter into prepared 9×13 pans and bake at 170°C for 30 to 35 minutes until the centers spring back to the touch.
- Prepare the syrup. Dissolve sugar in water, remove from heat, add elderflower cordial and mint, then strain after the mixture cools.
- Reduce strawberry puree. Simmer the puree in a skillet until thickened by half, then whisk into white chocolate, butter, and glucose syrup to create a smooth ganache.
- Assemble cake layers. Brush the cooled cake with elderflower syrup, spread a layer of ganache, and add sliced fresh strawberries before stacking the second cake layer.
- Prepare the buttercream. Whip the butter until aerated, gradually add icing sugar and elderflower cordial until the frosting reaches a smooth, spreadable consistency.
- Finish and decorate. Apply a crumb coat, chill to set, frost the final layer, and garnish with fresh mint and edible flowers before serving.
Notes
- Ensure all ingredients are at room temperature to prevent the batter from splitting during the emulsification process.
- Use a high-quality white chocolate with high cocoa butter content to achieve a smooth, professional ganache finish.
- Strain the elderflower syrup through a fine-mesh sieve to ensure no mint particles remain before applying it to the sponge.
- Rest the completed cake at room temperature for at least one hour before slicing to allow the ganache and buttercream to set perfectly.
- Prep Time: 45 mins
- Cook Time: 35 mins
- Category: Dessert
- Method: Baking
- Cuisine: French-inspired
Ingredients, Chosen with Purpose
Creating a superior sponge requires more than simply following a list; it requires an understanding of how each component behaves under heat and agitation. Your mise en place must be exact, with every ingredient tempered to the ambient temperature of your kitchen to avoid breaking the delicate emulsions we will build.
- Unsalted Butter: Using a high-fat European-style butter ensures the crumb is exceptionally tender and carries the strawberry notes effectively.
- Strawberry Puree: Reducing fresh berries into a concentrated puree allows for maximum flavor impact without introducing excess water that could collapse the sponge.
- Glucose Syrup: This addition to the ganache is critical for preventing sugar crystallization, resulting in a professional, glass-like finish.
- Self-Raising Flour: Sifted three times, this provides the necessary lift and consistent aeration required for a large-format sheet cake.
- Elderflower Cordial: This botanical extract acts as a sophisticated bridge between the sweetness of the white chocolate and the tartness of the berries.
- Caster Sugar: The fine crystals dissolve rapidly during the creaming stage, promoting a stable structure and preventing a grainy texture.
| Ingredient | Why It Matters |
|---|---|
| Strawberry Puree | Provides concentrated flavor without excess water. |
| Glucose Syrup | Prevents ganache crystallization for smooth texture. |
| Elderflower Cordial | Adds a floral counterpoint to sweet berries. |
| European Butter | High fat content ensures a tender crumb. |
| Handful of Mint | Infuses the syrup with a refreshing, clean finish. |
Working Through the Recipe
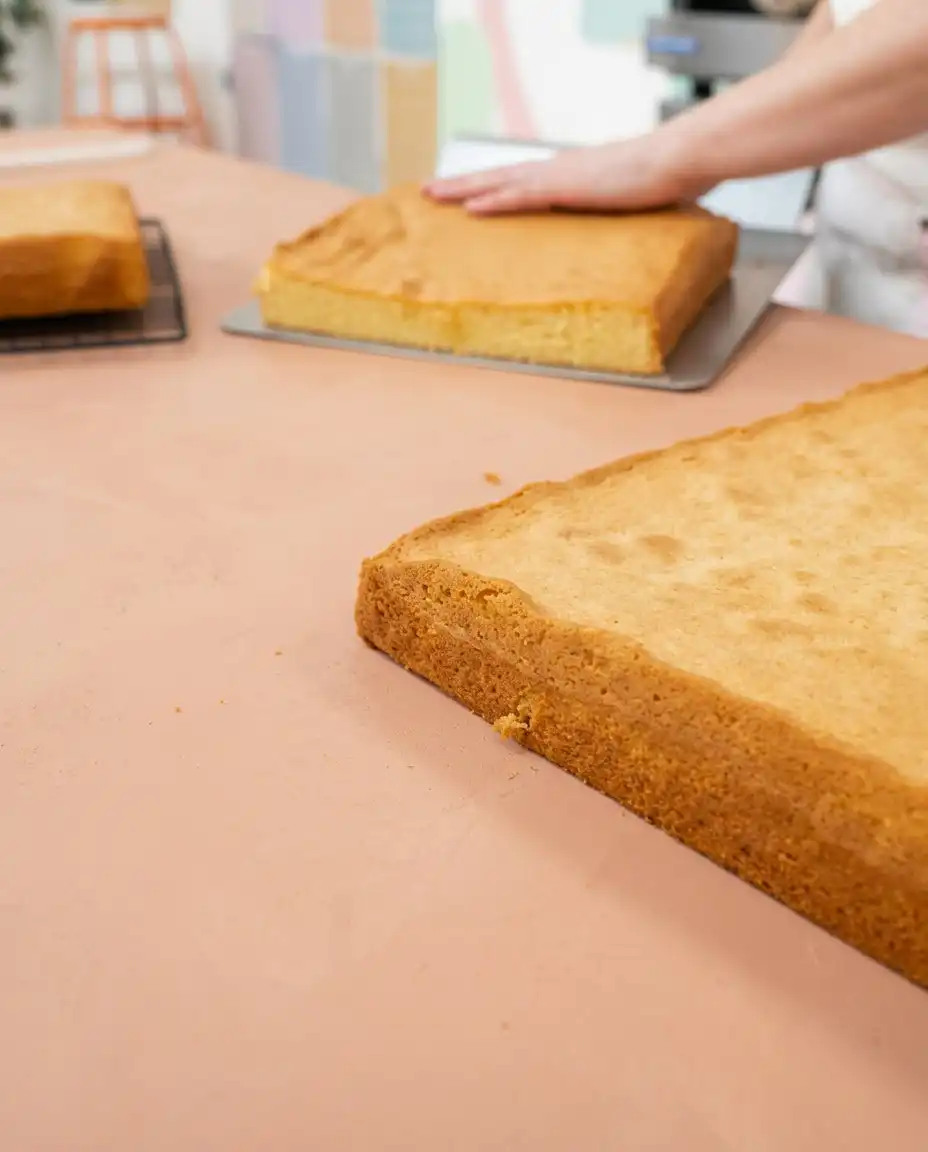
Step 1: Execute a Precise Mise en Place
Begin by weighing every ingredient to the gram using a digital scale, as volumetric measurements are too imprecise for a cake of this scale. You must ensure the eggs and butter have sat at room temperature for at least two hours to ensure they reach approximately 21°C. Prepare your two 9×13” rectangle tins by greasing them with softened butter and lining them with parchment paper, leaving a small overhang for easy removal. This preparation allows you to move through the mixing process without interruption, maintaining the temperature of your batter.
Step 2: The Creaming Stage and Air Incorporation
Place the 620g of unsalted butter and 620g of caster sugar in the bowl of a stand mixer fitted with the paddle attachment. You will cream these together on medium speed for exactly eight minutes until the mixture reaches a pale ribbon stage and appears almost white. This process is not about mixing; it is about mechanical leavening, where the sugar crystals tear tiny air pockets into the fat. If you cut this step short, your cake will be dense and lack the sophisticated lightness required for a double-layer sheet cake.
Step 3: Emulsifying the Eggs
With the mixer running on low, add the 10 eggs one at a time, allowing each to be fully incorporated before adding the next. If the mixture begins to look curdled or broken, add a single tablespoon of your measured flour to help re-bind the emulsion. You are looking for a smooth, glossy batter that holds its shape when the paddle is lifted. This careful addition prevents the fat from separating from the liquid, which is the primary cause of a greasy or uneven crumb.
Step 4: Sifting and Folding the Flour
Stop the mixer and remove the bowl to fold in the 620g of self-raising flour by hand using a large metal spoon or silicone spatula. Sift the flour directly over the batter in three separate additions, using a gentle figure-eight motion to combine. You must be cautious not to deflate the air pockets you worked so hard to create in the earlier steps. Finally, stir in the 6 tbsp of milk and 1 tsp of vanilla until the batter is just uniform and falls from the spatula in a heavy, slow stream.
Step 5: Baking the Best Strawberry Sheet Cake
Divide the batter equally between your prepared tins, smoothing the tops with an offset spatula to ensure an even rise. Place the tins in the center of a preheated oven at 170°C and bake for 30 to 35 minutes or until the center springs back when lightly pressed. You should notice the edges just beginning to pull away from the sides of the tin, indicating the structure is set. Avoid opening the oven door during the first 25 minutes to prevent a sudden drop in temperature that could cause the center to sink.
Step 6: Infusing the Elderflower Mint Syrup
While the cakes are baking, combine 1/2 cup sugar and 1/2 cup water in a small saucepan over medium heat until the sugar dissolves. Remove from the heat and stir in 2 tbsp of elderflower cordial and a handful of fresh mint leaves, allowing them to steep as the liquid cools. This syrup will be applied to the warm cakes to lock in moisture and provide a hidden layer of botanical complexity. Strain the syrup through a fine-mesh sieve to remove the mint leaves before application, ensuring a clean and professional result.
Step 7: Reducing the Strawberry Puree for Ganache
To create the ganache base, you must first reduce 200g of strawberry puree in a wide skillet over low heat until it has thickened by nearly half. This concentration of flavor is essential to prevent the white chocolate from seizing due to excess water content. Once reduced, pour the hot puree over 400g of finely chopped white chocolate, 25g of butter, and 30g of glucose syrup. Let it sit for two minutes before whisking from the center outward until a smooth, emulsified ganache forms.
Step 8: Constructing the Internal Layer
Once the cakes are completely cool, trim the tops if necessary to create a flat surface, then brush the first layer generously with the elderflower syrup. Spread a thin, even layer of the strawberry ganache across the surface, followed by a dense arrangement of sliced fresh strawberries. Place the second cake layer on top, pressing down very gently to ensure the two layers are bonded. This internal structure provides the weight and stability needed for the final decoration.
Step 9: Preparing the Elderflower Buttercream
Beat 375g of soft unsalted butter for five minutes until it is exceptionally light and aerated before gradually adding 600g of sifted icing sugar. Incorporate 3-4 tbsp of elderflower cordial, adjusting the quantity until the frosting is supple and holds a soft peak. This buttercream should be smooth enough to glide over the cake without pulling at the crumb. If the frosting feels too firm, a teaspoon of room-temperature milk can be added to achieve the correct working consistency.
Step 10: Final Decoration and Setting
Apply a thin crumb coat of buttercream to the sides and top of the assembled cake, then chill for 20 minutes to set the foundation. Apply the remaining buttercream and smooth the edges with a bench scraper for a sharp, clean finish. Garnish the top with edible flowers and fresh mint leaves, following a deliberate pattern that suggests the natural origin of the ingredients. Allow the completed cake to rest at room temperature for one hour before slicing to let the flavors meld and the structure stabilize.
Where Precision Makes the Difference
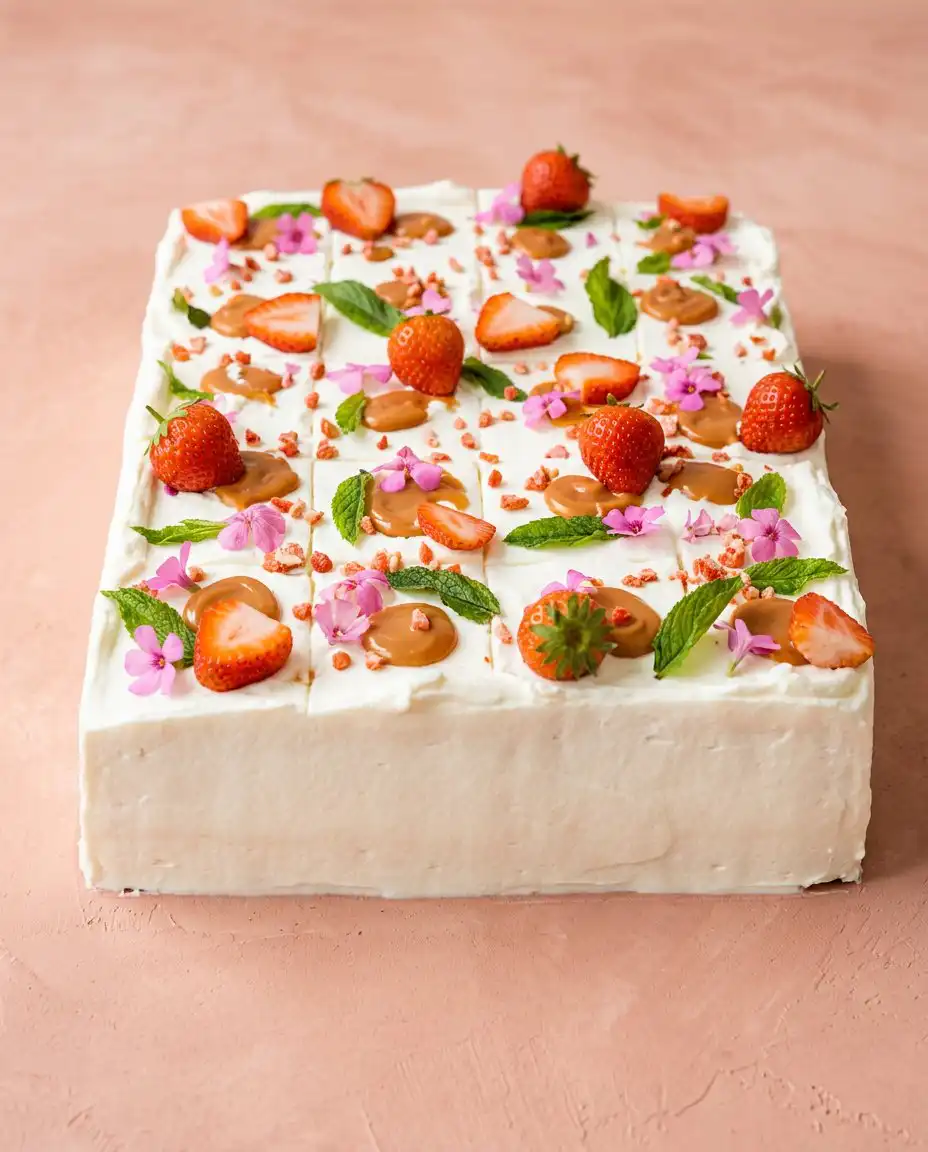
The quality of your strawberry puree is the single most important factor in achieving a deep, natural flavor in this fresh strawberry sheet cake construction. If you find your puree is too watery even after reduction, you may whisk in a half-teaspoon of cornstarch mixed with cold water to help stabilize the texture before adding it to the chocolate.
Temperature management is the hallmark of the professional baker, and nowhere is it more critical than during the buttercream stage. If your buttercream appears curdled or grainy, it is likely because the butter was too cold; you can fix this by gently warming the base of the bowl with a hair dryer for ten seconds while continuing to whisk.
When working with white chocolate ganache, always use a high-quality bar with a high cocoa butter content rather than standard chocolate chips. Standard chips often contain stabilizers that prevent a smooth melt, resulting in a textured finish that lacks the refined mouthfeel of a professional ganache.
Precision in sifting cannot be overlooked, as even small clumps of flour can create tunnels in your sponge during the baking process. By sifting the flour three times, you ensure maximum aeration and a crumb that is uniform in both density and color.
For those seeking a more detailed understanding of fruit-based cake structures, studying the strawberry sheet cake preparation techniques can provide additional insight into moisture management. This external perspective reinforces the importance of the reduction process we have utilized here.
Always use a serrated knife dipped in hot water and wiped dry between each cut to ensure the cleanest possible slices. This technique prevents the strawberries and ganache from smearing across the cross-section, preserving the visual integrity of your hard work.
Frequently Asked Questions
Why is my sheet cake dense rather than light?
Density usually occurs when the creaming stage is rushed or the flour is over-mixed. You must cream the butter and sugar until the ribbon stage is reached, and always fold in the flour by hand to preserve the air pockets. If you use a mixer for the flour, you risk developing too much gluten, which toughens the structure.
Can I use frozen strawberries for the puree?
Frozen strawberries are acceptable for the puree, provided they are thawed and drained of excess water before the reduction process. Because frozen fruit often contains more moisture, you may need to reduce it for a longer period to reach the necessary concentration. Never use frozen berries for the internal filling, as they will release too much liquid as they thaw.
How should I store this cake to maintain its texture?
The cake should be stored in an airtight container in a cool room for up to two days. If your kitchen is warm, refrigeration is necessary to protect the ganache and buttercream. Always bring the cake back to room temperature for at least an hour before serving to ensure the butter-based crumb and frosting soften to their intended consistency.
What if my ganache refuses to emulsify?
If your ganache appears split or oily, it is likely due to the temperature being too high or the ratio of liquid to fat being off. You can often rescue a split ganache by adding a teaspoon of cold milk and whisking vigorously. Ensure the strawberry reduction has cooled slightly before pouring it over the white chocolate to avoid overheating the cocoa butter.
Can I make the sponge layers in advance?
The sponges can be baked a day in advance, wrapped tightly in plastic wrap once cool, and kept at room temperature. This resting period actually allows the moisture to redistribute, making the cake easier to trim and layer. Do not apply the syrup until the day you intend to assemble the cake to prevent the sponge from becoming overly saturated.
Why is glucose syrup necessary for the topping?
Glucose syrup acts as an interfering agent that prevents sugar molecules from bonding into crystals. This ensures the ganache remains smooth and flexible rather than becoming grainy or brittle over time. It also contributes a subtle sheen to the finish that is characteristic of high-end patisserie work.
Variations Worth Attempting
For a subtle shift in the flavor profile, you may replace the elderflower cordial with a high-quality rose water or orange blossom water. These botanical alternatives pair beautifully with the strawberry base but should be used sparingly, as their potency can easily overwhelm the delicate fruit notes. If you choose this path, consider reading about a strawberry poke cake to see how different infusions affect the moisture levels of the sponge.
A more textural variation involves incorporating a crunch element between the layers or on the edges of the cake. You can create a toasted almond or shortbread crumble to provide a necessary contrast to the soft crumb and creamy ganache. This addition respects the traditional principles of French pastry, where a balance of textures is as important as the balance of flavors.
If a smaller format is required, this recipe can be successfully halved and baked in two 8-inch square tins, though you must reduce the baking time by approximately five to seven minutes. Monitor the internal temperature of the sponge closely; it should reach 98°C when fully baked. This smaller version maintains the same sophisticated layering but serves a more intimate gathering.
Presentation and Service
When presenting this cake, the goal should be an understated elegance that highlights the quality of the ingredients. Serve each slice on a chilled porcelain plate to maintain the integrity of the buttercream and ganache. A single, perfectly formed strawberry half placed beside the slice can provide a visual cue to the flavors within. For those who enjoy a more communal dessert experience, a strawberry crunch cake approach to serving can offer a more relaxed but equally flavorful alternative.
To complement the elderflower and mint notes, consider serving a lightly sparkling wine or a chilled herbal tea alongside the cake. The effervescence of a Prosecco or the clean finish of a peppermint tea will cleanse the palate between bites of the rich ganache. This thoughtful pairing ensures that the complex layers of the cake are appreciated throughout the entire serving. Ensure the cake is sliced with a hot, clean blade to reveal the precise layers of fruit and sponge to your guests.
A Word Before You Slice
Mastering the Best Strawberry Sheet Cake is an achievement that demonstrates a true understanding of the small disciplines that define great baking. By respecting the temperature of your ingredients and the necessity of the reduction process, you have created a dessert that is as structurally sound as it is flavorful. This cake serves as a reminder that patience here is not a virtue—it is an instruction that leads to a superior result. It is my hope that this recipe finds a permanent place in your collection of cherished techniques.
As you continue to refine your skills, you may wish to revisit the basics with a strawberry shortcake radical recipe to see how these flavors behave in a different format. Every bake is an opportunity to practice the precision that makes French pastry so enduring. Please share your results and technical successes with our community of dedicated bakers on our social channels.