I remember the first time I saw a Red Velvet Cake sitting on my grandmother’s kitchen counter. Its color was so startlingly bright against her worn wooden table, a deep crimson that promised something truly special. She told me it was a cake for celebrations, the kind of treat that made a regular Sunday feel like a holiday. I still have her handwritten index card for this recipe, the edges soft and stained with vanilla and buttermilk.

This Red Velvet Cake is exactly how a vintage cake should be—tender, tangy, and subtly cocoa-flavored. It relies on the classic marriage of buttermilk and vinegar to create a crumb so soft it feels like velvet against your tongue. While many modern versions are overly sweet, this recipe balances the richness of the cream cheese frosting with a light, airy base that honors the traditions of Southern baking.
A Timeless Treasure from the Recipe Box
There is a specific kind of magic in baking a Red Velvet Cake from scratch. This isn’t just a chocolate cake with food coloring; it is a unique scientific wonder where the ingredients work together to create a texture unlike any other. The tiny hint of cocoa provides a sophisticated depth without being heavy, making it perfect for those who want something more interesting than plain vanilla.
You will love the way this cake fills your home with the scent of sugar and warmth. It is a humble showstopper that doesn’t need fancy techniques to impress your guests. Whether you are celebrating a milestone or just a quiet afternoon, this cake brings a sense of occasion to the table. It is reliable, honest, and deeply comforting, just like a well-loved quilt.
The small-batch nature of using 7-inch pans makes this feel intimate and manageable. It is just enough to share with family without leaving you with weeks of leftovers. Each slice is a reminder that the best things in life are often the ones we make with our own two hands, following paths laid down by the bakers before us. It is a heritage piece you will want to pass down yourself.
Print
Red Velvet Cake
- Total Time: 1 hour 55 mins
- Yield: 12 servings
- Diet: Vegetarian
Description
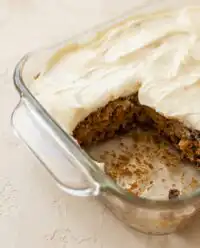
This classic Southern Red Velvet Cake features three tender layers of crimson sponge with a hint of cocoa, perfectly balanced by a silky cream cheese frosting. It is an elegant, vintage-inspired dessert that transforms any gathering into a special celebration.
Ingredients
- 2 1/2 cups all-purpose flour
- 1 1/2 cups granulated sugar
- 1 teaspoon baking soda
- 1 teaspoon cocoa powder
- 1/2 teaspoon salt
- 1 cup vegetable oil
- 2 large eggs, room temperature
- 1 cup buttermilk
- 1 teaspoon vanilla extract
- 1 teaspoon white vinegar
- 1–2 teaspoons red gel food coloring
- 1/2 cup unsalted butter, room temperature
- 8 ounces cream cheese, room temperature
- 4 cups powdered sugar
- 1 teaspoon vanilla extract (for frosting)
- Pinch of salt (for frosting)
Instructions
- Preheat your oven to 350°F (175°C). Spray three 7-inch round cake pans with nonstick spray and line the bottoms with parchment paper.
- In a large mixing bowl, whisk together the all-purpose flour, granulated sugar, baking soda, cocoa powder, and salt until smooth.
- Add the vegetable oil, room temperature eggs, buttermilk, vanilla extract, white vinegar, and red gel food coloring to the dry mixture. Whisk until the batter is smooth and the color is consistent.
- Divide the batter evenly between the three prepared pans. Bake for 30 minutes or until the tops spring back gently when touched.
- Allow the cakes to rest in their pans for 15 to 20 minutes, then turn them out onto a wire rack to cool completely to room temperature.
- In a stand mixer, whip the room temperature butter and cream cheese for 2 minutes until pale and fluffy.
- Add the powdered sugar in two batches, mixing on low speed initially then increasing to high. Stir in the vanilla and salt, then whip on medium for a few more minutes until silky.
- Level the cooled cake layers with a serrated knife. Stack with frosting between each layer, apply a thin crumb coat, chill for 20 minutes, then finish with the remaining frosting.
Notes
For the most professional finish, ensure your cake layers are completely cold—or even slightly chilled—before frosting to prevent the cream cheese from melting. If you want a more vibrant red, use a high-quality gel paste rather than liquid food coloring. Always use full-fat brick cream cheese rather than the spreadable kind from a tub for a stable frosting that holds its shape.
- Prep Time: 25 mins
- Cook Time: 30 mins
- Category: Dessert
- Method: Baking
- Cuisine: American
The Pantry Staples for a Perfect Crumb

To recreate this classic, we look to the staples found in any well-stocked vintage kitchen. Each ingredient plays a vital role in the delicate chemistry of the Red Velvet Cake.
- All-Purpose Flour: This provides the structure we need without the heaviness of bread flour. It keeps the layers light.
- Granulated Sugar: Sweetness is essential, but it also helps to tenderize the crumb as it bakes.
- Buttermilk: This is the heart of the recipe. It provides the tang and reacts with the leavening agents to create that signature lift.
- Cocoa Powder: We use just a small amount of regular cocoa. It isn’t meant to be a chocolate cake, but rather a hint of cocoa that interacts with the acidity.
- Vegetable Oil: Using oil instead of butter ensures the cake stays incredibly moist, even after a few days in the refrigerator.
- Red Gel Food Coloring: While the original cakes got their tint from a reaction between cocoa and acid, today we use gel for that vibrant, festive look.
- White Vinegar and Baking Soda: This duo creates the bubbles that help the cake rise, ensuring it is never dense or chewy.
- Cream Cheese and Butter: For the frosting, these must be at room temperature to whip into a cloud-like consistency.
The Baking Process
Step 1: Prepare the Foundation
Preheat your oven to 350°F (175°C). Prepare your three 7-inch round cake pans by spraying them with nonstick spray and lining the bottoms with parchment paper circles. This is a step Grandma never skipped to ensure a clean release every time.
Step 2: Whisk the Dry Ingredients
In a large, sturdy mixing bowl, whisk together the all-purpose flour, granulated sugar, baking soda, cocoa powder, and salt. Make sure there are no large lumps of cocoa, as you want a smooth, uniform dry base before the liquids are introduced.
Step 3: Combine the Wet Ingredients
Add the vegetable oil, room temperature eggs, buttermilk, vanilla extract, white vinegar, and the red gel food coloring to the dry mixture. Whisk everything together by hand or with a gentle mixer until the batter is smooth and the color is a beautiful, consistent crimson.
Step 4: Portion and Bake
Divide the batter evenly between your three prepared pans. Using a kitchen scale helps ensure each layer is the same height. Place them in the center of the oven and bake for about 30 minutes. You will know they are ready when the tops spring back gently under your finger.
Step 5: Cool the Layers
Allow the cakes to rest in their pans for about 15 to 20 minutes. This lets the structure set. Carefully turn them out onto a wire rack to cool completely to room temperature before you even think about frosting them.
Step 6: Prepare the Cream Cheese Frosting
In your stand mixer, whip the room temperature butter and cream cheese for about 2 minutes until very pale and fluffy. Add the powdered sugar in two batches, mixing low at first so you don’t end up in a sugar cloud, then increasing the speed.
Step 7: Final Frosting Touches
Stir in the vanilla and salt, then whip on medium speed for another few minutes. The frosting should look like silk. If it feels too soft, a quick chill in the fridge can help it firm up for easier spreading.
Step 8: Assemble the Cake
Level your cooled cake layers with a serrated knife. Stack them with a generous layer of frosting in between. Apply a thin crumb coat to the outside, chill for 20 minutes, then finish with the remaining frosting and any leftover cake crumbs for decoration.
Secrets from the Recipe Box

One of the most important things to remember is the temperature of your ingredients. Always ensure your eggs and buttermilk are at room temperature so they emulsify properly with the oil. If the liquids are too cold, the batter can break, and you won’t get that perfectly smooth finish. This is a common hurdle when making a velvet spray cake or any delicate layer cake.
When leveling your cakes, don’t throw away those domed tops. Crumble them up and use them to decorate the sides or top of the frosted cake. It adds a professional look without any extra tools. Also, if you find your red color is too dull, check the age of your cocoa powder; older cocoa can sometimes react differently with the acidity in the buttermilk. For more technical tips on achieving the perfect texture, you can also look at this guide for a classic red velvet cake.
Classic Variations to Try
While the classic cream cheese frosting is traditional, some families prefer a boiled flour frosting, also known as ermine frosting. This was very common in the early 20th century and offers a less sweet, very buttery alternative. If you want a deeper chocolate profile, you can increase the cocoa powder by a tablespoon, which moves the flavor closer to a devils food cake while keeping the red hue.
You can also turn this batter into cupcakes. Simply line a muffin tin and bake for about 18 to 22 minutes. For a festive holiday twist, try adding a half teaspoon of almond extract to the frosting; it provides a subtle, nutty aroma that pairs beautifully with the tangy cream cheese and the cocoa notes in the cake.
At the Table

I always suggest serving this cake on your favorite vintage pedestal. There is something about the height of a three-layer cake that demands a place of honor in the center of the table. Pair a thick slice with a cup of black coffee or a cold glass of milk to balance the sweetness of the frosting. It is a wonderful centerpiece for a red cake themed dessert spread.
For a truly nostalgic touch, serve the cake on floral china plates with small silver dessert forks. If you are serving this for a special dinner, a few fresh raspberries on the side can add a bright pop of tartness that complements the cream cheese beautifully. It is a dessert that invites people to linger at the table long after the meal is finished, sharing stories and making new memories together.
A Final Word on Baking Memories
Baking a Red Velvet Cake is a labor of love that rewards you with every tender bite. It is a recipe that has stood the test of time, bridging the gap between the kitchens of the past and the celebrations of today. Whether it’s for a birthday or a simple gathering, this cake is sure to become a favorite in your own recipe box. If you enjoy this style of baking, you might also like our valentines day cake for your next romantic occasion.
I would love to see how your cake turns out! Please share your baking photos with our community and let us know who you shared your first slice with. You can find more inspiration and vintage baking tips on our social pages below. Happy baking, from my kitchen to yours.


