I remember the soft rustle of Grandma’s apron as she reached for the small, blue glass bottle of rose water that sat like a jewel on her highest pantry shelf during every spring thaw.

This delicate Rose Water Layer Cake captures that same floral magic, blending a tender crumb with the whisper of a summer garden. It is a quiet masterpiece for those who appreciate the subtle art of vintage baking. Every slice tells a story of patience and refined flavor, offering a texture that feels as light as a spring breeze. We find that this particular Rose Water Layer Cake serves as a gentle bridge between the rustic comfort of home and the elegance of a formal gathering.
A Bite of Pure Nostalgia: Why This Rose Water Layer Cake is Special
Prep: 45 min · Serves: 12 · Difficulty: Medium
- Delicate floral notes in every single bite.
- Incredibly tender crumb from using sour cream.
- Elegant watercolor frosting creates a stunning visual.
- Timeless flavors that honor old-fashioned baking traditions.
- Perfectly balanced sweetness for a sophisticated dessert.
This Rose Water Layer Cake is the kind of dessert Grandma would serve in her Sunday best for the most cherished guests. We often find that this recipe reminds us of the classic vanilla butter cake we used to enjoy during garden parties. This is the cake that transforms a quiet afternoon into a cherished family memory.
Get The Full Cake Recipe
Print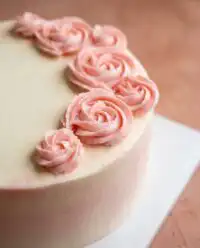
Rose Water Layer Cake
- Total Time: 1 hour 8 mins
- Yield: 12 servings
Description
Experience the timeless elegance of a vintage-inspired layer cake infused with delicate floral notes and finished with a silky, fragrant rose buttercream. This sophisticated dessert features a tender, airy crumb and a beautiful watercolor design perfect for any special occasion.
Ingredients
- 2 1/2 cups all-purpose flour
- 2 cups granulated sugar
- 1 cup unsalted butter, softened
- 1 cup sour cream, room temperature
- 6 large egg whites
- 1 tablespoon baking powder
- 1/2 teaspoon salt
- 1 tablespoon rose water
- 1/2 cup whole milk
- 1/2 cup water
- 1 cup unsalted butter (for frosting)
- 1/2 cup shortening (for frosting)
- 4 cups powdered sugar
- Sparkling sugar for garnish
Instructions
- Prepare the pans. Preheat oven to 350°F and grease three 8-inch cake pans, lining them with parchment paper.
- Cream the butter. Beat room temperature butter and sugar in a large bowl until the mixture is pale, fluffy, and light.
- Add wet ingredients. Mix in the sour cream and vanilla extract until the batter is smooth and creamy.
- Incorporate egg whites. Add the egg whites in two batches, scraping down the sides of the bowl to ensure a perfect emulsion.
- Combine dry ingredients. Whisk flour, baking powder, and salt together, then alternate adding to the batter with the milk and water.
- Bake the layers. Divide batter into prepared pans and bake for 21 to 23 minutes until a toothpick comes out with only a few moist crumbs.
- Cool the cake. Let layers sit on a wire rack for several minutes before turning them out to cool completely.
- Make the frosting. Beat butter and shortening until smooth, then gradually mix in powdered sugar and rose water until thick and glossy.
- Assemble the cake. Trim the tops of the cooled cake layers, then stack them with a generous spread of frosting between each.
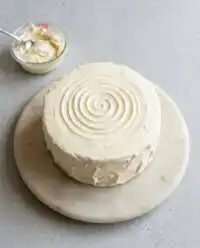
- Decorate the exterior. Apply the remaining frosting to the outside, using a pink tint for a watercolor effect and finishing with rosettes and sparkling sugar.
Notes
- Ensure all dairy and egg components reach room temperature to create a stable, airy emulsion.
- Use a kitchen scale to measure flour precisely, as excess flour is the primary cause of a dense, dry crumb.
- A crumb coat is highly recommended to seal the surface before applying the final watercolor frosting layer.
- If the frosting appears broken, gently warm the bowl over steam to restore a smooth, spreadable consistency.
- Test the strength of your rose water before adding the full amount, as different brands vary significantly in potency.
- Prep Time: 45 mins
- Cook Time: 23 mins
- Category: Dessert
- Method: Baking
- Cuisine: American Heritage
Gathering Your Ingredients
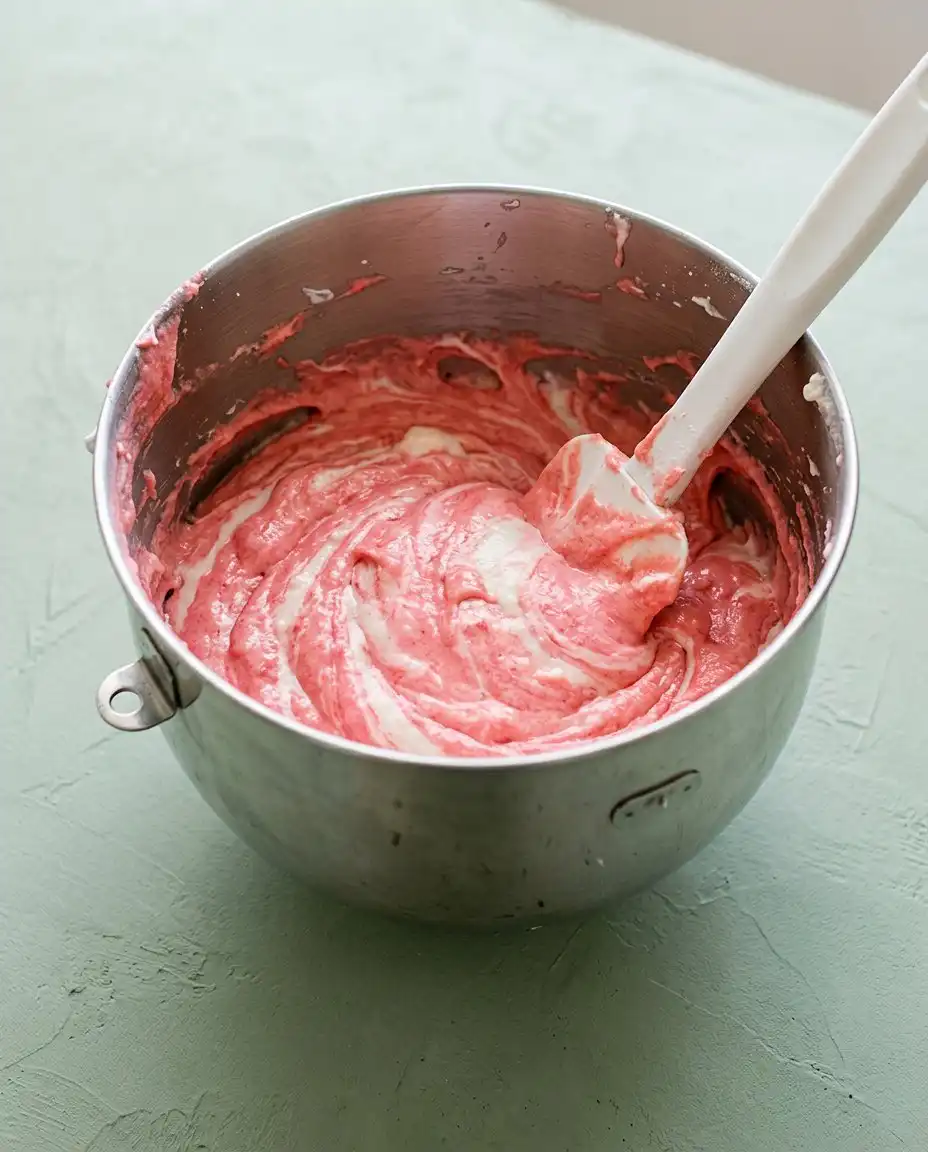
To begin your Rose Water Layer Cake, you must gather your supplies with the same care one would use to pick a bouquet from the garden. Each component plays a vital role in ensuring the final Rose Water Layer Cake has that signature lightness and fragrant appeal. We recommend using the best quality butter and fresh extracts to honor the heritage of this recipe.
- Rose Water: This provides the soul of the Rose Water Layer Cake, offering a floral aroma that is subtle rather than overpowering.
- Sour Cream: The secret to a moist Rose Water Layer Cake, adding fat and acidity to soften the flour proteins.
- Egg Whites: Using only whites ensures the Rose Water Layer Cake remains snowy white and maintains a delicate, airy structure.
- Unsalted Butter: This allows you to control the salt content precisely while providing a rich, creamy base for the batter.
- Baking Powder: A generous amount gives the Rose Water Layer Cake its necessary lift and ensures it does not become dense.
- Shortening: When used in the buttercream, it provides a stability that keeps your Rose Water Layer Cake looking beautiful in warmer weather.
- Sparkling Sugar: This adds a tiny crunch and a hint of magic to the finished decoration of your Rose Water Layer Cake.
| Ingredient | Why It Matters |
|---|---|
| Rose Water | Provides the essential floral essence and traditional aroma. |
| Sour Cream | Creates a tender, moist crumb that stays fresh longer. |
| Egg Whites | Keeps the cake layers light, airy, and beautifully pale. |
| Shortening | Stabilizes the buttercream for intricate piping and rosettes. |
| All Purpose Flour | Forms the foundation and reliable structure of the cake layers. |
The Baking Process
Step 1: Prepare the Foundations
Begin by tending to your pans with care, ensuring three 8-inch cake pans are fitted with parchment circles and greased well. Preheat your oven to 350°F (176°C) so the heat is steady and ready when your batter is finished. Taking this time to prepare ensures your Rose Water Layer Cake releases perfectly once it has finished baking.
Step 2: Cream the Butter and Sugar
In a large glass mixing bowl, combine the room temperature butter and granulated sugar with a steady hand. Cream them together for several minutes until the mixture looks pale, fluffy, and light as a cloud. This process incorporates air, which is the first step in giving your Rose Water Layer Cake its legendary height.
Step 3: Add the Liquid Gold
Slowly mix in the sour cream and the vanilla extract until the mixture is uniform and smooth. The sour cream should be at room temperature to ensure it integrates without causing the butter to seize. You will notice the batter for your Rose Water Layer Cake becoming thick and incredibly creamy at this stage.
Step 4: Incorporate the Egg Whites
Add the egg whites in two separate batches, mixing well after each addition to maintain the emulsion. It is important to scrape the sides of the bowl with a rubber spatula so every drop is included. This step builds the delicate structure that makes every Rose Water Layer Cake so ethereal on the tongue.
Step 5: Sift and Stir the Dry Goods
Whisk your flour, baking powder, and salt together in a separate bowl before you begin the final mixing. Alternate adding the dry ingredients with the milk and water mixture, starting and ending with the flour. This technique prevents overworking the gluten, which keeps your Rose Water Layer Cake soft rather than tough.
Step 6: Bake Your Rose Water Layer Cake to Perfection
Divide the pale batter evenly between your three prepared pans and place them in the center of the warm oven. Bake for about 21 to 23 minutes, watching for the moment a toothpick comes out with only a few moist crumbs. The kitchen will begin to smell of warm vanilla and sweet cream as the Rose Water Layer Cake reaches its peak.
Step 7: Cool with Patience
Allow the pans to sit on a wire rack for a few minutes before gently turning the cakes out to cool completely. Rushing this stage can lead to a broken Rose Water Layer Cake, so let the air circulate around the layers. Once they are cold to the touch, they will be ready for the fragrant buttercream.
Step 8: Prepare the Floral Buttercream
Beat the butter and shortening together until they are perfectly smooth and free of any lumps. Gradually add the powdered sugar and the precious rose water, watching as the frosting becomes thick and glossy. This Rose Water Layer Cake frosting should be stiff enough to hold a rosette but soft enough to spread like silk.
Step 9: Assemble the Layers
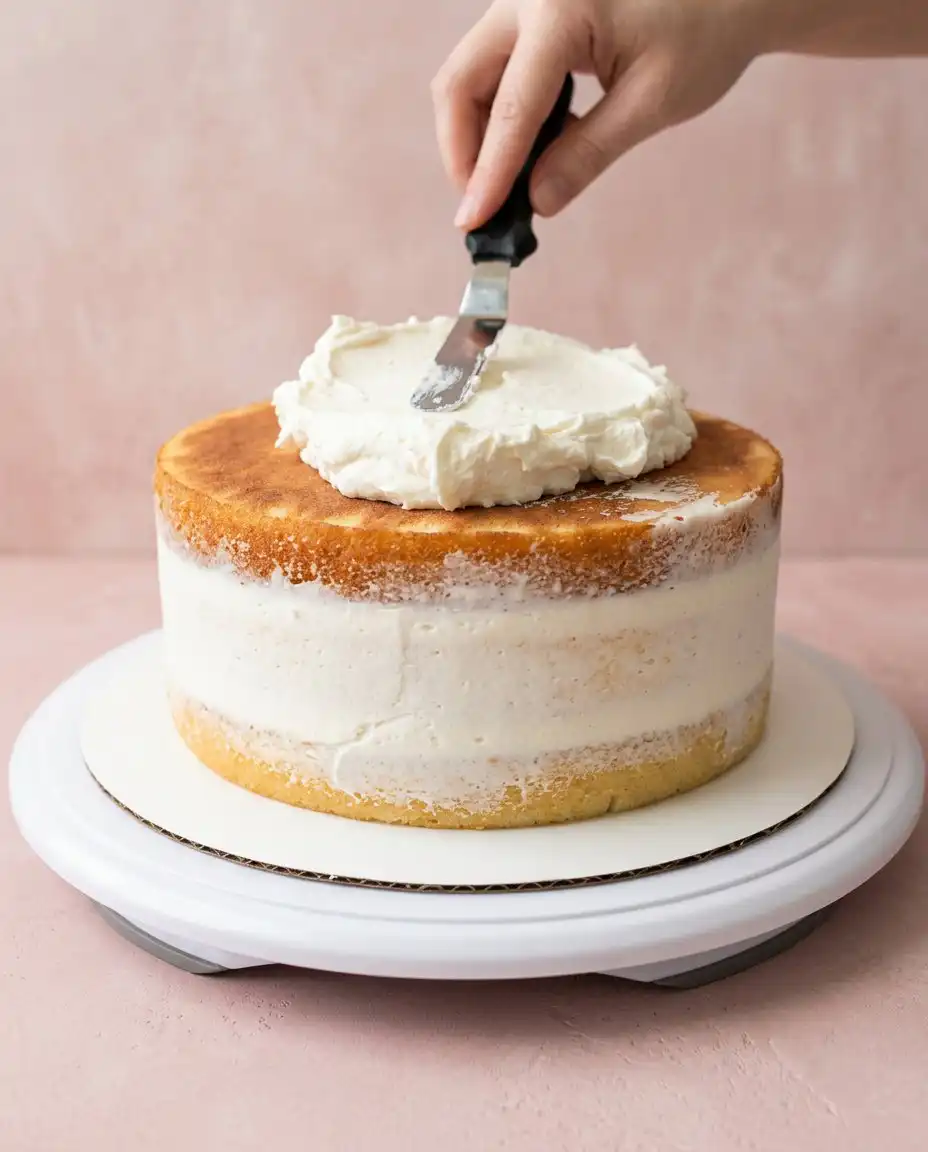
Trim any domes from the tops of your cakes with a serrated knife so they sit flat and true. Place the first layer on your stand and spread a generous cup of frosting across the surface before repeating with the remaining layers. This creates the beautiful tiered look that defines a classic Rose Water Layer Cake.
Step 10: Final Decorative Flourish
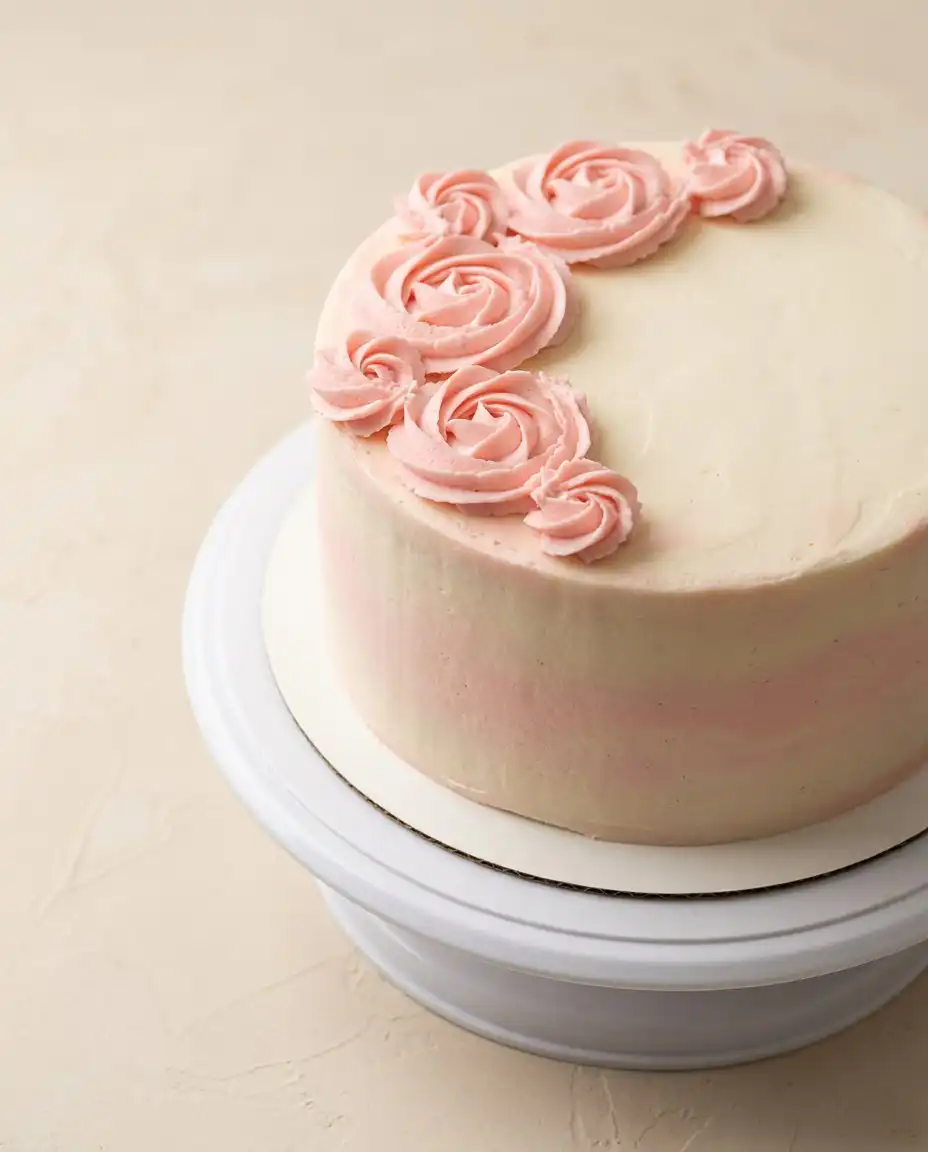
Apply the remaining frosting to the outside of the Rose Water Layer Cake, using a little pink tint for a watercolor effect. Pipe delicate rosettes around the top edge and finish with a dusting of sparkling sugar. Your Rose Water Layer Cake is now a centerpiece ready to be shared with those you love.
Secrets from the Recipe Box
Always ensure your ingredients are at true room temperature before you begin mixing your Rose Water Layer Cake. When butter and liquids are the same temperature, they form a stable emulsion that traps air more effectively. This leads to a much lighter crumb that resembles the classic vanilla layer cake from old handwritten recipe cards.
Measuring your flour by weight is the most reliable way to avoid a dry or heavy Rose Water Layer Cake. If you do not have a scale, fluff the flour with a spoon and level it off without packing it down into the cup. Excess flour is the most common reason why a Rose Water Layer Cake might turn out dense or crumbly.
If your buttercream looks curdled or broken during the mixing process, the butter was likely too cold to emulsify. You can fix this by warming the bowl gently over a pot of steaming water for a few seconds before continuing to beat. This small adjustment restores the smooth texture needed for a beautiful Rose Water Layer Cake.
When applying the frosting, a crumb coat is your best friend for a professional and tidy appearance. Spread a very thin layer of buttercream over the entire Rose Water Layer Cake and chill it for twenty minutes to seal in the crumbs. This provides a clean canvas for the final watercolor pink layer of your Rose Water Layer Cake.
Rose water can vary in strength depending on the brand you find at the market or apothecary. Start with a smaller amount and taste the frosting as you go to avoid a flavor that is too strong. Learning how to achieve a smooth finish on layer cakes will help you present this floral treat with pride.
Do not overbake the layers, as floral flavors can become muted if the cake is allowed to brown too much. Check the oven a few minutes before the timer goes off to ensure the Rose Water Layer Cake stays pale and tender. A perfectly baked layer will feel springy to the touch and just barely pull away from the sides of the tin.
Frequently Asked Questions
Can I use rose syrup instead of rose water in this recipe?
Rose syrup contains a high amount of sugar and water, which can alter the delicate chemistry of your Rose Water Layer Cake batter. It is best to stick with pure rose water to ensure the flavor is concentrated without adding extra sweetness. If you must use syrup, reduce the sugar in the frosting and monitor the consistency closely.
How should I store the leftover Rose Water Layer Cake?
You should keep the Rose Water Layer Cake in an airtight container or under a cake dome at room temperature for up to two days. For longer storage, you can place it in the refrigerator for up to five days, though the cold can slightly firm up the butter. Always allow the Rose Water Layer Cake to return to room temperature before serving to restore its soft texture.
Can I make the Rose Water Layer Cake layers in advance?
The cake layers can be baked, cooled, and wrapped tightly in plastic wrap up to two days before you plan to assemble the Rose Water Layer Cake. You can also freeze the layers for up to a month if they are wrapped properly in foil. Thaw them in the refrigerator overnight while still wrapped to prevent condensation from making the Rose Water Layer Cake soggy.
What if I cannot find shortening for the buttercream?
You can replace the shortening with an equal amount of unsalted butter if you prefer an all-butter frosting for your Rose Water Layer Cake. Be aware that an all-butter frosting will be softer and more prone to melting in warm environments. Keep the Rose Water Layer Cake in a cool place until you are ready to present it to your guests.
Why did my Rose Water Layer Cake sink in the middle?
A Rose Water Layer Cake often sinks if the oven door is opened too early or if the baking powder has lost its potency. Ensure your leavening agents are fresh and keep the oven door closed until the final few minutes of baking. Also, avoid over-beating the batter after adding the flour, as excess air can cause a rapid rise followed by a collapse.
Is there a substitute for sour cream in this Rose Water Layer Cake?
Full-fat Greek yogurt is a wonderful substitute for sour cream in a Rose Water Layer Cake if you have it on hand. It provides the same acidity and moisture that helps create that signature tender crumb. We do not recommend using low-fat versions, as the fat content is necessary for the Rose Water Layer Cake to remain moist.
How can I get the watercolor effect on the frosting?
Apply a base layer of ivory frosting to the Rose Water Layer Cake and then dot small amounts of pink frosting around the sides. Use a flat spatula to smooth the colors together with a single, long stroke around the cake. This creates the soft, blended look that makes the Rose Water Layer Cake look like a hand-painted heirloom.
Through the Seasons
For a bright and summery twist, you might consider adding a layer of fresh berries between the Rose Water Layer Cake rounds. A raspberry white chocolate cake often uses similar logic, where the tartness of fruit balances the sweet floral notes. Simply press fresh raspberries into the frosting layer before placing the next cake on top.
If you prefer a more nutty profile, finely ground pistachios can be folded into the batter of your Rose Water Layer Cake. This variation is quite traditional in many heritage recipes and adds a beautiful green hue to the slice. The earthy taste of the nut provides a lovely contrast to the perfume of the rose water.
During the colder months, a hint of cardamom added to the dry ingredients can bring a warm spice to your Rose Water Layer Cake. This creates a more complex flavor profile that feels cozy and inviting for a holiday dinner. You can find more inspiration for spices in our floral cake archives to suit any time of year.
At the Table
When it comes time to serve your Rose Water Layer Cake, we suggest using your finest bone china and silver forks. This cake is an elegant affair and deserves a presentation that reflects the care you put into its creation. A simple sprig of fresh mint or a few organic rose petals scattered on the plate can provide a beautiful finish for each slice of Rose Water Layer Cake.
This Rose Water Layer Cake pairs beautifully with a hot pot of Earl Grey or a delicate jasmine tea. The tannins in the tea provide a clean contrast to the creamy buttercream and the floral notes of the cake. For a special celebration, a glass of sparkling cider or a light white wine can also complement the subtle flavors of your floral cake creation.
We find that serving this Rose Water Layer Cake during a mid-afternoon gathering allows the sunlight to catch the sparkling sugar on the rosettes. It is a dessert meant for slow conversation and meaningful connection with family. Whether it is a birthday or a simple Sunday, the Rose Water Layer Cake brings a sense of occasion to the table.
Before You Close the Recipe Box
Baking this Rose Water Layer Cake is an act of love that honors the quiet traditions of the past. It requires patience and a gentle touch, but the reward is a dessert that lingers in the memory long after the final crumb is gone. We hope this rose cake brings as much joy to your home as it has to our own kitchen over the years.
There is something truly special about sharing a handmade Rose Water Layer Cake with the people who matter most. It reminds us that the old ways of baking are still the best ways to show we care. We invite you to take your time, enjoy the process, and let the scent of roses fill your home as you bring this Rose Water Layer Cake to life.
We would love to see how your Rose Water Layer Cake turned out and hear about the memories you made while baking it. Please join our community on Pinterest or follow our journey on Facebook for more vintage inspiration. You can also find us sharing quiet moments in the kitchen on TikTok as we continue to preserve these heritage recipes together.