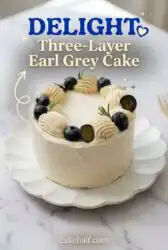
Scaling down to a six-inch Three-Layer Earl Grey Cake proves that grand architectural drama and deep botanical flavor do not require a wedding guest list to justify the effort.

You are not just making a dessert; you are engineering a sensory experience that balances the tannins of bergamot with the bright acidity of citrus. This Three-Layer Earl Grey Cake uses a concentrated tea syrup to ensure the flavor is structural, not just a suggestion. Most tea cakes whisper, but this one speaks clearly because we control the moisture and the extraction perfectly. Precision with your kitchen scale will transform these layers from standard sponges into a cohesive masterpiece of texture and aroma.
What Makes This Three-Layer Earl Grey Cake Different
Prep: 180 min · Serves: 12 · Difficulty: Advanced
- Concentrated tea syrup provides intense botanical depth.
- Six-inch layers create a stunning vertical profile.
- Ermine-style buttercream offers a silky finish.
- Fresh orange zest cuts through rich cream cheese.
- Small-batch logic ensures perfectly moist cake crumbs.
Small batch, full conviction.
Get The Full Cake Recipe
Print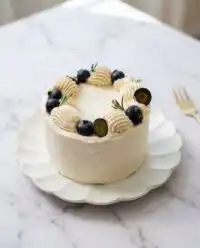
Three-Layer Earl Grey Cake
- Total Time: 205 mins
- Yield: 12 servings
- Diet: Vegetarian
Description
This refined three-layer Earl Grey cake features delicate sponge layers infused with concentrated bergamot tea, paired with a tangy orange cream cheese frosting. It is a sophisticated, small-batch dessert designed for those who appreciate the complex balance of floral notes and bright citrus acidity.
Ingredients
- 1 cup whole milk
- 3 tablespoons loose leaf Earl Grey tea
- 1/2 cup boiling water
- 1/2 cup granulated sugar (for syrup)
- 1 3/4 cups cake flour
- 1 1/2 teaspoons baking powder
- 1/2 teaspoon salt
- 3/4 cup unsalted butter, softened
- 1 1/4 cups granulated sugar (for batter)
- 3 large eggs, room temperature
- 1/4 cup sour cream
- 1 teaspoon vanilla extract
- 2 tablespoons fresh orange zest
- 1 tablespoon orange juice
- 8 ounces cream cheese, softened
- 4 tablespoons all-purpose flour
- 1 1/2 cups whole milk (for pudding base)
- 3/4 cup granulated sugar (for pudding base)
- 4 ounces white chocolate
- 2 tablespoons heavy cream
Instructions
- Infuse the tea. Simmer milk and tea leaves for twenty minutes, then strain and cool; separately, boil water and tea to create a thick sugar syrup.
- Prepare the pans. Set oven to 160°C (325°F), line three 6-inch tins with parchment, and sift dry ingredients together.
- Cream butter and sugar. Beat butter with sugar and cooled syrup until pale and aerated, then add eggs one by one until emulsified.
- Combine wet ingredients. Whisk infused milk with sour cream and vanilla, then alternate adding dry and wet mixtures to the batter.
- Bake the layers. Divide batter equally by weight into pans and bake for 20-25 minutes until springy to the touch.
- Cook pudding base. Whisk flour, sugar, salt, and milk over medium heat until thick, then strain and chill with plastic wrap covering the surface.
- Finish the frosting. Beat butter until fluffy, incorporate the cooled pudding base, then fold in cream cheese, orange juice, and zest.
- Assemble the cake. Level the cakes, stack with layers of frosting, chill for stability, and finish with a white chocolate ganache drip.
Notes
- Ensure all dairy and egg components are at room temperature to prevent the emulsion from breaking during mixing.
- Use a digital kitchen scale to divide the batter equally across the three tins for perfectly uniform layers.
- Keep the pudding base covered with plastic wrap directly against the surface to prevent a skin from forming while it cools.
- Chill the cake after applying the crumb coat to ensure the final layer of frosting applies smoothly without loose crumbs.
- Avoid over-steeping the tea leaves to prevent extracting bitter tannins that can compromise the delicate floral flavor.
- Prep Time: 180 mins
- Cook Time: 25 mins
- Category: Dessert
- Method: Baking
- Cuisine: Modern Fusion
Build Your Mise en Place
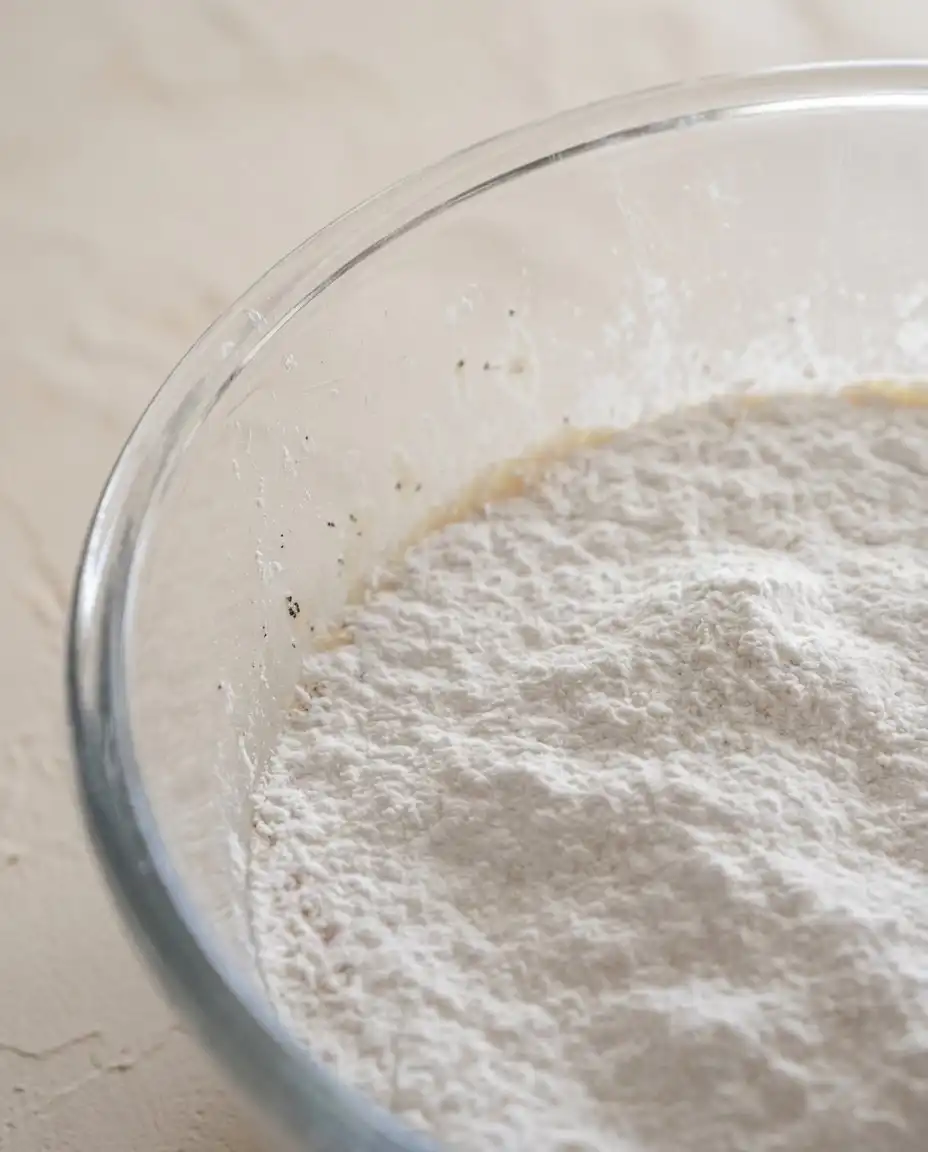
Your success depends on the quality of the infusion and the temperature of your fats. We are using a dual-infusion method, pulling flavor into both the milk and a dedicated sugar syrup to maximize the bergamot presence without compromising the crumb structure.
- Loose Leaf Earl Grey: Choose a high-quality tea where the bergamot oil is prominent and fragrant.
- Sour Cream: This provides the necessary acidity to keep the gluten structure tender and rich.
- Orange Zest: The essential rebel swap that brightens the heavy tannins of the tea leaves.
- Unsalted Butter: High-quality fat acts as the carrier for every botanical note in the batter.
- Granulated Sugar: This creates the structural syrup that keeps the cake layers moist for days.
- Cream Cheese: Adding this to a pudding-base buttercream provides a tangy, stable finish.
| Ingredient | Why It Matters |
|---|---|
| Earl Grey Syrup | Concentrates flavor without adding excess liquid volume. |
| Infused Milk | Distributes the tea aroma evenly through the fat particles. |
| Orange Juice | Softens the sweetness and provides a sharp, refreshing counterpoint. |
| Cake Flour | Provides the delicate protein structure needed for a three-tier height. |
| White Chocolate | Creates a professional-grade drip that sets with a clean snap. |
The Method
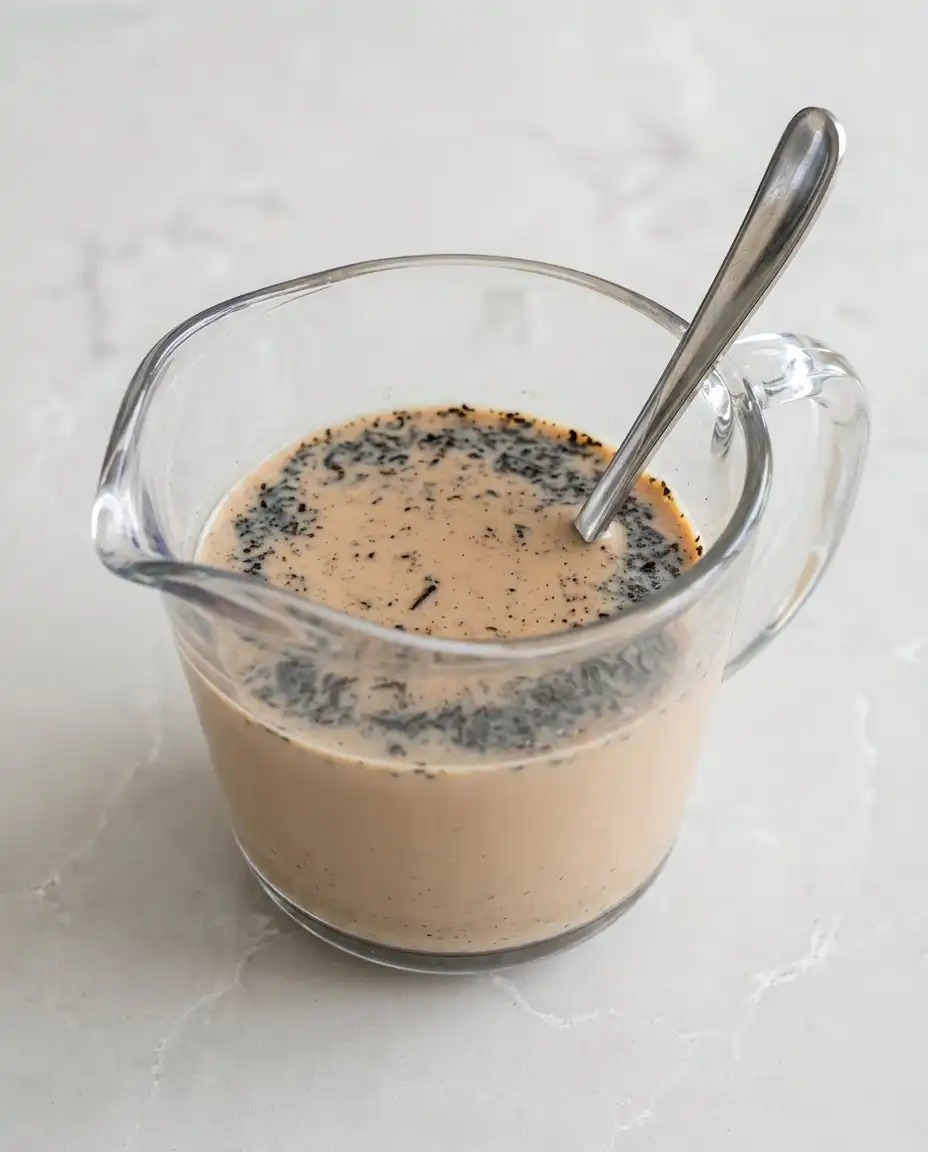
Step 1: Execute the Dual Tea Infusion
Begin by bringing your milk to a gentle simmer in a heavy-bottomed saucepan until small bubbles form at the edges. Remove from heat, add the loose leaf tea, and cover with a plate to trap the volatile bergamot oils for twenty minutes. This concentrated liquid must cool to room temperature before it touches your batter to prevent curdling. Simultaneously, boil the water and tea for five minutes before straining the liquid into a saucepan with sugar to create a thick, botanical syrup.
Step 2: Prepare the Architectural Foundation
Set your oven to 160°C (325°F) for a fan-assisted bake, or 175°C (350°F) for conventional heat, ensuring the rack is centered. Line your three six-inch tins with parchment paper and grease the sides with softened butter to ensure a clean release later. Small-batch baking requires this precision because the high surface-to-volume ratio makes the edges vulnerable to over-browning. Sift your dry ingredients—flour, baking powder, and salt—into a medium bowl to aerate the mixture and remove any stubborn lumps.
Step 3: Mix the Three-Layer Earl Grey Cake Batter
Cream your softened butter with the granulated sugar and that cooled earl grey syrup until the mixture looks pale and significantly aerated. Add your room-temperature eggs one at a time, allowing the paddle attachment to fully emulsify the fats before adding the next one. You will notice the batter change from a dense yellow to a light, mousse-like consistency as the air incorporates. Scrape the bowl often to ensure no pockets of unmixed butter remain at the bottom, which could cause dense streaks.
Step 4: Integrate the Botanical Liquids
In a separate jug, whisk together your infused milk, sour cream, and vanilla extract until the mixture is uniform and smooth. Alternate adding your dry ingredients and this wet mixture to the butter base, starting and finishing with the flour to protect the emulsion. Mix for no more than fifteen seconds after each addition; overworking the batter at this stage will develop too much gluten. The finished batter should look thick, velvety, and carry a distinct grayish-tan hue from the tea infusion.
Step 5: Bake for Structural Integrity
Divide the batter equally among the three tins, using your kitchen scale to ensure each layer is exactly the same weight. Bake for twenty to twenty-five minutes, or until a skewer inserted into the center comes out with just a few moist crumbs clinging to it. The tops should be springy to the touch and just barely beginning to pull away from the sides of the tins. Allow the cakes to rest in their pans for ten minutes to set their structure before flipping them onto a wire rack.
Step 6: Construct the Pudding Buttercream Base
Combine the flour, sugar, salt, and milk in a saucepan over medium-high heat, whisking constantly to prevent the bottom from scorching. This stage requires patience, as it takes about fifteen minutes for the mixture to thicken into a gloopy, pastry-cream-like consistency. Cook for an additional three minutes once thick to ensure the raw flour taste is completely neutralized by the heat. Strain this through a fine-mesh sieve onto a plate and cover it with plastic wrap touching the surface to prevent a skin from forming.
Step 7: Finalize the Orange Cream Cheese Frosting
Beat your butter for five full minutes until it is incredibly pale and fluffy, then add the cooled pudding base one spoonful at a time. Once the mixture is silky and stable, fold in the room-temperature cream cheese, orange juice, and fresh zest for that bright citrus punch. The frosting should be sturdy enough to hold its shape but soft enough to spread without tearing the delicate cake layers. If it feels too soft, chill it for ten minutes before proceeding to the assembly phase.
Step 8: Assemble and Apply the Ganache Drip
Level your cake tops with a serrated knife, saving the off-cuts as a proof-of-concept snack for the baker. Stack the layers with generous amounts of buttercream in between, then apply a thin crumb coat and chill for thirty minutes to lock in moisture. Melt your white chocolate and heavy cream together until smooth, then let it sit for ten minutes to reach the perfect pouring viscosity. Apply the drip to the chilled cake, allowing it to run down the sides in deliberate, controlled streaks before finishing with piped rosettes.
Notes from Testing
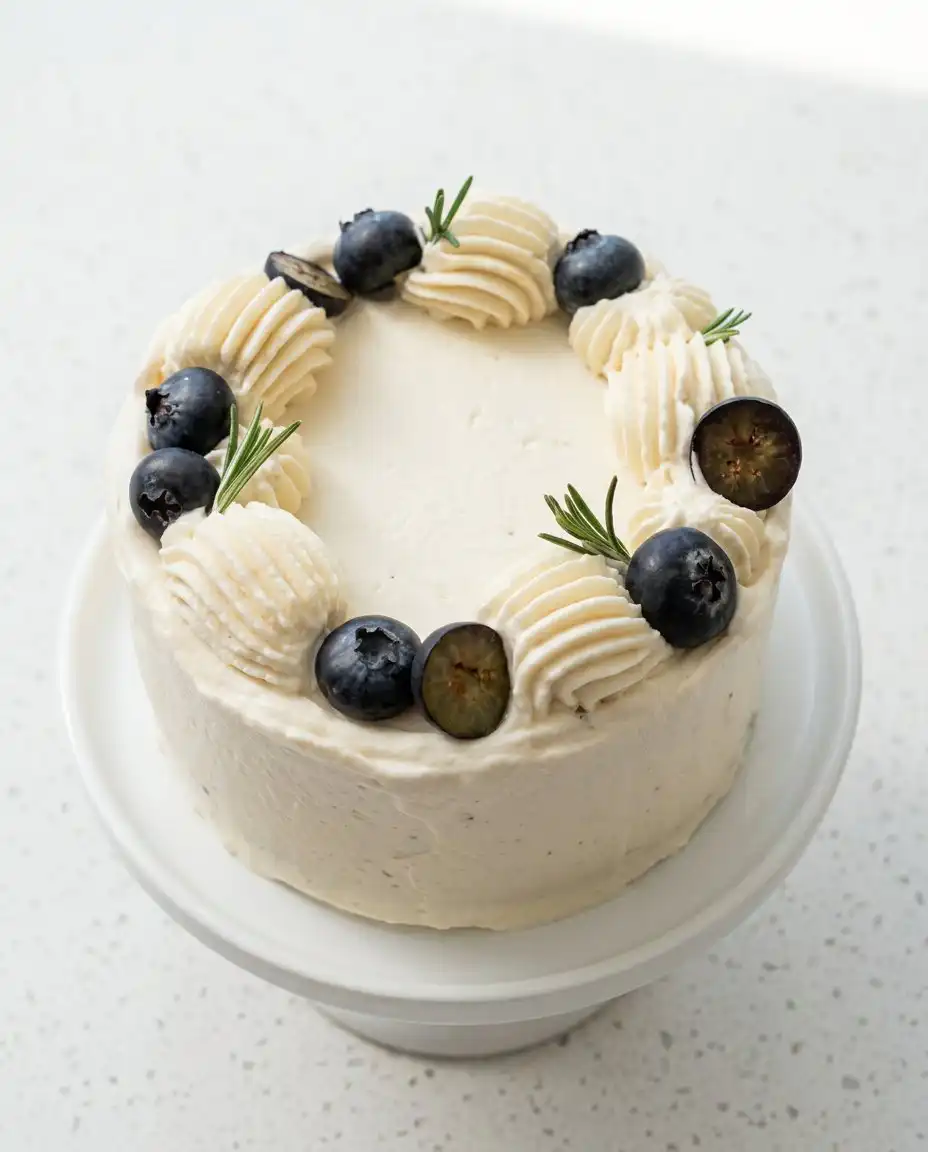
Temperature is your greatest ally and your worst enemy when working with this specific botanical profile. If your infused milk or syrup is even slightly warm when it hits the butter, the emulsion will break, leading to a greasy and dense crumb. Always use a digital thermometer to ensure your liquids have returned to 21°C (70°F) before mixing them into the batter. This attention to detail is what separates a professional classic vanilla butter cake texture from a dense home-baked version.
If your buttercream appears curdled or lumpy after adding the pudding base, it is usually a temperature mismatch between the fat and the flour mixture. You can fix this by gently warming the bottom of the mixing bowl with a hair dryer for ten seconds while the mixer is running on low. This slightly melts the butter just enough to allow the pudding base to emulsify into a perfectly smooth, velvet-like consistency. Precision in temperature is as vital as how to properly measure ingredients by weight when dealing with these complex fats.
Loose leaf tea is non-negotiable for this recipe because the surface area of fannings found in tea bags releases too many bitter tannins. When you steep the tea in milk, avoid squeezing the leaves during the straining process, as this releases the astringent compounds you want to avoid. A gentle stir is all you need to get the flavor without the bitterness that can ruin a delicate sponge. High-quality tea leaves provide a nuanced bergamot flavor that lingers on the palate without being overwhelming.
Your kitchen scale is a liberation device that removes the guesswork from small-batch baking, especially when dividing batter between three tins. Even a ten-gram difference between layers can result in uneven baking times, causing one layer to be dry while another is undercooked. Weigh your empty mixing bowl before you start, then weigh the full bowl at the end to calculate the exact amount of batter per tin. This ensures every layer reaches the same height and moisture level simultaneously.
Oven calibration varies wildly, so do not trust the dial on your appliance without a secondary thermometer inside. For these small six-inch rounds, start checking for doneness at the eighteen-minute mark to prevent the outer edges from becoming tough. The center should still have a very slight wobble when the pan is nudged, which will firm up as the cake cools on the wire rack. Over-baking even by two minutes can sap the floral moisture we worked so hard to build into the batter.
Frequently Asked Questions
Can I use Earl Grey tea bags instead of loose leaf tea?
While you can use tea bags, the flavor will be less nuanced and potentially more bitter due to the smaller leaf size. Loose leaf tea provides a higher concentration of bergamot oil and a cleaner botanical finish. If you must use bags, double the quantity and do not squeeze them when straining.
Why does this recipe use a pudding-based buttercream?
The Ermine or pudding-based buttercream is less sweet than American buttercream and has a silkier texture that doesn’t overwhelm the tea flavor. It is also more stable in warmer temperatures because the flour base provides a structural network for the butter. This makes it ideal for the height of a three-layer construction.
How should I store this cake to keep it moist?
The cake is best stored at room temperature in an airtight container for up to two days. If you must refrigerate it, wrap the entire cake or individual slices in plastic wrap to prevent the fridge from drying out the crumb. Always bring the cake back to room temperature for thirty minutes before serving for the best texture.
My ganache drip is too runny, how do I fix it?
If the ganache is running all the way to the bottom of the cake, it is either too warm or the cake isn’t cold enough. Let the ganache sit for another five minutes to thicken, and ensure your cake has been in the fridge for at least an hour. You can also add a small amount of melted chocolate to the mixture to increase its viscosity.
Can I bake this as two eight-inch layers instead of three six-inch layers?
Yes, this batter will fit perfectly into two eight-inch round tins if you prefer a wider, shorter cake. You will need to increase the baking time to approximately twenty-eight to thirty-two minutes. Keep a close eye on the center of the cake, as the larger surface area can lead to uneven baking if the oven has hot spots.
Is the homemade earl grey syrup absolutely necessary?
The syrup is the secret to the intense tea flavor without adding too much liquid, which would ruin the cake’s structure. If you skip it, you must add an extra 30 grams of granulated sugar to maintain the correct sweetness level. However, the botanical depth will be significantly less impressive without this concentrated infusion.
Rebel Swaps
If you want to lean into a more traditional profile, you can swap the orange zest for lemon zest and use a honey-based syrup instead. The honey complements the bergamot beautifully, creating a profile reminiscent of a London Fog latte in cake form. This variation pairs exceptionally well with a triple chocolate layer cake if you are serving a dessert spread for a larger gathering. Ensure the honey is a light, floral variety like clover so it does not compete with the tea.
For an even more experimental approach, try replacing the white chocolate drip with a dark chocolate ganache infused with a pinch of sea salt. The bitterness of the dark chocolate provides a grounding element that balances the floral sweetness of the tea and the tang of the cream cheese. This change transforms the cake from a light afternoon tea treat into a sophisticated, moody evening dessert. You can find similar flavor balancing techniques in our classic vanilla layer cake guide for advanced decorators.
Those who prefer a lighter texture can omit the cream cheese and stick to a pure Ermine buttercream with extra vanilla bean. This results in a cloud-like frosting that highlights the bergamot without the heavy richness of the cheese. It is a fantastic option for summer garden parties where a lighter, more refreshing finish is desired. Regardless of the swap you choose, remember that the recipe is a starting point and you are the variable.
Before You Slice
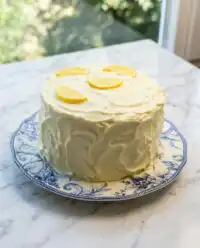
This Three-Layer Earl Grey Cake is an architectural feat that deserves a moment of appreciation before the first cut. Serve it on a simple white pedestal to let the watercolor frosting and the white chocolate drip remain the focal point. The contrast between the botanical interior and the bright orange zest in the frosting is best appreciated when the cake is sliced into thin, tall wedges. For a truly immersive experience, pair each slice with a hot cup of the same tea used in the batter.
If you are hosting a formal gathering, consider plating each slice with a small dollop of lightly sweetened whipped cream and a single strip of candied orange peel. The added creaminess of the whipped topping softens the tannins of the tea, making the whole experience feel even more luxurious. You might find inspiration for your next event by browsing our three layer italian cream cake story for more presentation ideas. Make sure your dessert forks are chilled to keep the buttercream stable during the tasting.
For a more casual afternoon, simply place the cake in the center of the table and let guests help themselves to thick slabs. The structure of this cake is sturdy enough to hold up even if it isn’t perfectly sliced, making it a great option for family style service. The visual drama of the three layers provides all the decoration you really need for a memorable afternoon. Just remember that the cake is best eaten at room temperature to allow the butter in the layers to soften completely.
What You Just Proved
By finishing this Three-Layer Earl Grey Cake, you have moved beyond basic baking into the realm of flavor engineering. You successfully balanced the complex chemistry of tea infusions with the precision required for a stable three-tier structure. This process proves that small-batch baking is not about making less, but about making every single bite mean more. The combination of the tangy orange cream cheese and the floral bergamot is a testament to your willingness to experiment with bold flavor profiles.
Take this technique and apply it to your future projects, knowing that the rules of baking are simply a foundation for your own creativity. Whether you stick to this recipe or use it as a springboard for your next rebel swap, the skills you have honed here will serve you well. For more innovative ideas on how to layer your desserts for maximum impact, visit our classic vanilla bean layer cake story for further guidance. The kitchen is your laboratory, and you are the innovator.
Share your botanical creations with us on our social channels and join our community of rebellious bakers. We love seeing how you take these recipes and make them your own. Follow us on Pinterest and Facebook for daily inspiration and more small-batch logic. Your journey into advanced pastry innovation is just beginning, and we are here to support every experiment you conduct.