A quiet kitchen in the early morning light always feels like a sanctuary, especially when flour drifts softly through the air and a tin measuring cup rests on the worn counter.

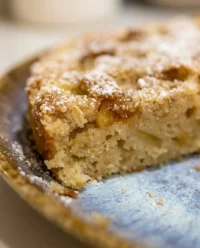
Sitting quietly by the oven as the warm scent of baking batter begins to fill the room is a simple pleasure that connects us to generations of bakers. This Classic Vanilla Layer Cake represents the very heart of traditional baking, offering a tender crumb that feels like a warm embrace from the past. Rather than relying on modern shortcuts or flashy decorations, we find beauty in the unhurried process of creaming butter and scraping real vanilla beans.
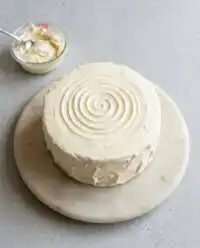
Grandmother always believed that the finest desserts required patience, and this recipe honors that philosophy in every single step. We gather honest pantry staples to construct three beautiful, soft layers that sandwich a rich, cooked custard filling. Wrapping the entire dessert in a velvety white chocolate frosting creates a centerpiece worthy of Sunday dinners and quiet family milestones alike.
Taking the time to bake from scratch is not about showing off, but rather about creating a physical memory that guests can share at the table. When you slice into these delicate white layers, you are offering more than just cake; you are sharing a tradition of care. Let the kitchen grow warm, let the flour dust your apron, and let us begin the slow, rewarding journey of making this classic cake.
A Bite of Pure Nostalgia with Classic Vanilla Layer Cake
Prep: 60 min · Serves: 12 · Difficulty: Medium
- Delicate cake layers offer a tender and soft texture.
- Rich cooked vanilla custard brings deep historical character.
- Smooth white chocolate frosting adds a beautiful modern touch.
- Traditional baking steps offer a deeply satisfying kitchen ritual.
- Elegant tall layers hold together beautifully for holiday celebrations.
This classic dessert is the heirloom bake that my family gathers to enjoy every autumn harvest, standing as our favorite vanilla cake recipe of all time.
Get The Full Cake Recipe
Print
Classic Vanilla Layer Cake
- Total Time: 3 hours 45 mins
- Yield: 12 servings
Description
This timeless three-layer vanilla cake features a tender, buttery crumb and a rich vanilla bean custard filling. Finished with a velvety white chocolate buttercream, it is the perfect centerpiece for cherished family milestones.
Ingredients
- All-purpose flour
- Baking powder
- Fine sea salt
- Unsalted butter
- Granulated sugar
- Vanilla bean paste
- Almond extract
- Egg whites
- Whole milk
- Vegetable oil
- Heavy cream
- Cornstarch
- Egg yolks
- Sweetened condensed milk
- White chocolate
Instructions
- Prepare cake pans. Preheat your oven to 350°F (170°C) and grease three 9-inch cake pans, lining the bottoms with parchment paper.
- Cream butter mixture. Whisk dry ingredients in a bowl, then cream the butter and sugar in a mixer for 4-5 minutes until fluffy.
- Incorporate flavorings. Add vanilla bean paste and almond extract to the butter, then gradually beat in room temperature egg whites.
- Combine the batter. Alternate adding dry ingredients and a mixture of milk and oil to the butter, mixing just until incorporated.
- Bake the layers. Divide batter into pans and bake for 30 to 34 minutes until a toothpick inserted into the center comes out clean.
- Cool the layers. Let the cakes rest in the pans for ten minutes before inverting them onto wire racks to cool completely.
- Prepare custard base. Simmer milk, cream, salt, and vanilla bean paste in a heavy saucepan over medium heat.
- Temper the yolks. Whisk sugar, cornstarch, and egg yolks, then slowly ladle in hot milk before returning everything to the saucepan to thicken.
- Finish pastry cream. Stir in cold butter, strain the custard through a sieve into a dish, and chill for at least two hours with plastic wrap.
- Assemble the cake. Whip butter, vanilla, salt, condensed milk, and white chocolate to form the frosting; fill the layers with chilled custard and frost.
Notes
- Ensure all dairy and egg ingredients are at room temperature to avoid curdling during mixing.
- Use a digital kitchen scale to measure flour for the most consistent crumb structure.
- If the custard develops lumps, passing it through a fine-mesh sieve is the most effective fix.
- Wait until the cake layers are completely cold before assembly to prevent the frosting from melting.
- Prep Time: 60 mins
- Cook Time: 45 mins
- Category: Dessert
- Method: Baking
- Cuisine: Traditional American
From the Kitchen Shelf

Gathering these quiet pantry staples is the first step in our unhurried baking ritual. Selecting high-quality ingredients guarantees that the pure, nostalgic flavor of vanilla shines through in every single slice.
- Vanilla bean paste: This fragrant ingredient supplies the tiny, dark flecks and the deep, aromatic flavor that defines our delicate cake layers.
- Egg whites: Whacking these carefully at room temperature provides the light, airy structure that keeps the crumb wonderfully soft and pale.
- Unsalted butter: Using high-grade fat provides the rich, traditional mouthfeel and fine structure that modern oils simply cannot replicate.
- Whole milk: Adding this liquid helps hydrate the flour gently, producing a tender crumb that melts in your mouth.
- Sweetened condensed milk: Pouring this rich milk into the frosting creates an incredibly smooth, glossy texture without requiring mounds of powdered sugar.
- White chocolate: Melting real chocolate into the buttercream adds a subtle depth of flavor and helps stabilize the frosting naturally.
| Ingredient | Why It Matters |
|---|---|
| Vanilla bean paste | Supplies deep floral aroma and beautiful dark flecks |
| Egg whites | Provides structure while keeping the crumb delicate |
| Unsalted butter | Delivers the classic rich mouthfeel of traditional baking |
| Whole milk | Creates a tender, soft texture throughout the layers |
| White chocolate | Stabilizes the buttercream while adding modern richness |
Step by Step in Teresa’s Kitchen

Step 1: Prepare the Cake Pans
Preheat your oven to 350°F (170°C) with the rack placed in the center position. Grease three 9-inch (23 cm) cake pans with a gentle coat of nonstick spray, then line the bottom of each with a round of parchment paper. Smooth another light layer of grease over the paper to make sure the layers release cleanly after baking.
Step 2: Whisk the Dry Ingredients and Cream the Butter
Combine the all-purpose flour, baking powder, and fine sea salt in a medium bowl, whisking gently to distribute the leavening evenly. In the bowl of your electric mixer, cream the room temperature butter and granulated sugar together using the paddle attachment. Allow this mixture to beat on medium speed for four to five minutes until it turns light, pale, and fluffy.
Step 3: Incorporate the Extracts and Egg Whites
Pour the fragrant vanilla bean paste and a touch of almond extract into the creamed butter. Mix these ingredients for one full minute to saturate the fats with the sweet aroma of vanilla. Gradually add the room-temperature egg whites in four separate additions, beating well after each to keep the batter smooth and emulsion intact.
Step 4: Combine the Batter for Your Classic Vanilla Layer Cake
Whisk the whole milk and vegetable oil together in a glass measuring cup until combined. Alternate adding the dry ingredients and the milk mixture to the butter, beginning and ending with the flour mixture. Mix on low speed only until each addition disappears, scraping the bowl carefully with a flexible spatula to avoid overworking the flour.
Step 5: Bake the Fragrant Cake Layers
Divide the smooth batter evenly among your three prepared pans, smoothing the tops with an offset spatula. Place them in the warm oven and bake for 30 to 34 minutes, watching for a pale golden hue around the edges. A wooden toothpick inserted into the center should emerge clean or with just a few soft crumbs attached.
Step 6: Cool the Layers Gently
Let the baked pans rest on the counter for ten minutes to allow the structure to settle. Run a small offset spatula along the edges of the pans to release any stubborn spots, then invert them onto wire racks. Peel away the parchment paper carefully and let the layers cool completely before you begin assembly.
Step 7: Cook the Vanilla Custard Filling
Combine the whole milk, heavy cream, salt, and vanilla bean paste in a heavy saucepan over medium heat. Bring the liquid to a gentle simmer, letting the scent of warm cream fill your quiet kitchen space. In a separate heat-safe bowl, whisk the sugar, cornstarch, and egg yolks together until pale and smooth.
Step 8: Temper the Egg Yolks and Thicken the Custard
Slowly ladle about one-third of the hot milk mixture into the egg yolks, whisking constantly to prevent curdling. Return this tempered mixture to the saucepan, whisking vigorously over medium heat. As the custard thickens, stir continuously with a silicone spatula until large bubbles break the surface.
Step 9: Finish and Chill the Pastry Cream
Remove the hot pot from the stove and stir in the cold unsalted butter until fully melted. Strain the velvety custard through a fine-mesh sieve into a shallow dish to guarantee a completely smooth texture. Press a sheet of plastic wrap directly onto the surface to prevent a skin from forming, then refrigerate for at least two hours.
Step 10: Whip the White Chocolate Buttercream and Assemble
Beat the softened butter, vanilla, and salt on high speed for five to seven minutes until ivory and glossy. Gradually add the sweetened condensed milk, then stream in the melted white chocolate, mixing until the buttercream thickens. Pipe a sturdy border on your first cake layer, fill the center with chilled custard, stack the remaining layers, and frost the exterior.
What Grandma Would Tell You

Softening butter is a step that requires patience rather than heat. If you try to soften butter in the microwave, it melts unevenly, which ruins the texture of your frosting. Let the butter sit on the counter for several hours until it yields gently to a finger press.
If your custard becomes lumpy during the cooking process, do not panic. Immediately remove the pot from the heat and whisk vigorously to break up the starch clumps. Straining the warm mixture through a fine sieve as detailed in this classic vanilla butter cake recipe will save the filling.
Measuring flour by volume often leads to a heavy, dry cake. Always use a kitchen scale for precision, or spoon the flour gently into your measuring cup before leveling it with a knife. For a deeper understanding of traditional flour techniques, consult this external guide on how to bake the perfect vanilla cake to refine your kitchen skills.
Egg whites must be at room temperature to whip to their fullest volume. Cold whites are tight and will not trap enough air, resulting in a dense layer. Set your eggs on the counter an hour before cracking them, or place the whole eggs in warm water for ten minutes.
When melting white chocolate for your buttercream, use a gentle double boiler rather than direct heat. White chocolate burns very easily because of its high milk solid content, turning into a grainy, unusable paste. Let the melted chocolate cool slightly before adding it to the whipped butter to prevent melting.
Leveling your cake layers is the secret to a stable, towering dessert. Use a long, serrated bread knife with a steady sawing motion while slowly rotating the cake on a turntable. This creates flat surfaces that prevent your custard filling from sliding out of the sides during assembly.
Frequently Asked Questions
What is the secret to a super moist vanilla cake?
Keeping the ingredients at room temperature allows them to emulsify properly, trapping tiny air pockets that retain moisture during baking. Additionally, using a combination of butter for flavor and a touch of vegetable oil ensures the crumb remains soft even after cooling.
Is cake flour better than all-purpose flour for vanilla cake?
While cake flour produces an incredibly delicate crumb, all-purpose flour provides the necessary structure to support the heavy custard filling and rich white chocolate frosting. This recipe relies on all-purpose flour to make sure the layers hold their shape beautifully when sliced.
Why is my vanilla cake dry or dense?
A dry cake is often the result of overbaking or measuring the flour with a heavy hand. A dense texture usually occurs when the butter and sugar are not creamed long enough, or if the batter is overmixed after adding the flour.
What is the difference between white cake and vanilla cake?
White cakes rely solely on egg whites to maintain a pale, snowy color and a lighter texture. Traditional vanilla cakes often include whole eggs or egg yolks, which contribute a yellow tint and a richer flavor profile to the crumb.
Should ingredients be at room temperature?
Yes, having your milk, butter, and egg whites at room temperature is essential for a smooth batter. Cold ingredients will cause the creamed butter to seize, resulting in an uneven bake and a curdled appearance in the mixing bowl.
Can I freeze the cake layers ahead of time?
You can wrap the completely cooled cake layers tightly in double layers of plastic wrap and freeze them for up to two weeks. Assembling the cake while the layers are slightly cold actually makes them easier to frost and minimizes crumbs.
How should I store the leftover cake?
Because of the fresh egg custard filling, this cake must be stored in the refrigerator. Place it in a cake keeper or cover the sliced edges with plastic wrap, and let it sit at room temperature for fifteen minutes before serving.
From the Same Recipe Box
For a lovely seasonal variation, you can replace the custard filling with a homemade raspberry jam. The bright, tart berry flavor cuts through the rich white chocolate buttercream beautifully, reminiscent of summer afternoons. This variation pairs beautifully with our yellow cake recipe for an alternative base.
If you prefer a warmer, spiced profile, try infusing the milk for the custard with a cinnamon stick and a pinch of ground nutmeg. This subtle warmth evokes cozy autumn gatherings and makes the cake feel incredibly rustic. You can also experiment with citrus zests in the cake batter for a bright spring twist.
Sitting Down Together
Serve this elegant cake on a vintage glass pedestal to highlight the beautiful layers and creamy frosting. Slicing the cake with a warm, clean knife ensures neat cuts that showcase the dark vanilla bean flecks in the custard. It is best enjoyed in the afternoon alongside a hot pot of black tea or light roast coffee.
For special occasions, decorate the top of the cake with fresh, edible flowers or a simple dusting of powdered sugar. This simple presentation honors the natural beauty of the cake without overwhelming its classic flavor profile. For more inspiration on presenting your bakes, view the classic vanilla bean layer cake story to see how we set the table.

Until Next Time
Baking a cake like this is an act of love that requires time, but the reward is found in the smiles around the table. Each step connects us to the home bakers of the past who stood in quiet kitchens, crafting sweet memories from simple pantry ingredients. If you cherish these old-fashioned flavors, visit our classic vanilla layer cake for more kitchen inspiration.
Share your baking journey with us as you bring these traditional recipes into your own modern home. You can follow our quiet moments and seasonal updates on Pinterest or join our baking community on Facebook. We also share glimpses of our flour-dusted counters on TikTok to keep the spirit of heritage baking alive.


