
Maceration, the ancient art of drawing out juices with sugar, requires your patience but rewards you with an incredibly rich, structural moisture in this Harvest Apple Cake.
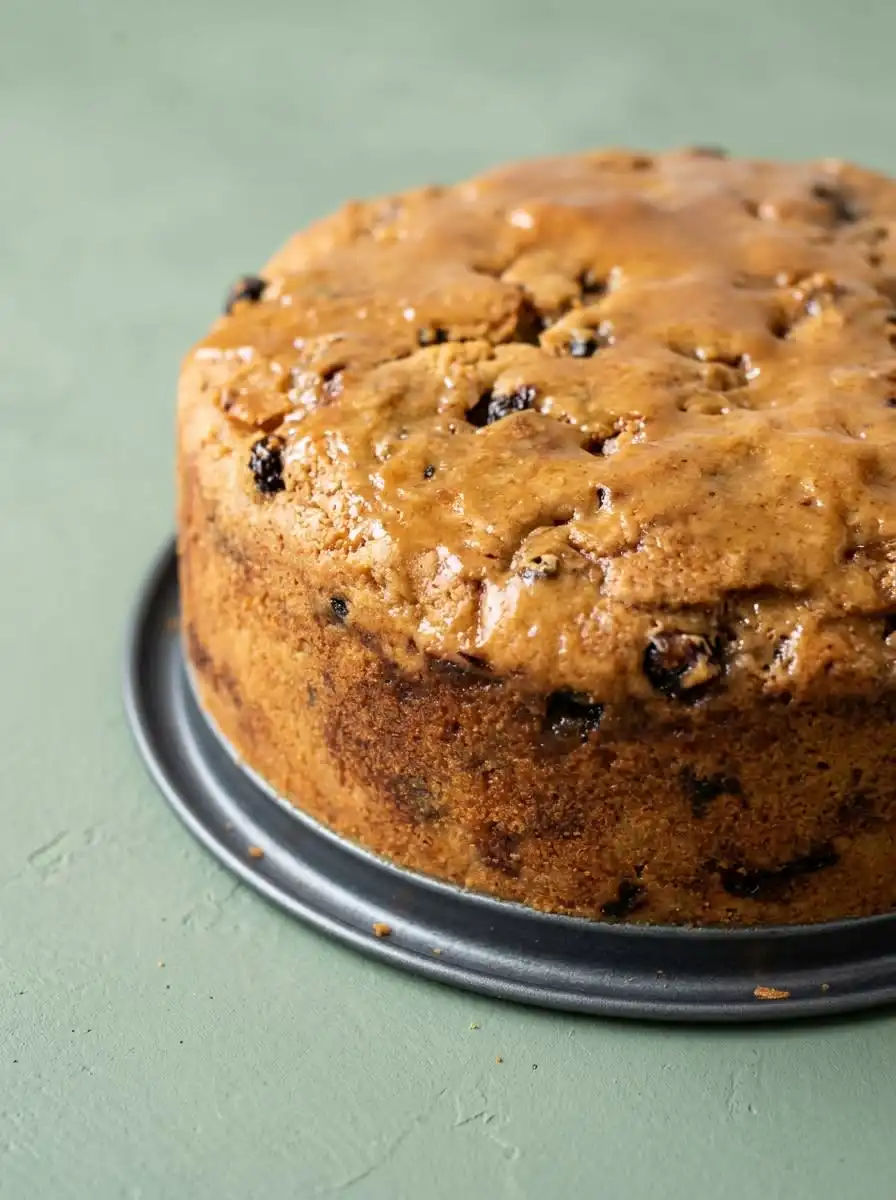
When you bake this Harvest Apple Cake, you are not merely mixing flour and fruit; you are engaging in a thoughtful chemical exchange. By letting the sugar draw the natural moisture from the apples, you create a thick syrup that hydrates the dry ingredients. This careful preparation guarantees a dense, tender crumb that tastes even better on the following day.
Your kitchen will fill with the quiet scent of cinnamon and nutmeg, inviting everyone to gather. The rustic, unadorned surface represents a classic patisserie approach where flavor is paramount. You will find that taking your time with each stage makes all the difference in the final result.
Why This Harvest Apple Cake Rewards Patience
Prep: 75 min · Serves: 12 · Difficulty: Medium
- Macerating apples creates superior cake structure.
- Freshly grated nutmeg offers deeper aromatic complexity.
- Resting the batter develops an incredibly tender crumb.
- This rustic bake requires no complex frosting.
- Every slice reveals a beautiful fruit cross-section.
This is the classic heritage recipe that my family gathers for every autumn season. When you master this classic apple cake recipe to create a Harvest Apple Cake, you will discover how small adjustments yield professional results.
Get The Full Cake Recipe
Print
Harvest Apple Cake
- Total Time: 2 hours 15 mins
- Yield: 12 servings
Description
This rustic Harvest Apple Cake utilizes the technique of macerating firm apples in sugar to create a deeply moist and tender crumb. Infused with fresh nutmeg and toasted pecans, this classic autumn treat matures in flavor beautifully over time.
Ingredients
- 4 cups firm apples (Fuji or Honeycrisp), diced
- 1.5 cups granulated sugar
- 2 cups all-purpose flour
- 1 tsp baking soda
- 1 tsp ground cinnamon
- 0.5 tsp freshly grated nutmeg
- 2 large eggs
- 0.75 cup neutral oil
- 1 tsp pure vanilla extract
- 1 cup chopped pecans
Instructions
- Preheat the oven. Set your oven rack to the center and preheat to 350°F (177°C), then grease a 13×9-inch baking pan.
- Macerate the apples. Combine diced apples and sugar in a large bowl, letting it stand for one hour and stirring every fifteen minutes until a syrup forms.
- Sift dry ingredients. In a separate bowl, sift together the flour, baking soda, cinnamon, and nutmeg until well combined and uniform.
- Mix wet base. Create a well in the dry ingredients and beat in the eggs, oil, and vanilla extract until a smooth, thick paste forms.
- Combine the batter. Fold the macerated apples and their accumulated syrup into the batter, then stir in the chopped pecans until evenly distributed.
- Level the pan. Transfer the batter to the prepared pan, using an offset spatula to smooth the surface and reach the corners.
- Bake the cake. Bake for 50 to 60 minutes until a wooden toothpick inserted into the center comes out clean.
- Cool and rest. Place the pan on a wire rack and allow the cake to cool completely for at least two hours before slicing to set the crumb.
Notes
- Avoid using soft apple varieties that break down too easily under heat.
- Allow the cake to rest for a full day if possible to let the moisture and spice flavors fully develop.
- Use a microplane to grate your nutmeg freshly for a significantly more vibrant aromatic profile.
- Ensure your oil and eggs are at room temperature to prevent the batter from becoming too stiff during mixing.
- Prep Time: 75 mins
- Cook Time: 60 mins
- Category: Dessert
- Method: Baking
- Cuisine: American
The Mise en Place

Before beginning, you must organize your workspace according to the classic French discipline of mise en place. Weighing your ingredients precisely beforehand prevents errors during the mixing process and guarantees a balanced crumb. Each element in this recipe plays a vital role in creating the final texture and flavor profile.
- Fresh Apples: You should choose firm varieties like Fuji or Honeycrisp, which retain their structure during the long baking process. Avoid soft apples such as Red Delicious, as they collapse into mush under heat. This recipe requires four full cups of diced fruit to balance the dense batter.
- Granulated Sugar: This ingredient does more than sweeten; it acts as a hygroscopic agent, pulling the moisture out of the fruit to form a rich, aromatic syrup. This syrup is crucial because it dissolves the sugar completely before the batter enters the oven. It is this liquid exchange that creates the cake’s signature dense texture.
- All-Purpose Flour: Providing the structural gluten framework, this flour supports the heavy pieces of fruit without becoming tough. Sifting the flour beforehand is an essential small discipline that prevents lumps and promotes even spice distribution.
- Neutral Oil: Liquid fat coats the flour proteins, keeping the cake exceptionally soft and preventing it from drying out over time. Unlike butter, oil remains liquid at room temperature, which guarantees that the leftover cake remains wonderfully tender for days.
- Freshly Grated Nutmeg: Grating whole nutmeg seeds right before mixing preserves the volatile oils, delivering a warm, complex aroma that pre-ground spice cannot match. Fresh nutmeg has a much stronger flavor profile, so you may choose to use a tiny bit less based on personal preference.
- Chopped Pecans: These toasted nuts add a necessary textural contrast, offering a buttery crunch that balances the tender, macerated fruit. Using a mechanical hand-crank nut chopper allows you to achieve a uniform size, preventing the pieces from sinking to the bottom of the pan.
| Ingredient | Role in the Recipe |
|---|---|
| Fresh Apples | Provide moisture, structure, and tart sweetness |
| Granulated Sugar | Macerates the fruit and retains crumb hydration |
| Neutral Oil | Keeps the crumb tender and soft for days |
| Fresh Nutmeg | Delivers superior, aromatic spice complexity |
| Chopped Pecans | Introduces a contrasting buttery texture |
The Method, Step by Step
Step 1: Prepare Your Mise en Place
Position your oven rack in the center and preheat the oven to 350°F (177°C). Measure all your ingredients precisely using a digital kitchen scale before you begin mixing. Grease a 13×9-inch baking pan lightly with oil or butter, making sure the corners are well-coated to prevent sticking. Organizing your workspace beforehand allows you to focus entirely on the technique of each step.
Step 2: Macerate the Apples
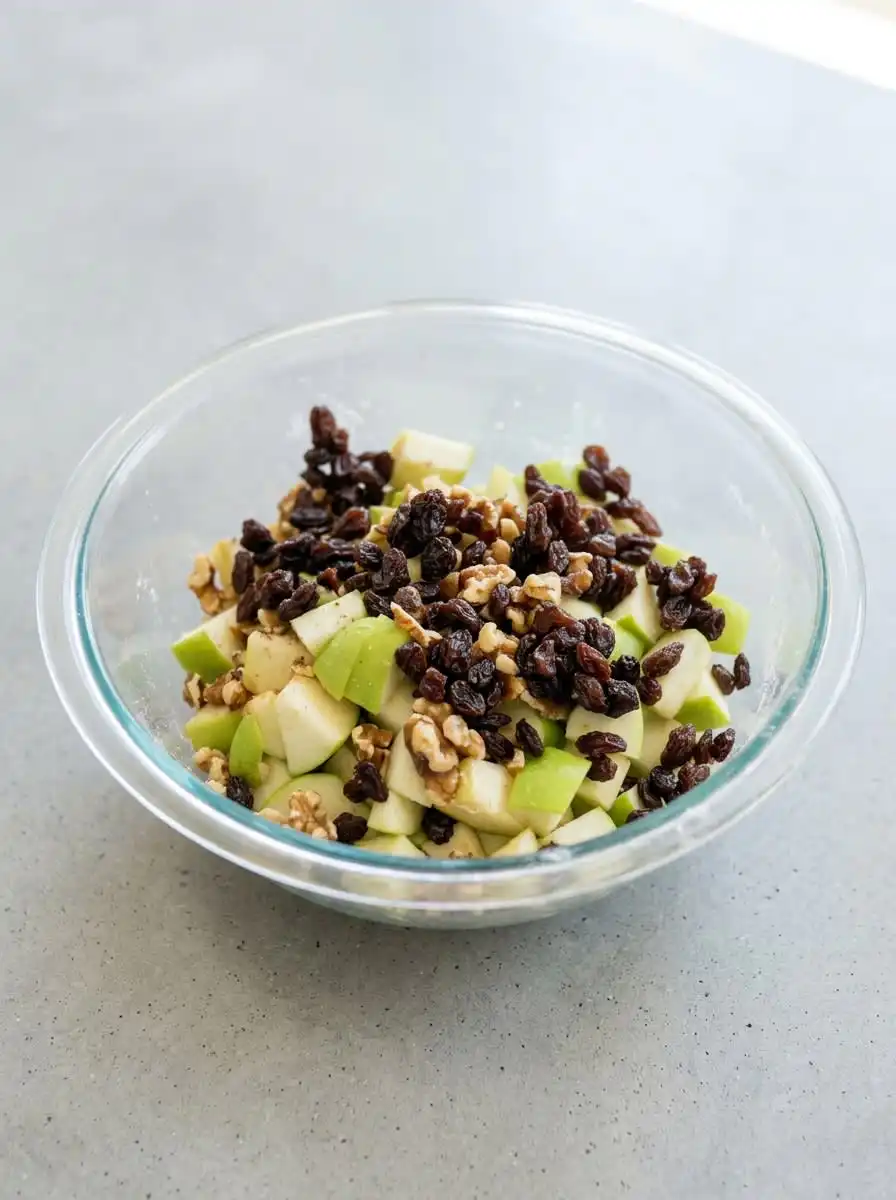
In a large ceramic bowl, combine the four cups of diced apples with the granulated sugar. Let this mixture stand at room temperature for exactly one hour, stirring thoroughly every fifteen minutes. You will notice a glossy, liquid syrup pool at the bottom of the bowl as the sugar draws out the natural juices. This quiet resting period is essential for tenderizing the fruit before it is baked.
Step 3: Sift and Whisk the Dry Ingredients
In a separate bowl, sift together the all-purpose flour, baking soda, ground cinnamon, and nutmeg. Sifting aerates the flour and guarantees that the leavening agent and spices are evenly distributed throughout the dry mixture. You should see a uniform, pale brown powder with no lumps remaining. Taking time for this step prevents pocketing of baking soda in your finished cake.
Step 4: Mix the Wet Base
Create a well in the center of your dry ingredients and add the eggs, neutral oil, and pure vanilla extract. Use a sturdy whisk to beat these ingredients together until they form a thick, smooth paste. The batter will appear quite dense at this stage, but the apple juices will loosen it later. Work the mixture just until no dry pockets of flour remain.
Step 5: Bake Your Harvest Apple Cake to Perfection
Fold the macerated apples along with their accumulated syrup into the thick batter using a sturdy wooden spoon. Mix gently until the flour is hydrated and you achieve a heavy, glossy batter. Gently fold in the chopped pecans, distributing them evenly throughout the mixture. With the apple mixture and dry base fully combined, your Harvest Apple Cake batter is now ready for the pan.
Step 6: Pour and Level the Batter
Transfer the heavy batter into your prepared 13×9-inch baking pan, using an offset spatula to smooth the surface. The batter will be thick, so make sure it is pushed into the corners of the pan for an even rise. You will see small pockets of glossy syrup reflecting the light on the surface. A level surface guarantees that the cake bakes uniformly from the edges to the center.
Step 7: Bake and Test for Doneness
Bake the cake for 50 to 60 minutes without opening the oven door during the first forty minutes. Insert a wooden toothpick into the center of the cake; it must come out clean with no wet crumbs attached. The top should present a deep golden-brown, semi-crisp crust that yields slightly to gentle pressure. If the toothpick has wet batter, bake for another five minutes before testing again.
Step 8: Cool and Rest the Cake
Place the pan on a wire cooling rack and allow the cake to cool completely for at least two hours before slicing. As the cake cools, the crumb settles and the moisture redistributes, preparing it for a clean, sharp cut. Slicing too early will cause the warm crumb to tear and release valuable steam. A patient wait results in a beautifully set cross-section.
Where Precision Makes the Difference
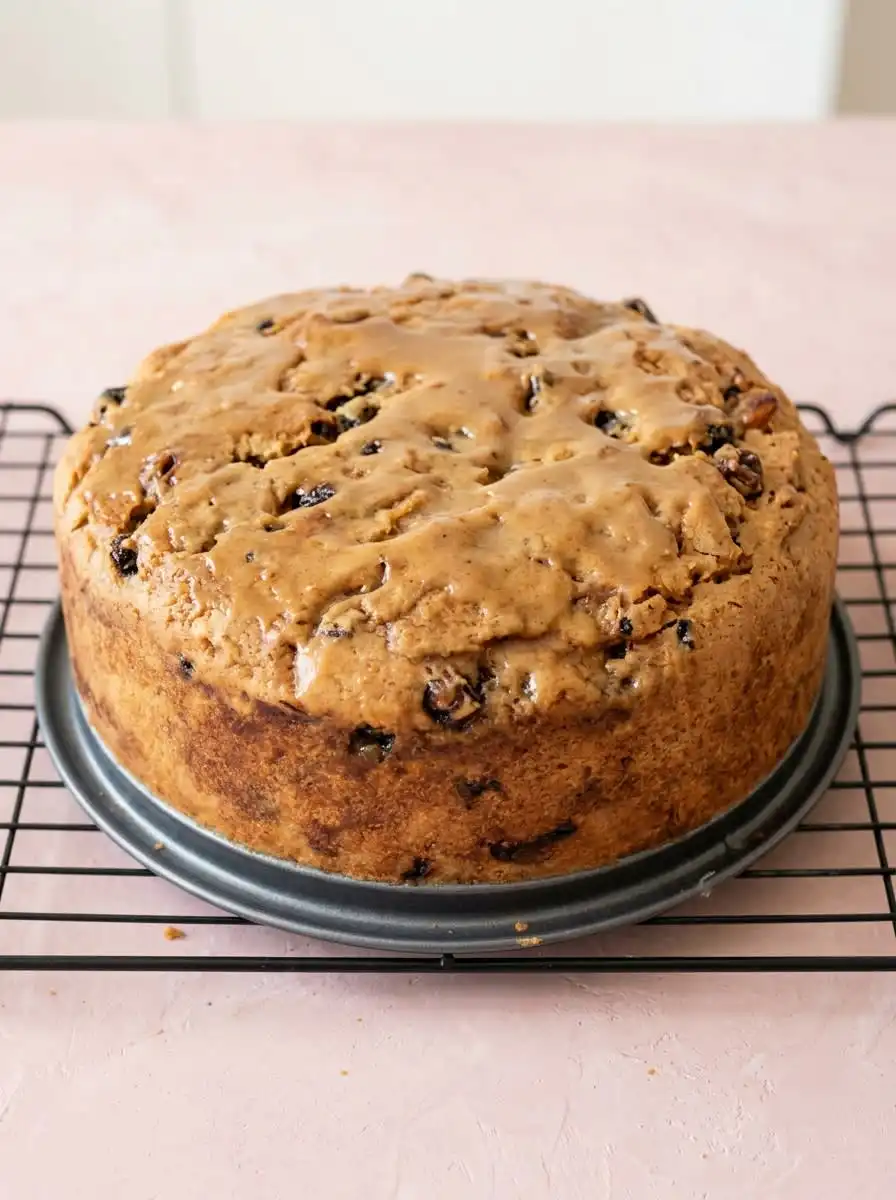
Achieving the correct density in your Harvest Apple Cake requires understanding apple varieties. While many bakers reach for whatever is in their fruit bowl, a mix of Fuji and Honeycrisp apples provides the ideal balance of sweetness, acidity, and structural integrity. Red Delicious apples must be avoided, as their high water content and soft flesh cause them to disintegrate during baking, leaving pockets of empty space in your cake.
Grating fresh nutmeg seed over a microplane right before mixing is a small discipline that yields tremendous results. Pre-ground nutmeg loses its volatile aromatic compounds quickly on the pantry shelf, resulting in a dull, dusty flavor. If you choose to use fresh nutmeg, you may want to use a tiny bit less than the recipe specifies, as its natural oil content makes it significantly more potent.
Invest in a reliable mechanical hand-crank nut chopper to prepare your pecans. A clean, uniform chop prevents heavy pieces of nuts from sinking to the bottom of your baking pan during the rise. If your nuts sink, here is why and how to fix it: they were either chopped too coarsely or your batter was too warm, which can be corrected by making sure your oil and eggs are kept at room temperature.
Do not rush to refrigerate your leftovers. Covering the cooled cake tightly with plastic wrap and storing it at room temperature allows the moisture to distribute evenly through the crumb. If you store the cake in the refrigerator, you will dry out the crumb prematurely and mute the warm spices.
You will find that this cake tastes significantly better on the second day after baking. On the first day, the edges of the cake remain quite crispy, but a quiet overnight rest allows the macerated apple juices to soften the crust. This resting period lets the spiced flavors mature into a cohesive, elegant dessert that slices beautifully with a sharp knife.
To learn more about mastering fruit-forward bakes, you can read our detailed guide on the apple spice cake, which outlines additional moisture management techniques. By studying how different fruits interact with flour and fat, you can achieve consistent results every time you bake.
Frequently Asked Questions
What are the best apples for an apple cake?
The best choice is a combination of firm, crisp varieties like Fuji, Honeycrisp, or Granny Smith. These apples maintain their texture and release their juices slowly during baking. Avoid soft varieties like Red Delicious, which become mushy and compromise the cake’s structural integrity.
Should you peel apples for a Harvest Apple Cake?
Yes, you should peel the apples before dicing them to ensure a uniform, delicate crumb in your finished Harvest Apple Cake. Leaving the skin on can create tough, papery pockets in the baked cake, which detracts from the smooth texture. Taking the extra time to peel the fruit is a small discipline that yields a far more elegant result.
Do you need to cook apples before putting them in cake?
No, you do not need to cook the fruit beforehand because the maceration process softens the apples beautifully. Letting the diced fruit stand in sugar for one hour draws out the moisture, creating a rich syrup and tenderizing the apples before they enter the oven. Pre-cooking the apples would make them overly soft and lead to a dense, heavy cake.
What makes an apple harvest cake so moist?
The exceptional moisture comes from the maceration of the diced apples in sugar, combined with the use of neutral vegetable oil. The oil coats the flour proteins to keep the crumb tender, while the extracted apple syrup hydrates the batter during baking. This dual hydration ensures a soft, dense crumb that remains fresh for several days.
How do you tell if an apple cake is done?
Insert a wooden toothpick or cake tester into the thickest part of the center; it should come out clean or with a few dry crumbs. The top crust should be deep golden brown, and the edges should slightly pull away from the sides of the pan. You can also press the center gently; it should feel firm and spring back slightly under your touch.
Can you use vegetable oil instead of butter in an apple cake?
Yes, vegetable oil is highly recommended for this recipe because it remains liquid at room temperature, keeping the cake tender for days. Butter provides excellent flavor but contains water and milk solids, which can lead to a slightly drier crumb in this heavy, fruit-laden batter. Using oil ensures the signature dense, moist texture of a rustic harvest cake.
What spices go into a harvest apple cake?
The primary spices are ground cinnamon and freshly grated nutmeg, which create a warm, comforting aroma. Cinnamon provides the classic woodsy sweetness, while nutmeg adds a complex, slightly nutty depth. You can also include a pinch of ground ginger or allspice if you prefer a sharper spiced note.
Can you freeze a Harvest Apple Cake?
Yes, you can freeze this Harvest Apple Cake easily once it has cooled completely. Wrap the entire cake, or individual slices, tightly in a double layer of plastic wrap followed by a layer of heavy aluminum foil. Freeze for up to three months, and thaw at room temperature overnight before serving to restore its soft texture.
Considered Variations
While the classic version relies on pecans for contrast, you may adapt this recipe to showcase other seasonal nuts. Substituting toasted walnuts or slivered almonds provides a different, delicate crunch that pairs beautifully with the warm spices. Remember to toast the nuts lightly in a dry pan before adding them to release their aromatic oils and maintain crispness.
For an elegant twist reminiscent of European patisseries, you can substitute the vanilla extract with a splash of dark rum or Calvados. This addition complements the macerated apples, adding a sophisticated depth of flavor without disrupting the moisture balance of the batter. The alcohol burns off during the long bake, leaving behind a subtle, woody warmth.
If you prefer a cake with a more pronounced spiced profile, you can consult our classic irish apple cake for inspiration. Adding a pinch of ground ginger or cardamom to the flour mixture introduces a bright, sharp note that contrasts beautifully with the sweet, rich apples. Always measure your spices carefully, as over-seasoning can easily mask the delicate fruit flavor.
To introduce an external element of technique, you might refer to this guide on traditional harvest baking methods to see how vintage bakers managed heat distribution in deep pans. Adjusting your baking pan from a standard metal tin to a heavy stoneware dish can alter the crust formation, requiring an extra five minutes of baking time.
Finishing and Presenting
Presenting this warm Harvest Apple Cake requires very little adornment, as its rustic, golden-brown crust carries an understated elegance. A light dusting of confectioners’ sugar right before slicing provides a delicate contrast to the deep, spiced tones of the baked fruit. Always wait until the cake is completely cool to dust it, otherwise, the sugar will melt into the warm surface.
To refine the tasting experience, you can serve each slice with a generous dollop of unsweetened crème fraîche or lightly whipped double cream. The lactic acidity of the cream cuts through the rich sweetness of the macerated apples, balancing the palate beautifully. For a warmer presentation, serve a slice alongside a cup of hot espresso or a clean, bitter black tea.
If you are preparing a large autumn dessert spread, this recipe pairs beautifully with other fruit-forward bakes. You might consider adding our easy apple dump cake to the menu to offer your guests a variety of textures. Serving these desserts on simple ceramic plates highlights the honest, handmade quality of your baking.
What You Have Learned Here
Baking this classic Harvest Apple Cake is a masterclass in the transformative power of simple kitchen chemistry. By respecting the maceration process and measuring your ingredients with care, you have transformed humble orchard fruit into an elegant, lasting dessert. The deep satisfaction of this bake lies in these quiet, deliberate steps that reward patience with a remarkably moist, spiced crumb.
As you share this cake with friends and family, you will notice how the flavors have deepened and settled. If you find yourself enjoying this style of comforting, fruit-infused baking, you may also appreciate our classic banana coffee cake, which relies on similar principles of starch hydration. We invite you to share your baking journey, questions, and successes with our community of dedicated bakers.
You can find more of our step-by-step pastry tutorials and connect with us on Pinterest, Facebook, and TikTok. Let these platforms serve as your digital workbench, where you can share your results and discuss the finer points of baking technique with fellow enthusiasts.







2 thoughts on “Harvest Apple Cake”