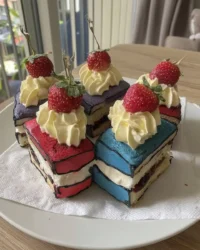
In the quiet corners of a Parisian kitchen, we are taught that color is not merely a visual treat but a vessel for celebration and pride. I remember the vibrant displays during national festivities, where pastry chefs would craft intricate layers to tell a story of heritage. This Red, White and Blue Layered Flag Cake is my homage to that precision, designed for those who appreciate the technical beauty hidden beneath a simple exterior.

Creating an architectural marvel like this demands a calm hand and an eye for geometry. While the ingredients are accessible, the mastery lies in the assembly of the internal design. Each slice reveals a pristine representation of the flag, a feat of baking engineering that transforms a holiday dessert into a centerpiece of patriotic devotion.
The Architectural Beauty of the Hidden Surprise\n\nThere is a specific joy in serving a cake that looks unassuming on the outside but reveals a complex, stunning interior upon the first cut. This Red, White and Blue Layered Flag Cake is the ultimate expression of that surprise. It is a masterpiece of precision, requiring the baker to think like an architect as they trim, stack, and align the various components to create a perfect cross-section. Mastery of this technique is a badge of honor for any home baker, proving that you can take simple materials and turn them into something extraordinary through careful execution.\n\nBeyond the visual impact, this cake offers a delightful texture and flavor profile. By utilizing specific types of fat and egg compositions for different layers, we achieve a consistent crumb that holds its shape during the intricate cutting process. It is a testament to the fact that festive baking can be both fun and highly technical. Whether you are hosting a summer gathering or a patriotic celebration, this cake stands as a symbol of your dedication to the craft of fine pastry.
Print
Red, White and Blue Layered Flag Cake
- Total Time: 2 hours
- Yield: 12 servings
- Diet: Vegetarian
Description
This architectural baking marvel features a hidden American flag design that is revealed only when the cake is sliced. It combines vibrant layers of red, white, and blue sponge with a light, whipped frosting to create a stunning patriotic centerpiece.
Ingredients
- 2 boxes premium white cake mix
- Water (as called for by cake mix instructions)
- Vegetable oil (as called for by cake mix instructions)
- 3 large whole eggs (for red layers)
- 3 to 4 large egg whites (for white and blue layers)
- Red paste food coloring
- Blue food coloring
- Star-shaped candy sprinkles
- 24 to 32 ounces whipped fluffy white frosting
Instructions
- Preheat oven to 350°F (175°C) and line two 8-inch round pans with parchment paper.
- Mix the first cake mix with whole eggs, oil, and water; tint with red paste color and bake for 28-33 minutes, then cool completely.
- Prepare the second cake mix using only egg whites; pour half into a pan and tint the other half blue with star sprinkles before baking.
- Once cooled, level all cake tops; slice red cakes into four disks and the white cake into two thin disks.
- Use a 4-inch biscuit cutter to remove the centers from one red disk, one white disk, and the thick blue layer.
- Stack a solid red layer, frosting, solid white layer, frosting, and another solid red layer to form the base.
- Place the blue ring on top, then insert a 4-inch red disk followed by a 4-inch white disk (with frosting between them) into the center hole.
- Apply a thin crumb coat of frosting to the entire cake and chill for 30 minutes.
- Finish by frosting the exterior smoothly and decorating with additional patriotic sprinkles.
Notes
For the cleanest internal lines, place your leveled cake layers in the freezer for 20 minutes before using the biscuit cutter to ensure the crumb is firm. Always use gel or paste food coloring rather than liquid to maintain the structure of the batter and achieve deep, vibrant hues.
- Prep Time: 45 mins
- Cook Time: 35 mins
- Category: Dessert
- Method: Baking
- Cuisine: American
Selecting the Foundation for Geometric Precision\n\nTo achieve the sharp lines required for a Red, White and Blue Layered Flag Cake, we must choose ingredients that provide a stable, tight crumb. The selection here is purposeful, ensuring each layer can be handled and trimmed without crumbling prematurely.\n\n* Premium White Cake Mix: We use a high-quality mix to ensure a consistent, bright white base. This allows the food colors to remain vibrant and true to their intended hue.\n* Whole Eggs vs. Egg Whites: For the red layers, whole eggs provide a slightly sturdier structure and a richer golden undertone that deepens the red paste. For the white and blue layers, we use only egg whites to maintain a pristine, snow-white appearance and a light, airy texture.\n* Paste Food Coloring: Unlike liquid drops, paste or gel colors provide intense pigmentation without altering the hydration levels of the batter. This is essential for maintaining the correct viscosity for the star-shaped sprinkles to remain suspended.\n* Star-Shaped Candy Sprinkles: These are folded into the blue layer to represent the stars of the flag. Their placement must be intentional to ensure they are visible in every slice.\n* Whipped Fluffy White Frosting: A light, airy frosting is necessary to bind the layers without adding excessive weight that might cause the internal structure to shift or compress.

The Method of Precise Assembly\n\n### Step 1: Preparing the Foundations\nHeat your oven to 350°F (175°C), or 325°F (160°C) if using dark, nonstick pans. For the most professional results, spray the bottoms and sides of two 8-inch round pans and line the bottoms with parchment paper. This ensures the layers remain perfectly flat and release without any tearing of the delicate crumb.\n\n### Step 2: Crafting the Red Layers\nPrepare the first cake mix according to the package instructions, using water, vegetable oil, and whole eggs. Gradually beat in the red paste food color until the batter reaches a deep, vibrant crimson. Divide the batter evenly between the prepared pans and bake for 28 to 33 minutes. A toothpick should come out clean when the structure is set. Allow these to cool in the pans for 10 minutes before transferring to a wire rack to cool completely for at least one hour.\n\n### Step 3: Preparing the White and Blue Elements\nClean your pans and prepare them again with spray and parchment. Mix the second cake mix using water, oil, and only egg whites. Pour half of this pristine white batter into one pan. To the remaining batter, add the blue food color and the star-shaped sprinkles, folding gently until the color is uniform. Pour this blue batter into the second pan. Bake as before, and cool thoroughly. Temperature control is vital; a warm cake cannot be trimmed with precision.\n\n### Step 4: The Geometry of Trimming\nOnce cooled, use a long serrated knife to flatten the tops of all cake layers. For the red cakes, cut each layer in half horizontally to create four thin red disks. Use a 4-inch biscuit cutter to remove the center from one of these red layers. For the white cake, cut it horizontally into two thin layers and remove the center from one of them. Finally, take the thick blue layer and remove its center with the same 4-inch cutter. These specific cutouts are the key to the flag’s internal design.\n\n### Step 5: The Primary Stacking\nPlace one solid red layer on your serving platter and spread a thin, even layer of frosting (about 1/3 cup). Top with the solid white layer, followed by another thin layer of frosting and a second solid red layer. This creates the bottom stripes of your flag. Ensure each layer is perfectly centered to maintain the cake’s balance.\n\n### Step 6: Constructing the Blue Union\nPlace the blue ring (the layer with the hole) on top of the stack. Frost only the top edge of this blue ring. Take the small 4-inch red circle and the 4-inch white circle you cut out earlier. Place the red one inside the blue ring, frost it, and then place the white one on top of that. This creates the alternating stripes next to the blue field of stars.\n\n### Step 7: Final Finishing\nApply a thin crumb coat of frosting over the entire cake to trap any loose crumbs. Chill the cake for 30 minutes to set this layer. Finally, apply a generous, smooth coating of the remaining whipped frosting over the top and sides. Decorate with additional red, white, and blue sprinkles to hint at the beautiful artistry contained within.
Precision Secrets from the Pastry Kitchen\n\nTo master the Red, White and Blue Layered Flag Cake, one must embrace the virtue of patience. The most common mistake is attempting to trim the layers while they are still slightly warm. For the cleanest lines, I recommend wrapping the leveled layers in plastic wrap and placing them in the freezer for 20 to 30 minutes before you begin the precision cutting with the biscuit cutter. This firms up the fats in the cake, allowing the blade to pass through with minimal tearing.\n\nWhen assembling, use a rotating cake stand to ensure your frosting layers are perfectly level. A slight tilt in one of the lower layers will be magnified as you stack higher, potentially ruining the geometric effect of the flag. If you enjoy the process of color-themed baking, you might also find the techniques used in our red-white-blue-fourth-july-poke-cake to be quite useful for more casual gatherings. Remember, the difference between a good cake and a professional one is often just a few minutes of extra cooling time and a sharp, steady knife.

Refined Twists on a Patriotic Classic\n\nWhile the classic vanilla profile is beloved, you can add a touch of refinement to your Red, White and Blue Layered Flag Cake by incorporating high-quality extracts. Adding a teaspoon of clear almond extract to the white and blue layers provides a sophisticated, professional aroma that pairs beautifully with the sweet frosting. For a citrus note, consider adding finely grated lemon zest to the batter; it provides a bright contrast to the richness of the oil-based cake.\n\nIf you prefer a different structural approach, you could adapt these colors into a red-white-and-blue-cake that focuses on marbled patterns rather than geometric stripes. Another option is to replace the star sprinkles in the blue layer with tiny dried blueberries for a more natural, albeit less traditional, appearance. Regardless of the variation, maintain the integrity of the three-color palette to keep the patriotic spirit of the dessert intact.
Presentation and the Art of the Reveal\n\nWhen presenting the Red, White and Blue Layered Flag Cake, simplicity is your greatest ally. Place the cake on a tall, white porcelain pedestal to let the pristine frosting stand out. Because the true beauty is on the inside, wait until your guests are gathered before making the first cut. Use a long, thin knife dipped in hot water and wiped dry between each slice to ensure the colors do not smear into one another.\n\nPair each slice with a dollop of freshly whipped cream or a few macerated strawberries to complement the sweetness. For those interested in other patriotic designs, you might look at our guide on the flag-cake for different assembly styles. Serving this cake with a crisp glass of sparkling cider or a light tea allows the flavors to shine without overwhelming the palate. The goal is to create a moment of shared wonder as the internal flag is revealed for the first time.

