Before you measure a single gram of flour, pause at the threshold of assembly, where a rushed hand ruins the delicate division of custard and crust.

To master the Classic Pumpkin Crunch Cake is to understand the interplay of contrasting textures under the gentle influence of heat. We are not merely assembling a rustic dessert; we are orchestrating a precise transition from a silky, spiced pumpkin custard to a crisp, buttery praline topping. Your patience during the baking process guarantees these distinct layers remain defined rather than dissolving into a singular, heavy mass. By respecting the physical boundaries of each layer, you create a dessert that is as beautiful to slice as it is satisfying to serve.
The Craft Behind This Classic Pumpkin Crunch Cake
Prep: 20 min · Serves: 12 · Difficulty: Medium
The beauty of this dessert lies in its structural integrity and the deliberate contrast of its components. When prepared with care, it offers a sophisticated alternative to traditional autumn pies, refining simple ingredients through precise technique. We must approach this bake not as a casual undertaking, but as an exercise in layering textures that must remain distinct from the oven to the dessert plate.
- Silky custard base set with gentle heat.
- Pecans toasted in sweet, melted butter.
- Creamy topping balances the warm spices.
- Distinct textures present in every slice.
- Simple assembly yielding a sophisticated profile.
To expand your baking repertoire with similar seasonal showstoppers, you may browse our selected recipe index for inspiration. This refined method guarantees your autumn table receives a dessert of incomparable structural elegance.
Get The Full Cake Recipe
Print
Classic Pumpkin Crunch Cake
- Total Time: 80 mins
- Yield: 12 servings
- Diet: Vegetarian
Description
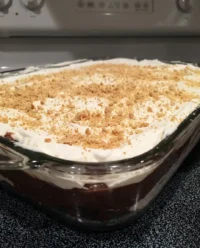
An elegant autumn dessert featuring a silky, spiced pumpkin custard base topped with a crisp, buttery pecan praline crust and finished with a velvety cream cheese topping. Perfectly balanced in texture and warmth.
Ingredients
- 1 can (15 oz) pure pumpkin puree
- 1 can (12 oz) evaporated milk
- 1 cup granulated sugar
- 4 large eggs
- 1 tsp salt
- 2 tsp pumpkin pie spice
- 1 box yellow cake mix
- 1 cup chopped pecans
- 1 cup unsalted butter, melted
- 8 oz cream cheese, room temperature
- 1/2 cup powdered sugar
- 8 oz whipped topping
Instructions
- Step 1: Whisk Base. Whisk pumpkin, evaporated milk, sugar, eggs, salt, and pumpkin pie spice until smooth.
- Step 2: Pour Custard. Pour into a greased 9×13-inch baking dish.
- Step 3: Layer Cake Mix. Sprinkle dry cake mix evenly over pumpkin mixture. Do not stir.
- Step 4: Add Pecans. Scatter chopped pecans evenly over the dry cake mix.
- Step 5: Drizzle Butter. Pour melted butter evenly over the top layer. Do not stir.
- Step 6: Bake. Bake at 350°F (175°C) for 55-60 minutes until the center is set. Cool completely.
- Step 7: Prepare Topping. Beat cream cheese and powdered sugar until smooth, then fold in whipped topping.
- Step 8: Assemble & Chill. Spread topping over the cooled cake and chill for 1 hour before slicing.
Notes
- Ensure all dairy and eggs are at room temperature before mixing to prevent separation.
- Do not stir the dry cake mix into the wet pumpkin; the separation is key to the texture.
- Use a warm knife wiped clean between cuts to get professional, clean slices.
- Prep Time: 20 mins
- Cook Time: 60 mins
- Category: Dessert
- Method: Baking
- Cuisine: American
The Mise en Place

A pastry chef begins with a clean workstation and ingredients tempered to the exact requirements of the recipe. Each component in this composition serves a structural purpose, from the moisture of the pumpkin to the fat content of the dairy. Understanding these roles allows you to bake with confidence, knowing how each element behaves under heat.
- Pumpkin Puree: This foundational element provides the essential moisture and delicate, earthy flavor of the base without the excess water or pre-blended spices found in commercial pie fillings. By using pure pumpkin, you retain complete control over the sugar balance and spice profile of your custard.
- Evaporated Milk: The reduction of water content in this specialized dairy product yields a concentrated fat structure that is essential for a velvety custard. Regular milk contains too much water, which would steam during baking and cause the delicate egg structure to curdle or separate.
- Large Eggs: Acting as the primary binding agent, the proteins in the eggs coagulate during the baking process to transform liquid dairy and pumpkin into a sliceable, stable custard. It is vital that these are at room temperature to guarantee they incorporate smoothly without seizing the other fats.
- Unsalted Butter: High-quality butter with a high butterfat content is non-negotiable for creating the crisp, golden praline topping. As the butter melts in the oven, it hydrates the dry cake mix, turning it into a rich, shortbread-like crust rather than a greasy layer.
- Pecans: These must be chopped uniformly to guarantee they toast at an even rate under the heat of the oven. Their natural oils release during baking, combining with the melted butter to create an aromatic, crunchy shield over the soft custard beneath.
- Cream Cheese: Tempered thoroughly to room temperature, this ingredient forms the smooth, stable base of our elegant final topping. Cold cream cheese will resist emulsification, leaving unsightly lumps that ruin the velvety texture of the whipped cream layer.
| Ingredient | Why It Matters |
|---|---|
| Pumpkin Puree | Establishes the smooth, structural custard base. |
| Evaporated Milk | Delivers concentrated richness without excess liquid. |
| Melted Butter | Hydrates the dry cake mix to create a crisp praline. |
| Cream Cheese | Anchors the velvety, lightly sweetened final topping. |
The Method, Step by Step

Step 1: Tempering the Wet Ingredients
Begin with room temperature elements. Whisk together the pumpkin puree, evaporated milk, granulated sugar, large eggs, salt, and pumpkin pie spice in a large glass bowl. You will notice the mixture transforms into a smooth, pale orange liquid with no visible streaks of egg yolk. Confirm the spices are completely dispersed throughout the liquid before proceeding, as this guarantees an even distribution of flavor.
Step 2: Preparing the Baking Dish
Butter your pan with precision. Apply a thin, even layer of softened butter to the bottom and sides of a nine-by-thirteen-inch ceramic or glass baking dish. This creates a reliable barrier that prevents the delicate pumpkin custard from sticking during its long caramelization process. Pour the whisked pumpkin mixture gently into the prepared dish, allowing it to settle naturally into a completely flat, even layer.
Step 3: Distributing the Dry Cake Mix
Sift the flour mixture evenly. Sprinkle the dry yellow cake mix over the wet pumpkin base, using a gentle shaking motion of your hand to guarantee uniform coverage. Do not stir or agitate the layers, as we require the dry mix to sit precisely on top of the liquid. Any disruption here will cause the cake mix to sink into the pumpkin, destroying the clean boundary of your Classic Pumpkin Crunch Cake layers.
Step 4: Layering the Pecans
Scatter the nuts with intention. Distribute the chopped pecans evenly across the dry cake mix layer, guaranteeing every square inch receives an equal share. The nuts must sit on top of the dry flour, where they will toast beautifully in the oven’s dry heat. This step provides the structural foundation for the signature crunch that defines the completed bake, creating a delightful contrast to the custard.
Step 5: Applying the Melted Butter
Drizzle the warm fat slowly. Pour the melted unsalted butter evenly over the pecan and cake mix layers, taking care to cover any dry patches of flour. Do not stir the pan; the butter will naturally seep down during the bake, hydrating the cake mix to create a golden, biscuit-like crust. A steady hand here guarantees that no pocket of dry flour remains unhydrated, which would otherwise leave powdery spots in the finished cake.
Step 6: The Slow Bake
Bake until the center sets. Place the dish in a preheated oven at three hundred and fifty degrees Fahrenheit for fifty to sixty minutes. You will observe the edges bubbling gently and the pecan topping turning a deep, amber gold. The cake is done when a gentle shake reveals only a slight, stable wobble in the exact center, indicating the custard has set without overcooking.
Step 7: The Critical Cooling Phase
Allow the structure to firm. Remove the pan from the oven and place it on a wire cooling rack to rest completely. Patience here is not a virtue — it is an instruction. The custard must cool to room temperature, and then chill in the refrigerator, to allow the fats and proteins to solidify completely before you attempt to spread the topping.
Step 8: Emulsifying the Cream Cheese Topping
Whip to a velvety ribbon. Beat the tempered cream cheese and powdered sugar together until completely smooth and free of lumps. Gently fold in the whipped topping using a silicone spatula, moving in a slow circular motion to preserve the aeration. The resulting cream should be light and billowy, holding soft peaks that will sit gracefully atop the chilled cake.
Step 9: The Final Assembly
Spread the topping with care. Spoon the cream cheese mixture over the completely cooled cake, using an offset spatula to smooth it into an elegant, even layer. Return the cake to the refrigerator for at least one hour before slicing. This final rest allows the flavors to meld and facilitates clean, sharp cuts when presenting your creation to your guests.
Where Precision Makes the Difference

If your custard layer appears watery or separates after baking, this is often the result of using cold eggs or milk. When cold ingredients meet warm melted butter, the emulsion breaks, causing the dairy fats to separate from the water content. Always make sure every liquid ingredient sits on your counter for at least forty-five minutes before you begin mixing.
To achieve the clean, sharp cuts expected of a professional patisserie, dip your chef’s knife in warm water and wipe it clean between every single slice. This prevents the delicate cream cheese topping from dragging into the golden pecan layer, preserving the beautiful contrast of the cross-section. A clean presentation is the ultimate reflection of the baker’s care.
Sifting your dry cake mix before sprinkling it over the pumpkin layer prevents dense clumps of flour from escaping hydration. Unhydrated flour pockets will remain dry and powdery even after an hour in the oven, disturbing the texture of your crust. Taking thirty seconds to sift guarantees a uniform, biscuit-like texture across the entire surface.
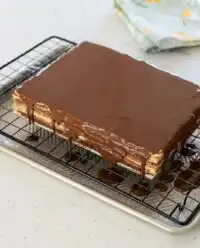
For those seeking to master other complex dessert textures, understanding the balance of fat and moisture is key. Consider practicing with our chocolate caramel toffee crunch cake, which offers a similar lesson in layering contrasting elements to achieve structural harmony. Each recipe builds upon the foundational skills of heat control and ingredient behavior.
Never rush the melting of your butter; melt it slowly over low heat or in short intervals in the microwave. Overheated butter loses its moisture content through steam, which can leave your crust dry and greasy rather than crisp and short. The water content in butter is necessary to activate the starches in the cake mix.
The choice of baking dish matters immensely; a heavy ceramic dish retains heat more evenly than a thin metal pan. This slower, more uniform heat transfer prevents the edges of your pumpkin custard from overcooking before the center has had time to set. Metal pans heat too quickly, which can result in rubbery edges and an undercooked center.
Frequently Asked Questions
What is the difference between pumpkin puree and pumpkin pie mix?
Pumpkin puree consists entirely of cooked, mashed pumpkin with no added sugars, starches, or spices. Pumpkin pie mix, on the other hand, contains sweeteners, water, and spices already mixed in. For this recipe, you must use pure pumpkin puree to maintain precise control over the sugar content and spice balance of your custard.
Can I use a cake mix other than yellow?
Yes, you can adapt this recipe by using a spice cake mix or a butter pecan cake mix. These alternatives add complementary warm notes to the dessert, enhancing the overall spice profile. Avoid chocolate or fruit-flavored mixes, as they will clash with the delicate pumpkin custard and ruin the balance of flavors.
Do I have to use pecans?
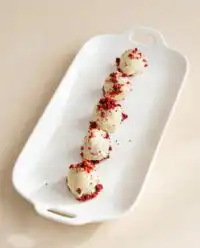
While pecans offer the classic southern flavor profile, you can easily substitute them with walnuts or hazelnuts. If you have a nut allergy, you can omit them entirely or substitute them with rolled oats tossed in a small amount of brown sugar. The oats will still provide a pleasant texture contrast without compromising safety.
What can I use instead of evaporated milk?
Heavy cream is the most suitable substitute for evaporated milk, as it maintains the necessary fat content to set the custard properly. Avoid using regular whole milk or skim milk, as their high water content will make the pumpkin layer wet and unstable. This structural balance is a lesson in dairy fat that you can also observe in our other creamy desserts.
Do I mix the dry cake mix into the wet ingredients?
No, you must never mix the dry cake mix into the wet pumpkin layer. Leaving the cake mix as a distinct layer allows the melted butter to hydrate it from the top down, creating a crisp crust. Mixing them together would result in a heavy, dense pumpkin bread rather than a beautifully layered crunch cake.
How much butter do you need and how is it applied?
You will need one cup of unsalted butter, melted completely but not allowed to become boiling hot. It is applied by drizzling it slowly and evenly over the top of the cake mix and pecan layers. A slow, steady pour guarantees that the dry flour is hydrated without disturbing the neat separation of the layers.
Does this dessert need to be refrigerated?
Yes, because of the cream cheese topping and the egg-rich custard base, this cake must be stored in the refrigerator. Keep it covered with plastic wrap or in an airtight container to prevent it from absorbing other refrigerator odors. It will keep beautifully for up to four days, and the flavors actually deepen over time.
Can I freeze the completed Pumpkin Crunch Cake?
You can freeze the baked and cooled cake base before adding the cream cheese topping. Wrap the pan tightly in plastic wrap and aluminum foil, and store it in the freezer for up to three months. When ready to serve, thaw it overnight in the refrigerator, then prepare and spread the fresh cream cheese topping immediately before slicing.
Considered Variations
For a deeper, more caramelized flavor profile, you may substitute the traditional yellow cake mix with a spiced cake mix. This adaptation introduces notes of ginger, nutmeg, and clove directly into the crust, complementing the pumpkin base beautifully. If you prefer a lighter, fruit-forward profile instead, you might consider our no bake lemon blueberry dessert for a refreshing alternative.
You can substitute the pecans with raw walnuts or slivered almonds to alter the nutty notes of the crust. Make sure the nuts are chopped to a uniform size so they toast at the same rate under the heat of the oven. For more inspiration on classic pumpkin crunch cake adaptations, consult the detailed guide on pumpkin crunch cake layering techniques.
A sophisticated touch can be added by incorporating a tablespoon of dark rum or bourbon into the pumpkin custard mixture before baking. The alcohol cooks off, leaving behind a complex warmth that pairs beautifully with the toasted pecans. This subtle enhancement refines the cake from a simple family dessert to an elegant dinner party finale.
Presentation and Service
Presenting this dessert requires the same attention to detail as its preparation. Slice the chilled cake into precise squares using a warm, clean knife, and serve it on chilled dessert plates to maintain the integrity of the cream cheese topping. The contrast of the cool cream against the spiced pumpkin layer is best enjoyed when the cake is served slightly below room temperature, allowing the butter in the crust to soften slightly.
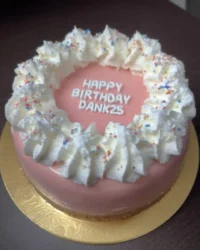
To refine the visual presentation, garnish each individual slice with a light dusting of freshly grated nutmeg or a single, pristine pecan half placed in the center of the cream. If you are hosting a formal gathering, you might offer this alongside our elegant limoncello mascarpone cake to give your guests a choice between warm autumn spices and bright, citrus-infused layers. This contrast of flavors provides a thoughtful and balanced dessert table.
For an elegant afternoon tea service, pair a slice of this cake with a robust black tea, such as Earl Grey or Assam. The natural tannins in the tea cut through the richness of the cream cheese and butter, while the bergamot notes complement the warm spices of the pumpkin. Serving the tea in delicate porcelain alongside the structured slices of cake creates an atmosphere of unhurried refinement.

The Result of Your Care
When you take the time to measure precisely and layer with care, the reward is a dessert that far exceeds the sum of its humble parts. The clean separation of the silky pumpkin custard, the buttery pecan crunch, and the cloud-like cream cheese topping is a testament to the quiet power of patience in the kitchen. Small things, done exactly right, yield a masterpiece every time.
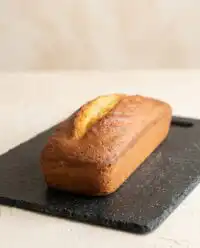
As you share this creation with your family and friends, remember that the techniques you practiced here are foundational to all fine baking. For your next baking project, we invite you to master the delicate crumb of our quick italian cream cake, another exercise in balancing rich textures and refined flavors. Each step forward in your baking journey is a step toward true culinary mastery.
We would love to see the beautiful layers of your finished bake. Share your culinary success with our community on Facebook or save your progress by pinning this recipe on Pinterest. Your dedication to the craft inspires us, and we look forward to guiding you through your next precise creation.

