Freezing a massive haul of melon cluttering your counter is chaos, but freezing exactly eight precise wedges in a single flat sheet is pure small-batch focus.

You do not need a giant commercial freezer to tackle a whole summer harvest when a tiny, controlled batch does the job with far more precision. Preparing these Frozen Watermelon Teething Pops in limited quantities means every single slice receives the exact structural cut required for tiny hands to hold safely. This targeted approach prevents the melon flesh from turning into a jagged block of solid ice that is impossible to manage. We are focusing on tight parameters today to yield a clean, soothing texture that offers instant relief.
Why Small-Batch Works Here for Frozen Watermelon Teething Pops
Prep: 10 min · Serves: 8 · Difficulty: Easy
- Clean hydration directly from the ripe red fruit source.
- Rigid rinds make safe natural handles for tiny fingers.
- Cold textures numb sore baby gums quickly and naturally.
- Small portion sizes reduce wasteful, time-consuming kitchen preparation.
- Fast clean cleanup simplifies busy parental clean-up routines.
While we often celebrate elaborate setups like a classic watermelon fruit cake story, sometimes the most direct path to relief is a simple, frozen wedge. This targeted frozen treat bypasses all the complex assembly of multi-tiered cakes while delivering pure, chilled moisture exactly where your infant needs it. You bypass the unnecessary fillers, stabilizers, and artificial dyes found in supermarket popsicles in favor of pure, single-ingredient hydration. Preparing these in compact quantities guarantees that your freezer remains uncluttered and your ingredients stay perfectly fresh.
Tradition noted. Proceeding anyway with a freezing method that makes commercial toys obsolete.
Get The Full Cake Recipe
Print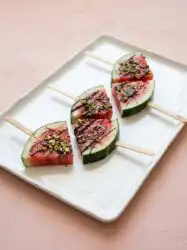
Frozen Watermelon Teething Pops
- Total Time: 6 hours 10 mins
- Yield: 8 pops
- Diet: Vegan, Gluten-Free
Description
These refreshing frozen watermelon wedges are a simple, natural remedy for soothing sore infant gums. By using fresh seedless melon and sturdy wooden handles, you can create a perfect, non-toxic handheld treat for hot summer days.
Ingredients
- 1 seedless watermelon
- 8 food-grade wide popsicle sticks
- Parchment paper
- Fresh lime juice (optional)
- Filtered water (optional)
Instructions
- Clean the fruit. Scrub the exterior of the watermelon under cool running water with a stiff brush and dry thoroughly with a clean towel.
- Slice into wedges. Cut the melon in half, then slice into one-inch thick rounds and further divide into uniform triangular wedges.
- Prepare the rind. Use a sharp paring knife to make a small, precise incision in the center of the green rind, about half an inch deep.
- Insert the handle. Firmly push a wooden popsicle stick into the pre-cut slit until it is securely anchored in the white pith.
- Arrange for freezing. Place a sheet of parchment paper on a baking tray and set the wedges in a single layer, ensuring they do not touch.
- Deep freeze. Place the tray in the coldest part of your freezer for at least six hours until the watermelon is completely frozen through.
Notes
- Use a fully ripe watermelon with a yellow ground spot to ensure the fruit remains tender even after freezing.
- Always keep the wedges at least one inch thick to maintain structural integrity and prevent them from warping during the freezing process.
- Store any remaining prepared wedges in a sealed container once frozen to prevent freezer burn or flavor absorption.
- If the melon flesh splits during insertion, cut a slightly wider channel in the rind rather than forcing the stick.
- Prep Time: 10 mins
- Cook Time: 6 hours
- Category: Baby Food
- Method: Freezing
- Cuisine: American
What You Actually Need
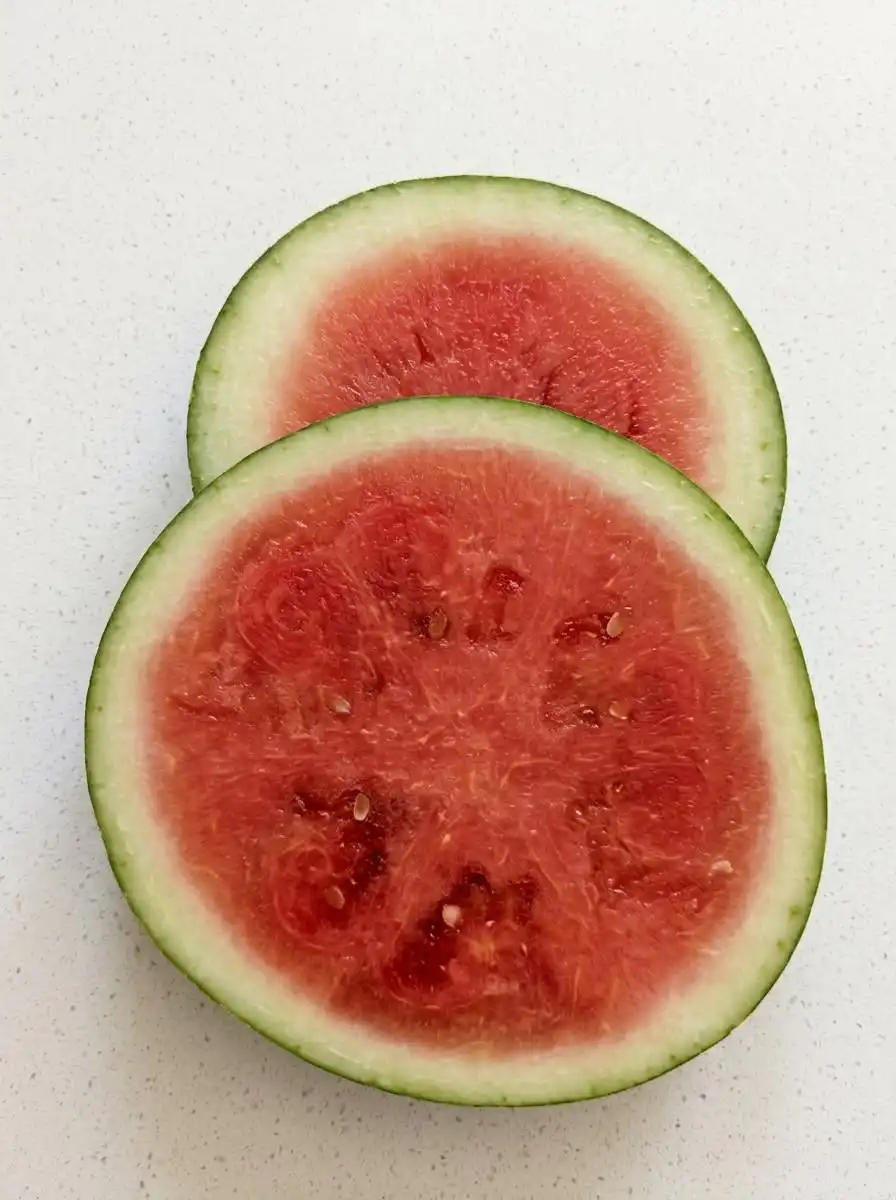
Selecting the right raw materials is the first and only real defense against a watery, structural failure. Since this recipe relies on a single key element, your choice of melon dictates the entire outcome. Preparing a small batch allows you to inspect every square inch of the fruit with clinical focus and absolute precision.
- Seedless Watermelon: You must select a dense, heavy specimen that displays a deep, buttery yellow spot where it rested on the soil during growth. This yellow patch is the ultimate visual cue that the sugars have fully concentrated, ensuring the flesh freezes with a tender, scoop-like texture rather than a rock-hard ice density. Avoid any melons with pale white spots or hollow-sounding thumps that indicate underripe, starchy pulp.
- Popsicle Sticks: Wooden handles provide the optimal texture for damp baby hands to grip without slipping. Choose food-grade, wide craft sticks that are thick enough to resist bending under pressure but narrow enough to fit comfortably in your pre-cut rind slits. Silicone alternatives are acceptable, but natural wood offers a rustic, reliable friction that holds steady during vigorous chewing.
- Parchment Paper: Heavy-duty, silicone-coated baking paper is the non-negotiable layer that sits between your wet melon wedges and the metallic sheet. This thin sheet prevents the leaking fruit sugars from cementing the wedges to the pan during the intense freezing cycle. Using foil or wax paper will lead to tearing and unwanted residues sticking directly to the edible fruit.
- Fresh Lime (Optional): A quick splash of fresh lime juice can be brushed over the melon surfaces to add a bright, preservative layer. The mild acidity balances the dense sweetness of the melon while helping to lock in the bright pink hue of the flesh. It is a simple, optional addition that works beautifully for older infants who are ready for more complex flavor profiles.
- Filtered Water (Optional): If you decide to blend the melon for molded pops, a tiny splash of purified water helps the blender blades catch without diluting the rich fruit flavor. Use this sparingly, as excessive water will create large, jagged ice crystals that are too hard for delicate gums. Precision in your liquid ratios is the secret to maintaining a soft, chewable icy texture.
| Ingredient | Why It Matters |
|---|---|
| Seedless Watermelon | Yields sweet, dense flesh that is safe and soft enough for small gums. |
| Popsicle Sticks | Acts as a sturdy anchor inserted directly into the rind. |
| Parchment Paper | Prevents sticking and guarantees easy release from the sheet. |
| Fresh Lime | Optional acidic wash that preserves the natural bright color of the flesh. |
| Filtered Water | Optional blending aid that maintains a smooth, liquid consistency. |
The Method
Step 1: Selecting and Washing Your Chosen Melon
You must begin with a pristine exterior to prevent transferring surface contaminants from the rind to the sweet interior flesh. Scrub the entire tough green skin under cool, running water using a stiff-bristled brush to remove stubborn soil and agricultural residues. You will notice a clean, fresh, grassy aroma rising from the wet rind as the outer layer is thoroughly cleansed. Dry the entire surface meticulously with a clean microfiber towel so your knife blade does not slip during the critical initial cuts.
Step 2: Slicing into Stable Wedges
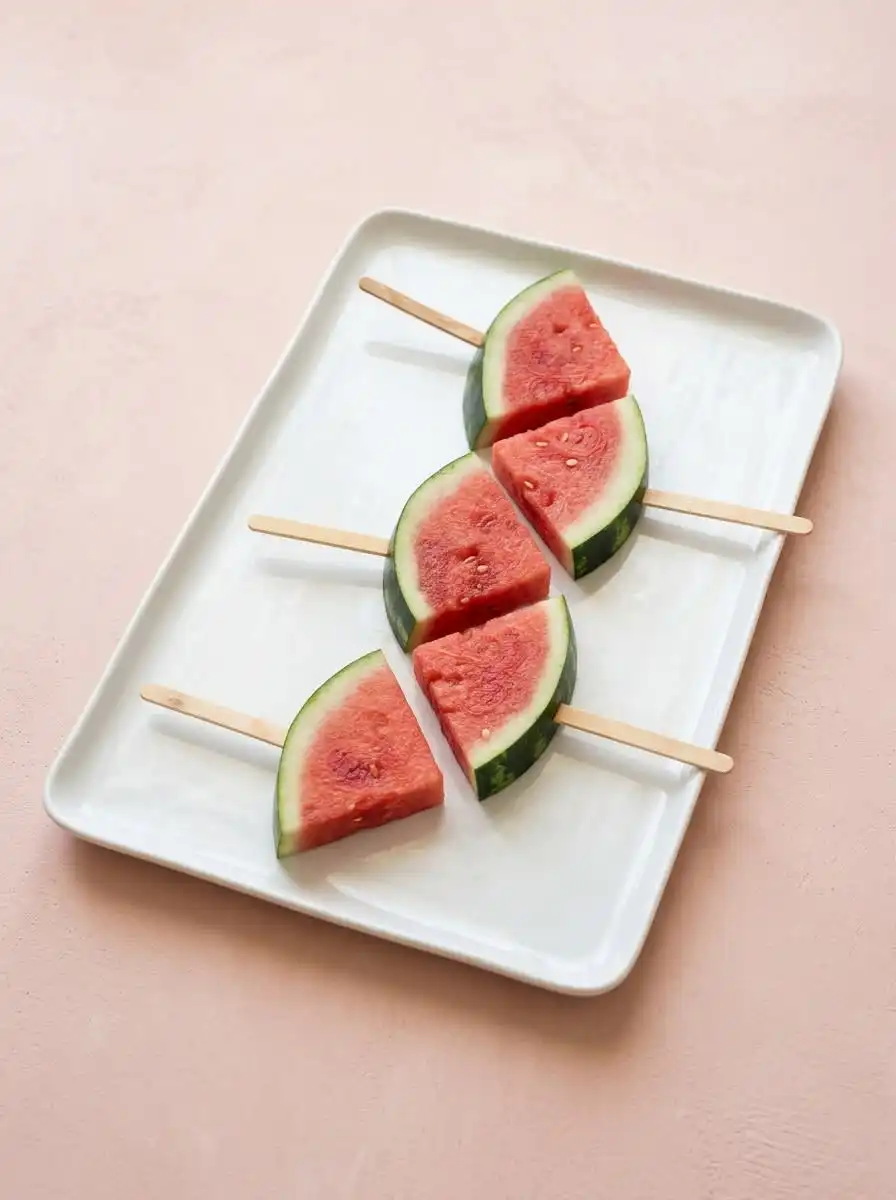
Slice the melon cleanly in half across its equator using a long, heavy chef’s knife to expose the glowing red interior. Lay each halved portion flat-side down on your heaviest cutting board to secure the base before making your next cuts. Slice the halves into uniform round discs that measure exactly one inch in thickness to guarantee structural consistency. Cut these thick discs into neat, triangular wedges that are small enough for an infant to grasp but large enough to contain the popsicle handle safely.
Step 3: Prepping the Sturdy Rinds
Hold a single triangular wedge firmly against the cutting board with your non-dominant hand while keeping your fingers clear of the edge. Use a sharp, narrow paring knife to make a small, controlled incision directly in the center of the green rind. The cut must be exactly the width of your wooden stick and penetrate about half an inch into the white pith. You will feel the blade yield as it passes through the tough rind into the soft, yielding red flesh.
Step 4: Inserting Your Wooden Handles
Push the wooden stick slowly into the pre-cut slit until it is deeply and securely embedded in the firm white rind of the wedge. You want the handle to sit straight and perfectly centered so the center of gravity remains balanced in tiny hands. If you hear a soft crack or feel the rind split, set that piece aside for parent snacks and adjust your next slit to be slightly wider. A properly seated handle will feel rock-solid and stable when you gently wiggle the stick.
Step 5: Lining the Sheet
Lay a pristine sheet of parchment paper flat across a heavy baking sheet to prepare your freezing workspace. This step is a critical defense because the high natural sugar content of the melon juice will stick to bare aluminum like hot glue. Press the paper firmly into the corners of the pan so it remains flat and does not curl up over your prepared fruit. You will hear a satisfying crinkle as the protective paper settles onto the cold metal tray.
Step 6: Arranging the Frozen Watermelon Teething Pops
Place the prepared wedges in a single, neat layer on the lined sheet with ample breathing room between each piece. Check that none of the wet flesh touches its neighbor, as they will fuse into a single solid block of ice mid-freeze. The wooden handles should all point in the same direction to keep the tray organized and easy to handle. This layout presents a beautiful, geometric pattern of pink and green that is ready for the extreme cold.
Step 7: Executing the Deep Freeze
Slide the entire loaded tray into the coldest part of your freezer and leave it undisturbed for at least six hours. The water within the melon cells slowly transforms into structured ice crystals during this quiet period of thermal consolidation. Keep the freezer door closed as much as possible to prevent warm air drafts from creating large, jagged ice sheets on the exposed flesh. When fully frozen, the wedges will sound like solid wood when tapped gently against each other.
Notes from Testing
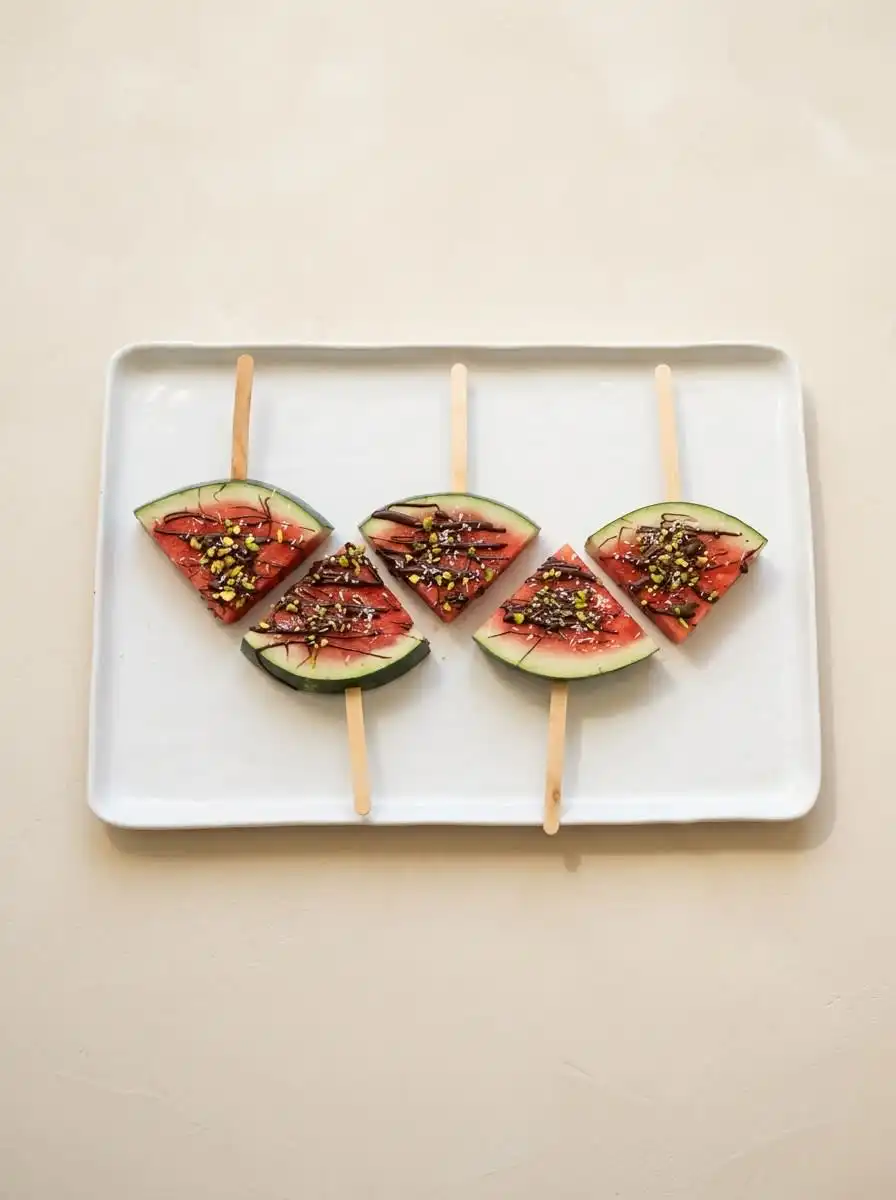
If your melon flesh cracks when inserting the stick, the incision was likely too shallow or your knife blade was too dull. Fix this by using a thin paring knife to lengthen the channel before attempting to slide the wood in. Never try to wedge a thick handle into a tight, unprepared rind or you will split the structural base completely. A clean, sharp cut is the only way to protect the integrity of the rind.
Adequate clearance in your freezer is critical to achieving a rapid freeze that locks in the best cellular texture. Clear a flat shelf before you begin cutting so the tray can slide in perfectly level without tilting. If space is tight, use a smaller quarter-sheet pan and freeze in multiple miniature batches instead of forcing a large sheet. Rapid cooling prevents large ice crystals from forming, which preserves the sweet flavor of the fruit.
If you prefer a smooth, molded shape over rustic whole fruit slices, blend the red flesh and run it through a fine-mesh strainer. Removing the fibrous pulp creates a glassy, uniform texture that melts smoothly without leaving behind small stringy bits. This method is excellent for younger infants who are newly beginning their solids journey and cannot handle raw fiber. You can freeze this strained juice in small silicone molds with handles for an alternative presentation.
While classic baked treats like a ritz cracker salted caramel icebox cake rely on heavy cream to stay soft, frozen fruit relies entirely on its natural sucrose levels to prevent rock-hard ice sheets. Selecting a melon that is fully ripe provides a higher sugar concentration, which acts as a built-in softener. An underripe melon will freeze into a punishing, flavorless glacier that is too hard for sore gums. This is why we never skip the physical inspection of the ground spot before purchase.
Monitoring the thickness of your cuts is another crucial factor in how the melon behaves under extreme cold. Aim for exactly one inch of thickness so the center of the wedge retains a slight yield even when completely frozen. You can refer to these easy prep for frozen watermelon popsicles to see how clean cuts behave when subjected to sub-zero storage. Thinner cuts will bend and warp as they freeze, making them difficult for a baby to hold.
Always use high-quality parchment rather than waxed paper or foil for lining your trays. Waxed paper can transfer its waxy coating to the wet melon skin, while foil tends to tear and stick to the frozen sugar. A clean sheet of silicone-coated baking paper is the gold standard for effortless release. This small detail guarantees that your baby’s first cold treat is free from paper fibers or metallic tears.
Frequently Asked Questions
At what age can a baby have frozen watermelon pops?
Most babies can safely enjoy these cooling treats around six months of age, which is when they typically show readiness for solid foods. Always look for key developmental signs like good head control and the ability to sit upright before introducing new textures. It is wise to consult your pediatrician if you have specific concerns about your infant’s developmental milestones. Waiting until six months guarantees that their digestive tract is fully prepared for raw fruit fiber.
Is frozen watermelon a choking hazard for babies?
Frozen melon can become a choking hazard if large, hard chunks break off in the mouth before melting. To prevent this, always supervise your baby closely and make sure they are sitting completely upright while enjoying the pop. Leaving the rind on provides a secure handle that keeps the melon structurally intact while they gnaw on the soft edges. If you notice a large piece shearing off, quickly remove it from their mouth immediately.
Can a 4-month-old have watermelon teething pops?
It is generally not recommended to introduce these pops to a four-month-old infant. Most pediatric guidelines advise waiting until six months when the digestive system and swallowing reflexes are more mature. If your younger baby is struggling with early teething discomfort, stick to cold washcloths or silicone teethers until they reach the appropriate age. Introducing raw fruit too early can upset a baby’s delicate stomach.
Should I leave the rind on frozen watermelon slices for a baby?
Leaving the rind on is highly recommended because it acts as a tough, natural handle that is easy for small hands to grip. The rind is virtually impossible for a toothless baby to bite through, which keeps the sweet flesh safely anchored. Always be sure to scrub the outer skin meticulously before cutting the melon to guarantee absolute cleanliness. Removing the rind entirely makes the slippery flesh very difficult for an infant to hold.
Does frozen watermelon actually help with teething pain?
The intense cold of the frozen melon acts as a natural anesthetic that temporarily numbs sore, inflamed gums. As the baby gnaws on the wedge, the mild pressure combines with the cold to provide immediate relief from the discomfort of emerging teeth. Plus, the sweet juice offers a pleasant sensory distraction from the constant pain. It is a healthy, chemical-free alternative to store-bought teething gels.
Why is watermelon better than traditional popsicles for teething?
Watermelon is a superior choice because it is a whole, single-ingredient food free from added sugars, dyes, or artificial preservatives. Traditional store-bought popsicles are often loaded with sweeteners that can promote early tooth decay and cause sugar crashes. The natural fiber in the melon also guarantees a slower, more even absorption of the fruit’s natural sugars. This simple, raw treat respects the child’s developing palate without introducing synthetic chemicals.
How do you make watermelon teething pops?
You cut fresh, ripe watermelon into neat triangular wedges and slice a small channel directly into the outer rind. Insert a sturdy popsicle stick into the slot, arrange the pieces on a parchment-lined baking sheet, and freeze them for at least six hours. This straightforward process requires no special molds or complex kitchen tools to execute. It is an accessible, low-waste method that any home cook can master in ten minutes.
How long do frozen watermelon pops stay good in the freezer?
These simple treats are best enjoyed within two to three weeks of freezing to guarantee optimal flavor and texture. Over time, the moisture in the melon cells will undergo sublimation, leading to freezer burn and a dry, woody texture. Keep them stored in a tightly sealed, airtight container once they are fully frozen on the initial tray. This protective barrier prevents the fruit from absorbing stale freezer odors.
Rebel Swaps
For an ultra-hydrating twist, you can lightly brush the raw melon wedges with pure, unsweetened coconut water before freezing. This simple swap adds a subtle tropical note and increases the potassium content, making it an excellent recovery snack after a warm afternoon outside. If you love presenting fruit in unique structures, read about a watermelon fruit cake tower story for inspiration on scaling up your melon presentations. The coconut water freezes into a thin, icy glaze that melts quickly upon contact with warm gums.
If you are preparing these treats for older toddlers, a light dusting of lime zest and finely minced mint adds a refreshing, complex finish. This combination stimulates the palate while maintaining the cooling, soothing properties of the frozen fruit. Scatter the zest over the freshly cut wedges right before they slide into the freezer so the oils fuse with the surface moisture. The bright green flecks also add a beautiful visual contrast against the deep pink flesh of the melon.
You can introduce a pleasant creamy element by dipping half of each frozen melon wedge into unsweetened Greek yogurt and freezing it for an additional hour. This creates a dual-texture treat that offers both the iciness of the melon and the soft, protein-rich cushion of the dairy. It is a fantastic bridge for babies who are ready to investigate more complex mouthfeels beyond simple water-based snacks. The tanginess of the yogurt balances the intense sweetness of the frozen melon beautifully.
Cutting, Plating, Presenting
These cooling wedges are the ultimate addition to a sunny backyard gathering or a warm afternoon on the porch. Since frozen melon will naturally drip as it melts, serving them outdoors reduces clean-up friction to absolute zero. You can arrange the bright pink triangles on a large platter lined with fresh mint leaves for a visually striking presentation that appeals to both eyes and palates. The contrasting colors of the green leaves and pink flesh create an instant summer mood.
If you are serving these indoors, place a wide silicone bib on your baby to catch the sweet, dripping juice as the melon warms up. You can also lay down a clean splash mat under the high chair to protect your hardwood floors or carpets from potential stains. If you are inspired by alternative messy celebration ideas, read the smash cake made watermelon story to see how raw fruit can become a beautiful, sensory centerpiece. Embracing the natural mess of childhood makes these moments much more memorable.
For older children who have outgrown teething but still crave a cold summer snack, you can serve these wedges with a small bowl of lime juice and sea salt for dipping. This classic Mexican-style presentation brings a bright, savory contrast that intensifies the natural sweetness of the melon. It transforms a simple baby remedy into a sophisticated, refreshing treat that the entire family can enjoy together. It is a fantastic way to bridge the age gap at your next family gathering.
What You Just Proved
By stepping away from plastic teething rings and chemical gels, you have embraced a clean, whole-food remedy that is as beautiful as it is functional. This simple freezing technique proves that we do not need complex engineering to solve everyday parental challenges. It is small-batch baking logic applied to raw, unadulterated fruit with spectacular results. You have demonstrated that nature provides the most elegant solutions when we respect its basic design.
If you are excited about the creative potential of raw melons, there is a whole world of natural desserts waiting to be discovered in your kitchen. Discover the fresh watermelon layer cake story to see how a single fruit can be sculpted into a stunning centerpiece without a speck of flour. The kitchen is your laboratory, and every experiment brings you closer to mastering natural ingredients. There is no limit to what you can achieve when you treat recipes as a launching pad rather than a cage.
We would love to see your little ones enjoying these cold, refreshing treats on a hot summer afternoon. Share your pictures and join our adventurous baking family on Pinterest and Facebook to stay updated on our latest kitchen experiments. Let’s continue pushing the boundaries of flavor and technique together, one small batch at a time. Your journey into bold, hands-on food creations is only beginning.