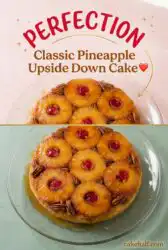
An amateur upside-down cake is often marred by a soggy, saturated crumb and unevenly caramelized fruit, whereas a technically precise version showcases a clean, dry crumb beneath a precisely glazed crown.

Achieving this immaculate balance requires us to examine the delicate relationship between sugar, fruit moisture, and batter structure. This Classic Pineapple Upside Down Cake relies on a carefully emulsified sponge that absorbs the bubbling pineapple juices without collapsing into heaviness. By treating the butter and sugar layer not merely as a sweet topping but as a structured caramel glaze, we refine a mid-century nostalgic favorite into an elegant work of pastry art. With the correct thermal conditions and patience, your efforts will yield a dessert that is as structurally sound as it is beautiful.
Why Technique Matters for This Classic Pineapple Upside Down Cake
Prep: 20 min · Serves: 8 · Difficulty: Medium
This refined bake rewards precision with a flawless, golden caramelized finish.
- Butter and sugar form a structured caramel base.
- Sifting flour produces a delicate, uniform crumb texture.
- Pineapple juice adds natural acidity to the batter.
- Controlled cooling prevents the fruit from sticking.
- Proper egg emulsification stabilizes the sponge cake.
Our elegant peach upside down cake technique guarantees your final reveal is stunning.
Get The Full Cake Recipe
Print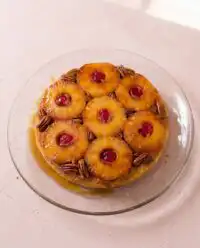
Classic Pineapple Upside Down Cake
- Total Time: 1 hour 15 mins
- Yield: 8 servings
Description
This classic pineapple upside down cake features a tender, golden sponge cake baked over a rich, buttery caramel base of caramelized pineapple slices and maraschino cherries. Through precise emulsification and moisture control, this recipe ensures a perfectly structured, moist crumb and a stunning fruit reveal.
Ingredients
- 6 tablespoons unsalted butter, melted
- 1 cup light brown sugar, packed
- 8 canned pineapple slices in natural juice
- Maraschino cherries
- 1 1/2 cups all-purpose flour
- 1 1/2 teaspoons baking powder
- 1/4 teaspoon kosher salt
- 1/2 cup unsalted butter, softened
- 1 cup granulated sugar
- 2 large eggs
- 1 teaspoon vanilla extract
- 1/2 cup whole milk
- 2 tablespoons reserved pineapple juice
Instructions
- Prepare the foundation. Pour the six tablespoons of melted unsalted butter into a nine-inch cake pan or skillet, ensuring it coats the bottom evenly on a level surface.
- Arrange the fruit. Sprinkle the brown sugar over the butter, then layer the pineapple rings and maraschino cherries in a symmetrical pattern.
- Whisk dry ingredients. Combine the sifted flour, baking powder, and salt in a bowl, whisking thoroughly to aerate and remove clumps.
- Cream butter base. Using a stand mixer, beat the softened butter and granulated sugar for three to four minutes until the mixture is pale and fluffy.
- Emulsify the batter. Incorporate the eggs, pineapple juice, and vanilla, then alternate adding the flour mixture and milk until the batter is smooth and emulsified.
- Bake the cake. Spread the batter evenly over the fruit and bake at 350°F (177°C) for forty-five minutes until a toothpick comes out clean.
- Rest the cake. Allow the cake to cool in the pan on a wire rack for exactly ten minutes to stabilize the caramel glaze.
- Invert and reveal. Place a platter over the pan, invert firmly, and lift the pan to reveal the caramelized pineapple topping.
Notes
- Ensure all dairy and egg components are at room temperature to prevent the batter emulsion from curdling.
- Drain pineapple slices on paper towels before arranging them to avoid excess liquid from compromising the cake texture.
- Use an offset spatula to smooth the batter carefully without displacing the fruit mosaic pattern.
- Wipe your knife with a warm, damp cloth between each slice to maintain a clean presentation of the caramel and sponge layers.
- Prep Time: 20 mins
- Cook Time: 45 mins
- Category: Dessert
- Method: Baking
- Cuisine: American
The Mise en Place
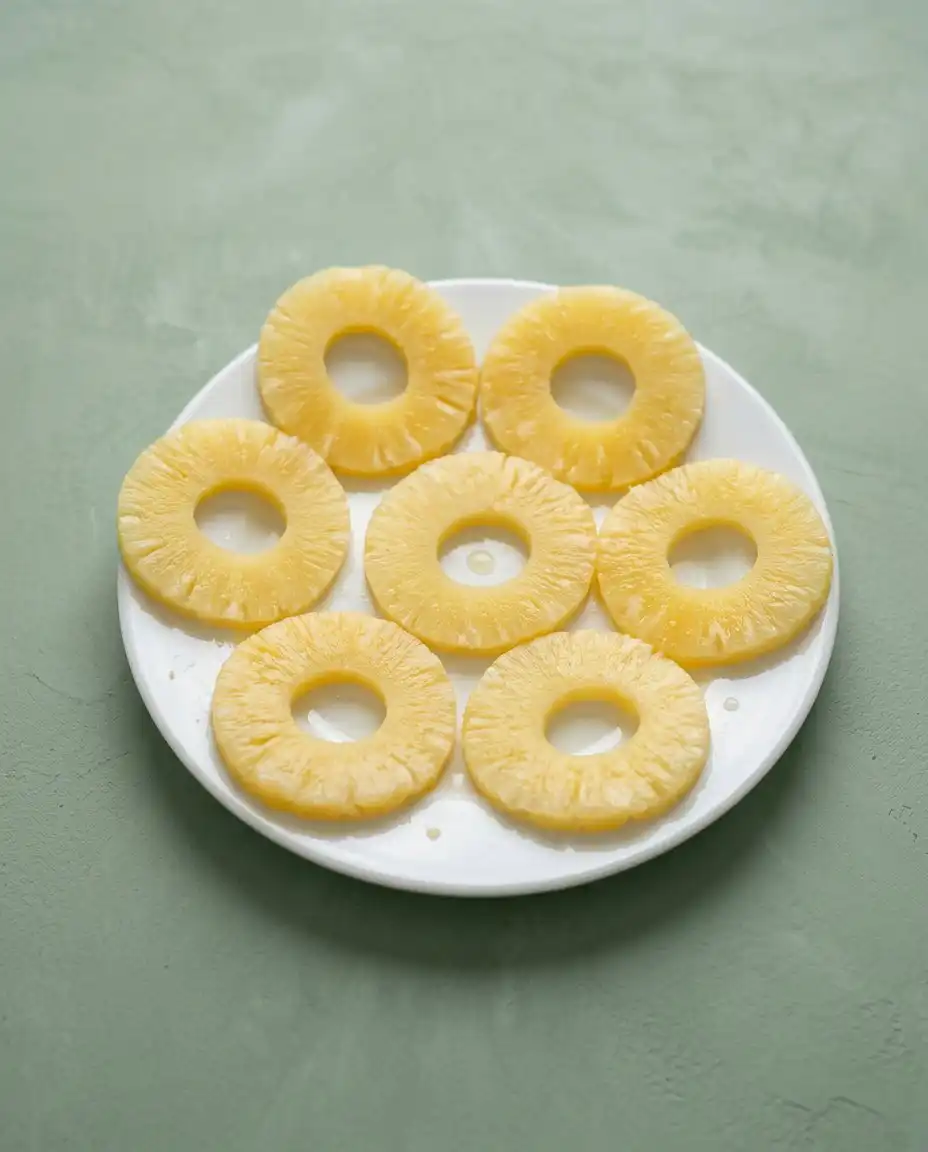
Before lighting your oven, you must organize your workspace according to the classic French principle of mise en place. Each element must be weighed, tempered, and positioned to guarantee a seamless execution once the butter begins to melt. Achieving a clean, dry crumb requires strict attention to the temperature and quality of each component.
- Unsalted Butter: This is a non-negotiable component that must have a high fat content to provide both structural integrity and a rich, tender crumb. Room temperature butter is an instruction, not a suggestion, as cold butter will cause the batter to curdle during cream emulsification.
- Light Brown Sugar: It serves as the rich foundation of the caramel glaze, offering molasses undertones that marry beautifully with the pineapple’s natural acidity. It must be packed firmly to guarantee accurate measurement and a consistent caramelized layer across the bottom of the pan.
- Sifted All-Purpose Flour: Sifting introduces air and guarantees the baking powder is evenly distributed, preventing any pockets of density in the baked sponge. This step is the patisserie apprentice’s first lesson in how small disciplines yield superior crumb structures.
- Canned Pineapple Slices: Canned fruit offers consistent moisture levels and thickness, which prevents excess liquid from saturating the delicate cake top. Be sure to select slices packed in 100% natural juice rather than heavy syrup to maintain the correct sugar-to-moisture ratio.
- Maraschino Cherries: These bright accents fill the gaps between the pineapple rings, providing a classic pop of color and a contrasting sweet note. They must be thoroughly drained and dried on paper towels before being placed in the pan to prevent color bleeding.
- Whole Milk: This provides the necessary hydration to activate the gluten gently, keeping the cake soft and tender. Like the other dairy elements, the milk must be at room temperature to maintain the stability of the creamed emulsion.
- Pineapple Juice: A small amount of reserved juice added directly to the batter provides a bright, acidic lift that balances the sweet caramel. This acidity also reacts with the baking powder, contributing to a lighter, more delicate crumb.
| Ingredient | Why It Matters |
|---|---|
| Unsalted Butter | Creates a tender crumb and a rich caramel glaze. |
| Light Brown Sugar | Caramelizes beneath the fruit for a glossy finish. |
| Sifted Flour | Provides the structural framework for a clean crumb. |
| Pineapple Slices | Delivers uniform moisture and classic tropical flavor. |
| Whole Milk | Hydrates the starches to keep the sponge moist and light. |
| Pineapple Juice | Adds natural acidity to balance the sweetness of the caramel. |
The Method, Step by Step
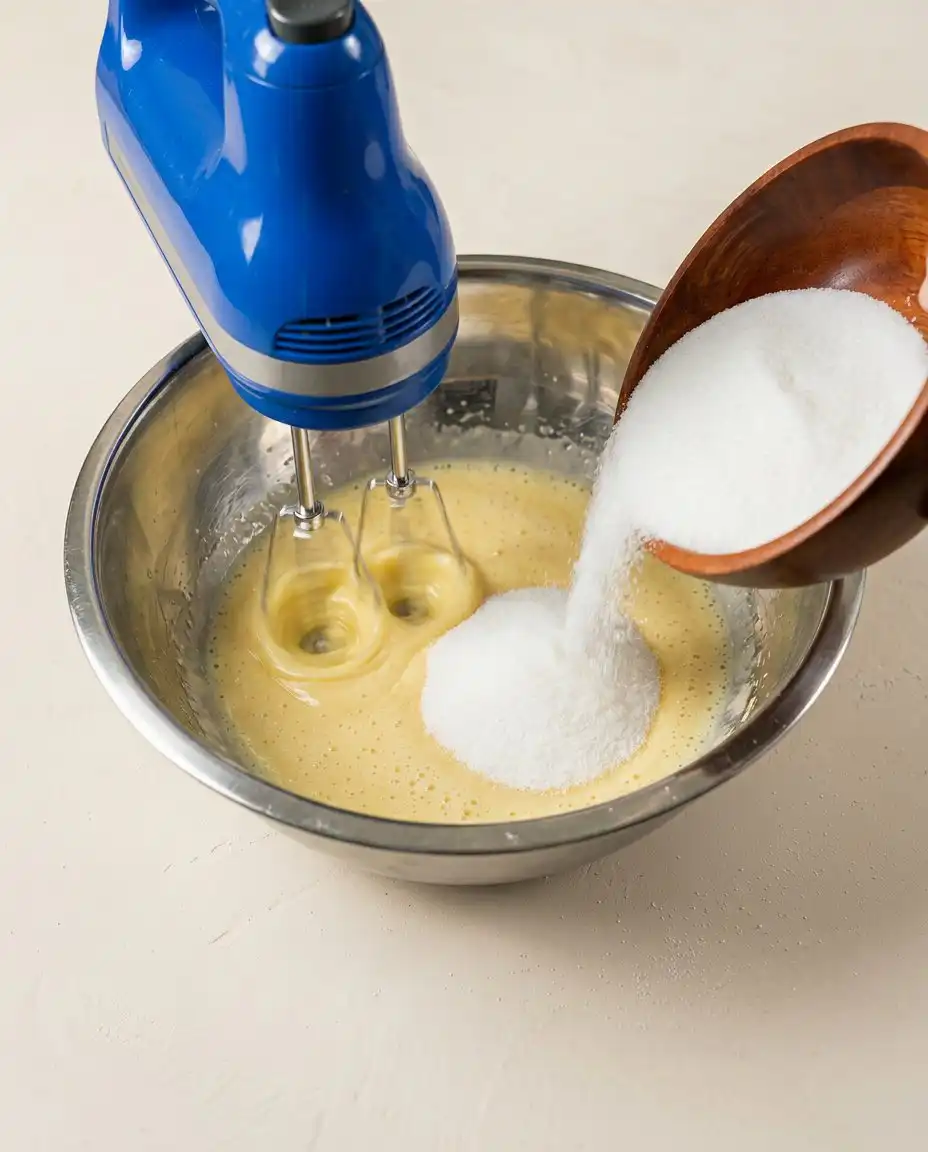
Step 1: Prepare the Melted Butter Foundation
Pour the six tablespoons of melted unsalted butter directly into your nine-inch cake pan or well-seasoned cast-iron skillet. The butter should coat the bottom evenly, forming a warm, golden pool that will act as the barrier between the sugar and the pan. Check that the pan is completely level on your counter so the butter does not pool to one side during the baking process. A level foundation is essential for preventing the caramel from baking into an uneven, lopsided layer.
Step 2: Arrange the Fruit Mosaic
Sprinkle the light brown sugar evenly over the melted butter, letting it absorb the fat until it resembles wet sand. Carefully arrange the eight pineapple rings on top of this sugar bed, fitting them snugly together in a circular pattern. Place the maraschino cherries in the center of each ring and in any empty spaces, pressing them gently so they are secure. This arrangement forms the visual crown of your cake, so take your time to make sure the pattern is symmetrical and neat.
Step 3: Whisk the Dry Ingredients
In a medium bowl, combine the sifted all-purpose flour, baking powder, and kosher salt. Use a balloon whisk to aerate the mixture, making sure there are no hidden clumps of leavening agent. The mixture should feel light and powdery, ready to be incorporated into the wet ingredients without resistance. This thorough whisking prevents uneven rising, preventing the baked sponge from developing an uneven surface.
Step 4: Cream the Butter and Sugar to the Pale Ribbon Stage
In the bowl of a stand mixer fitted with the paddle attachment, cream the unsalted butter and granulated sugar together on medium speed for three to four minutes. You will notice the mixture transition from a gritty paste to a pale, fluffy mass that holds its shape. Scrape down the sides of the bowl twice during this process to guarantee a uniform emulsion. This step incorporates the microscopic air pockets required for a tender, delicate crumb.
Step 5: Emulsify the Batter with Liquid Elements
Add the eggs one at a time, followed by the pineapple juice and vanilla extract, mixing until completely combined. Alternate adding the flour mixture and the whole milk in batches, beginning and ending with the flour. The finished batter should be thick, smooth, and fall from the spatula in a slow, unbroken stream. This classic ribbon stage indicates that the ingredients are completely emulsified and ready for the oven.
Step 6: Bake Your Classic Pineapple Upside Down Cake to Completion
Spoon the thick batter gently over the arranged pineapple rings and cherries, taking care not to disturb the fruit design beneath. Use an offset spatula to smooth the surface into an even layer that touches the edges of the pan. Bake at 350°F (177°C) for forty-five minutes, or until a toothpick inserted into the center emerges clean and dry. The cake should feel firm to a gentle touch and have a deep golden-brown color around the edges.
Step 7: The Critical Resting Period
Remove the cake from the oven and place the pan on a wire cooling rack. Allow it to rest undisturbed for exactly ten minutes; this is where the logic of resting comes into play as the hot caramel cools slightly and settles into a stable glaze. If you attempt to invert too early, the fruit may slip; if you wait too long, the caramel will harden and stick. This brief pause is a quiet discipline that guarantees structural success.
Step 8: The Inversion and Reveal
Place your serving platter upside down over the top of the warm cake pan. Holding both the pan and the platter firmly with oven mitts, invert the assembly in one swift, confident motion. Let the pan sit upside down for a few seconds to allow gravity to release the caramelized fruit, then gently lift the pan to reveal the golden crown. The caramelized fruit should gleam brilliantly, showcasing a flawless, unbroken glaze.
Where Precision Makes the Difference
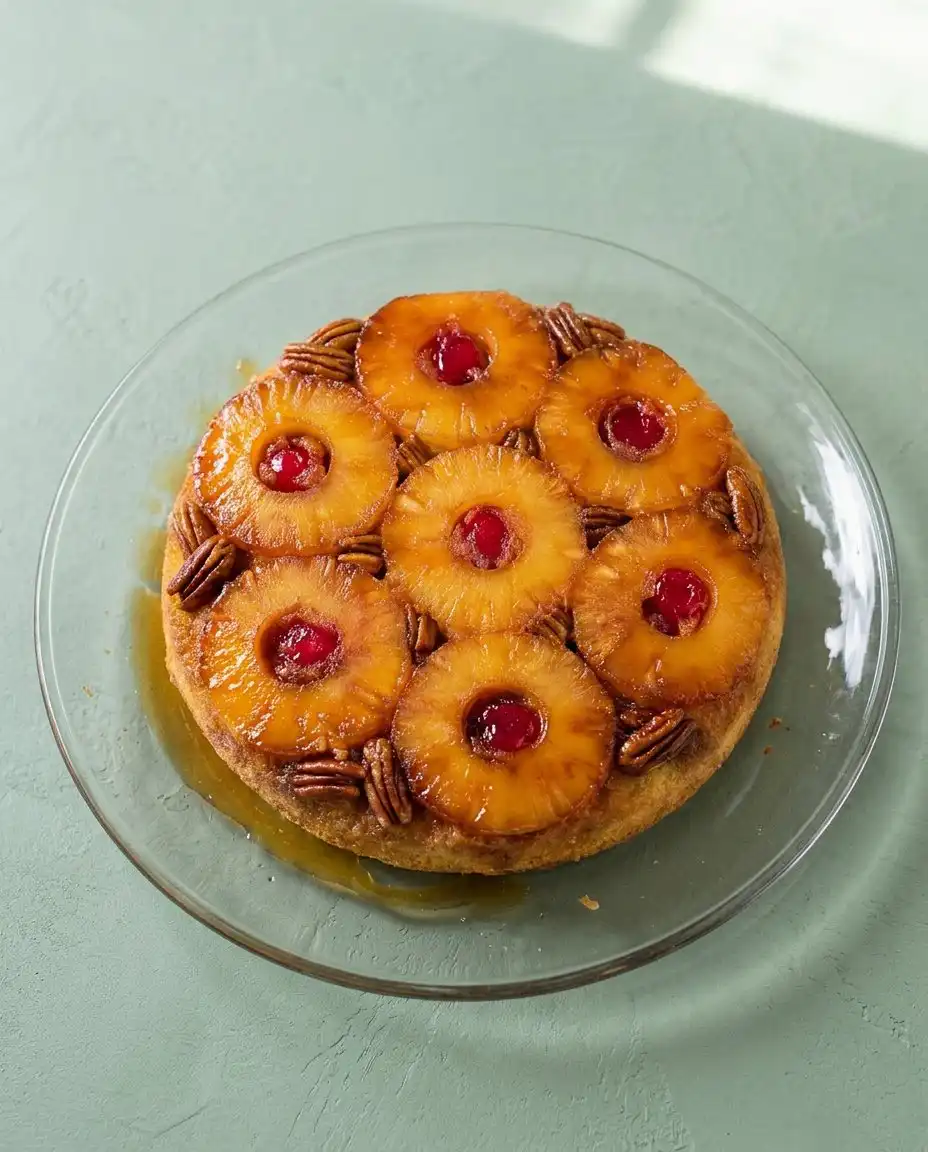
First, moisture control is the single most critical factor in achieving a clean, dry crumb. If you are using canned fruit, drain the pineapple slices on paper towels for at least fifteen minutes before arranging them in the pan. Pressing them gently to extract excess moisture guarantees the juices do not dilute the caramel base or seep upward into the baking batter. This simple step prevents the sponge from becoming soggy and heavy.
Second, if your cake sticks to the pan during inversion, here is why and how to fix it. This common failure occurs either because the caramel was left to cool for too long and solidified, or because the pan was not properly leveled. To remedy this, wrap a hot, damp kitchen towel around the bottom of the pan for two minutes to melt the sugar again before lifting. This gentle heat will liquefy the hardened caramel, allowing the cake to release cleanly.
Third, the temperature of your ingredients dictates the success of your emulsion. Your eggs, milk, and butter must all be at room temperature so they combine without separating. If you notice a curdled appearance in the batter, the fats have seized, which can be mitigated by placing the mixing bowl over a warm water bath for thirty seconds. Maintaining proper temperatures is the patisserie apprentice’s first lesson in batter stability.
Fourth, for an exceptionally luxurious crumb, consider pairing this classic with a complementary best pineapple cake recipe that highlights different flour textures. Experimenting with different grain densities can expand your pastry skills and help you understand how different starches interact with sweet liquid glazes. This comparative approach is excellent for refining your baking instincts.
Fifth, when pouring the batter over the fruit, drop it in small mounds rather than one large pour in the center. This technique prevents the force of the batter from displacing the cherries and pineapple rings from their designated positions. Once positioned, use a light hand with your offset spatula to smooth the top. Care at this stage preserves the symmetrical beauty of your fruit mosaic.
Sixth, to deepen the caramel notes in the glaze, you can read about specialized classic pineapple upside down cake caramelization techniques that detail temperature variations. Fine-tuning the caramel layer guarantees that the sweet-tart flavor of the pineapple is supported by a rich, deeply roasted sugar profile. A deep caramelization refines the flavor profile from simple sweetness to a complex pastry finish.
Frequently Asked Questions
Why does my Pineapple Upside Down Cake stick?
This occurs when the caramel cools completely and acts like a glue, binding the fruit to the pan. To prevent sticking, you must invert the cake exactly ten minutes after removing it from the oven while the sugar is still warm and fluid. If it still resists, gently warm the bottom of the pan on the stove for a minute to liquefy the caramel.
Can I use fresh pineapple instead of canned?
Yes, fresh pineapple can be used, but it requires preparation to guarantee consistent moisture levels. You must slice it thin and pat it completely dry before laying it onto the brown sugar. Since fresh pineapple contains more active enzymes that can soften the cake structure, pre-cooking the slices gently in a syrup is highly recommended.
Should I use maraschino cherries?
Maraschino cherries are traditional because they hold their shape and bright color beautifully during the baking process. If you prefer to avoid them, you can substitute them with fresh sweet cherries that have been pitted and halved. Keep in mind that fresh cherries will release more juice, which may slightly alter the color of the surrounding cake.
How do I stop the bottom of the cake from being soggy?
A soggy bottom is caused by excess moisture escaping from the pineapple slices into the raw batter. To prevent this, thoroughly drain your pineapple slices on paper towels before arranging them in the pan. Additionally, checking that your baking temperature is accurate will allow the sponge to rise and set before the fruit juices can saturate it.
How do you store Pineapple Upside Down Cake?
Due to the high moisture content of the caramelized fruit topping, this cake is best stored in the refrigerator. Cover it loosely with plastic wrap or place it in an airtight cake keeper for up to three days. When ready to serve, allow slices to sit at room temperature for thirty minutes or warm them gently in the microwave.
Can I bake this cake in a standard springform pan?
Avoid using a springform pan for this recipe because the melted butter and brown sugar will leak through the bottom seam, creating a mess and ruining the glaze. A solid nine-inch cake pan with two-inch sides or a seasoned cast-iron skillet is the ideal choice. These vessels contain the caramel completely, forcing it to glaze the fruit beautifully.
Considered Variations
The first variation involves substituting the canned pineapples with fresh, ripe pineapple slices. When selecting fresh fruit, choose one that is fragrant and firm, and slice it to a uniform thickness of a quarter-inch. You will need to simmer the fresh slices in a light sugar syrup for five minutes to soften their fibers and reduce their water content before baking. This step protects the cake from excess liquid release, keeping the sponge dry and tender.
The second variation introduces warm spices to the brown sugar glaze to add complexity. Whisking a quarter-teaspoon of ground cardamom or freshly grated nutmeg into the dry flour mixture provides an elegant, aromatic undertone that tempers the sweetness of the caramelized sugar. This spice profile echoes the seasonal warmth found in our classic peach upside down cake story which focuses on autumnal fruit notes. You will find that these spices heighten the tropical elements without overwhelming the classic butter base.
The third variation explores alternative sugars for the caramel base, such as dark brown sugar or muscovado sugar. These sugars contain a higher percentage of molasses, which creates a darker, more robust glaze with a subtle bitter edge that cuts through the rich sponge. Be sure to pack the sugar tightly into the butter layer to guarantee an even distribution of moisture. This results in a deeper flavor profile that appeals to those who enjoy complex, toasted sugar notes.
Finishing and Presenting
To present this classic dessert with the elegance it deserves, slice it only after it has cooled to warm room temperature. Use a clean, sharp knife and a steady hand when cutting to make sure the cross-section reveals the distinct, clean layers of caramelized fruit and golden sponge. Between each cut, wipe the blade with a warm, damp cloth to prevent the sticky caramel from tearing the delicate crumb. This discipline guarantees a professional presentation that honors your careful baking.
The cake is best served alongside a quenelle of lightly sweetened creme fraiche, which provides a sophisticated tang to balance the rich brown sugar glaze. For those who prefer a traditional touch, a scoop of vanilla bean ice cream is an excellent companion as it slowly melts into the warm sponge. If you enjoy the concept of no-bake desserts for warmer months, you might appreciate exploring our no bake caramel peach upside down cake story for more inspiration on structured fruit desserts. This addition brings a delightful temperature contrast that enhances the buttery crumb.
What You Have Learned Here
By taking your time and practicing precise pastry techniques, you have transformed a simple retro recipe into an elegant masterpiece. Understanding the delicate balance of fruit moisture, sugar caramelization, and batter emulsification is the hallmark of an accomplished home baker. Precision is not a constraint. It is the freedom to repeat success.
If you enjoyed mastering this technique, you can continue your journey with similar bakes by reading our brown sugar peach upside down cake story. Sharing your creations is one of the greatest joys of baking, and we would love to see your beautiful, golden cake cross-sections. This is the simple reward of patience and care at the bench.
Please share your baking progress and join our community of dedicated bakers on Pinterest, Facebook, and TikTok. Let us continue to bake with precision, patience, and care.